

Introduction
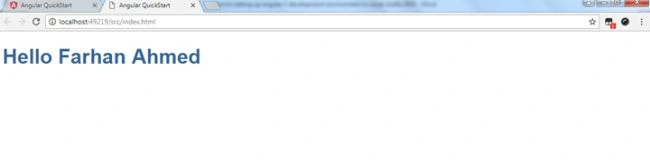
In this article, we are going to learn how to set up an Angular 2 development environment in Visual Studio and run the project by pressing ctr+F5. We don’t need to run the project from Command Prompt.
Step 1
Install node.js and npm. Both can be done with a single file installation.
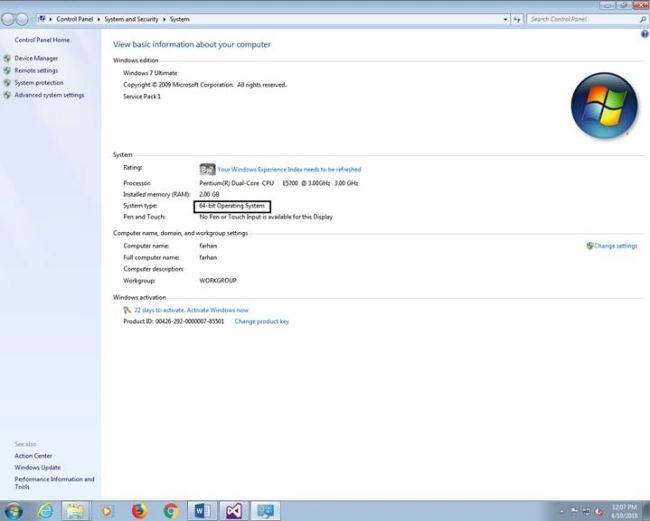
Download and install node from this link: https://nodejs.org/en/download/ based on your Windows version. Right-click on "My Computer" >> select Property >> check the bit of operating system.
Step 2
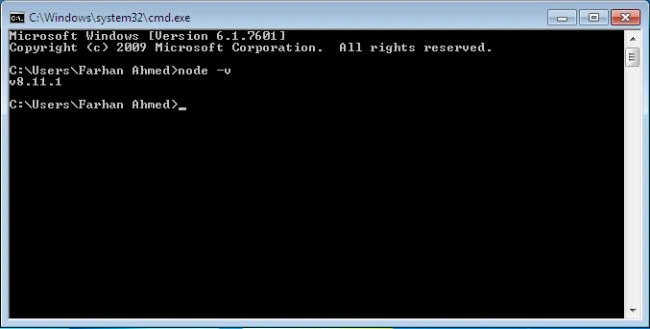
Check the version of node installed. For that, open command prompt by pressing Windows+ R key and typing cmd. The command prompt will open; type node -v and hit Enter.
Step 3
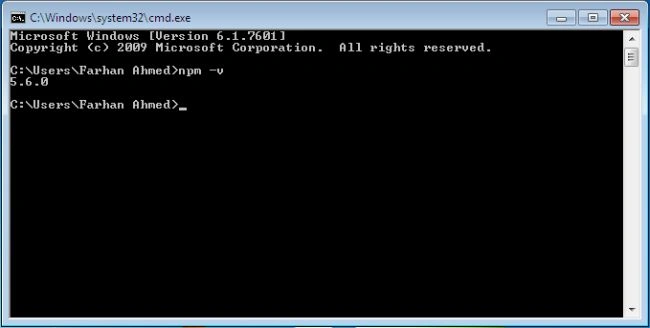
Check the version of npm installed. For that, open the command prompt and type npm -v followed by hitting the Enter key.
Step 4
Install Microsoft Visual Studio 2015 update 3 from http://download.microsoft.com/download/b/e/d/bedddfc4-55f4-4748-90a8-ffe38a40e89f/vs2015.3.com_enu.iso
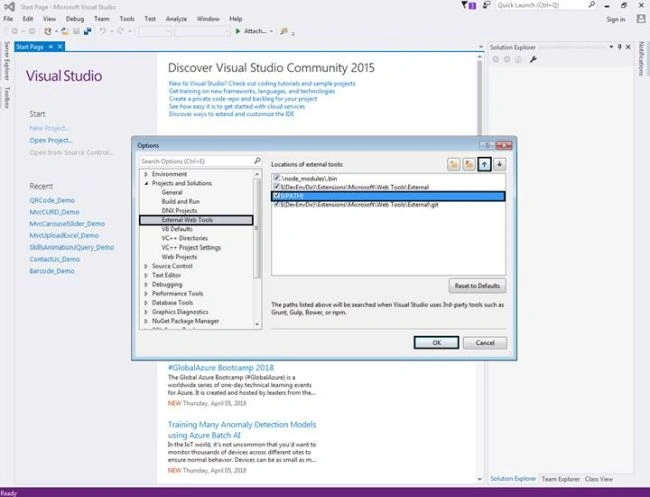
After installation of VS 2015 update 3, open it and click on Tools >> Options.
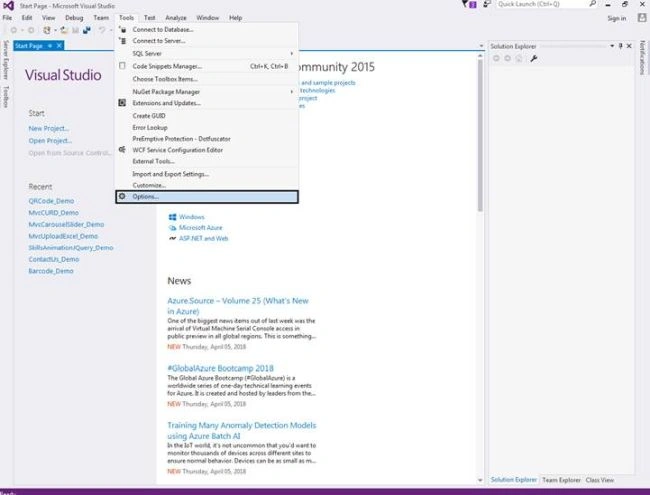
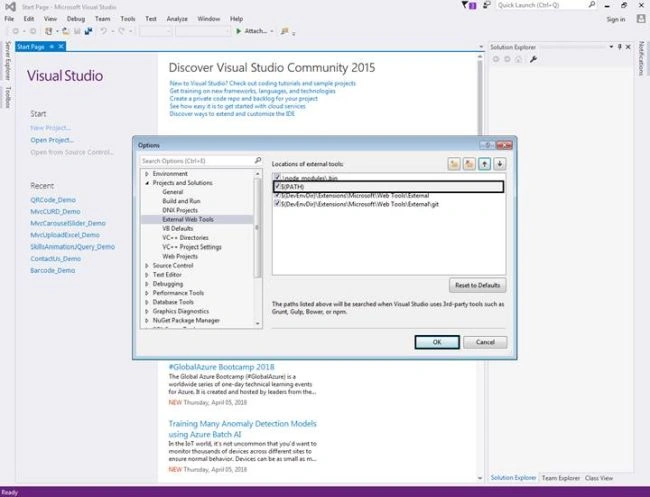
Open the project and solution, go to External Web Tools, move $(PATH) on the second position by clicking on the up arrow. This tells Visual Studio to look for an external tool like npm globally, before other external tools.
Step 5
Install TypeScript for Visual Studio 2015 from https://www.microsoft.com/en-us/download/details.aspx?id=48593
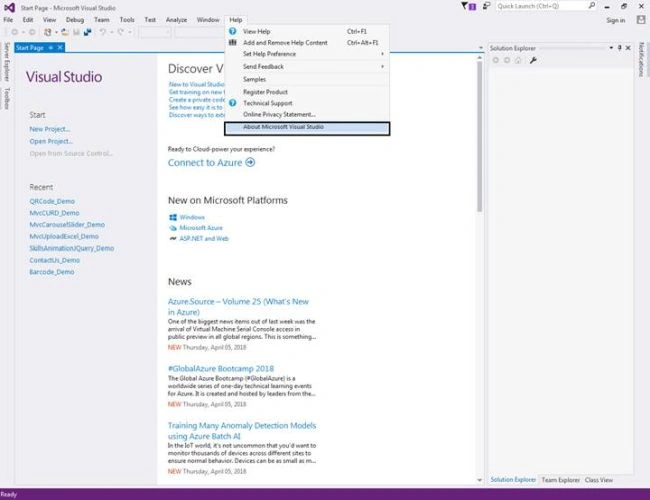
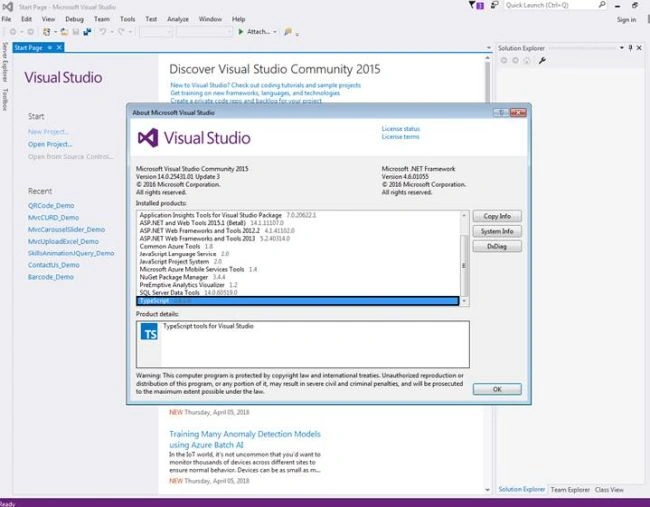
For developing Angular 2 applications, we need TypeScript 2.2.0 or later version. To verify TypeScript version, open Visual Studio, click on Help >> About Microsoft Visual Studio and check TypeScript.
Step 6
Create Empty ASP.NET Web Application project.
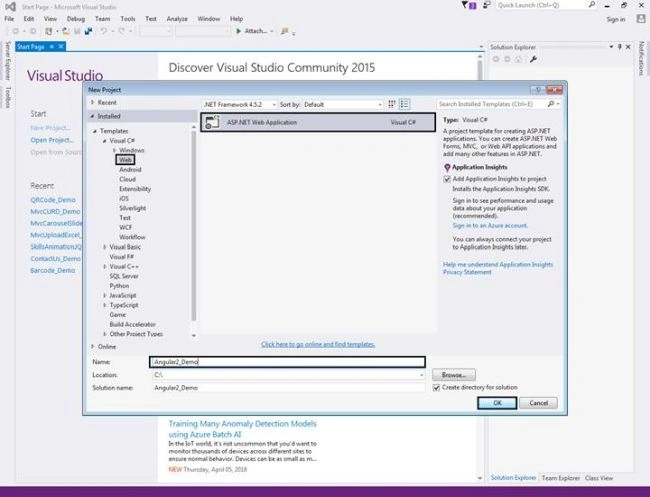
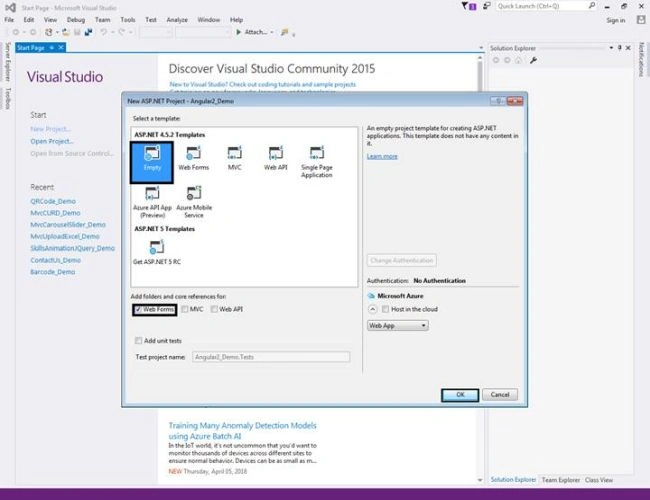
Step 7
Download the "Quick Start Files" from the Angular web site.
https://github.com/angular/quickstart
Step 8
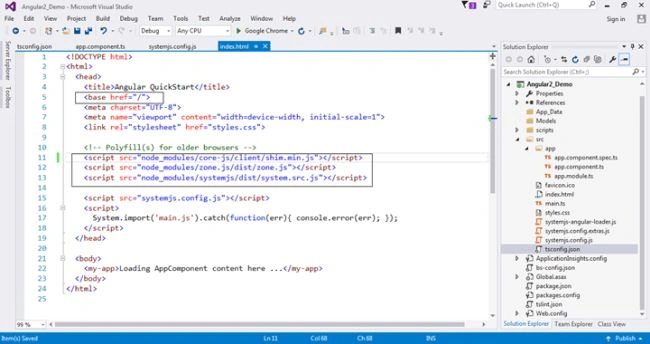
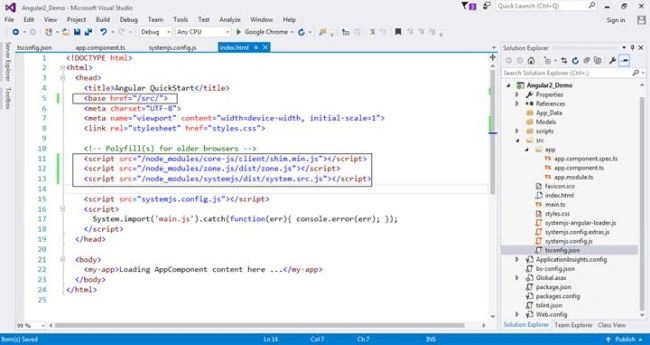
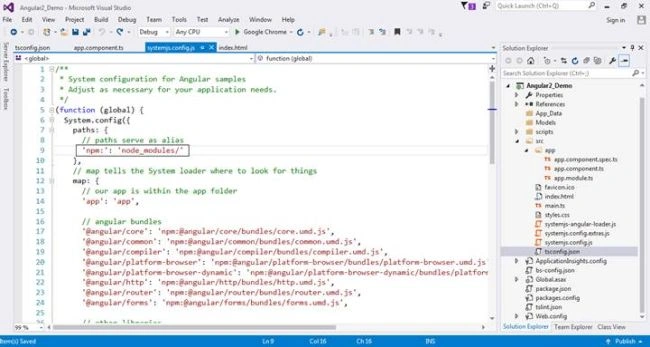
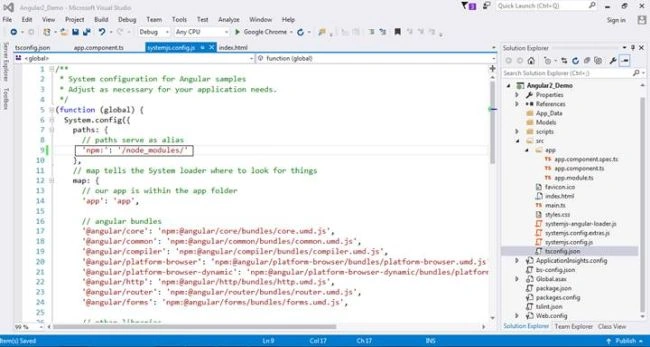
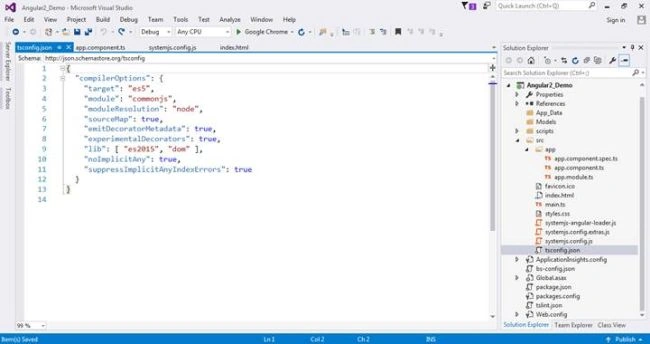
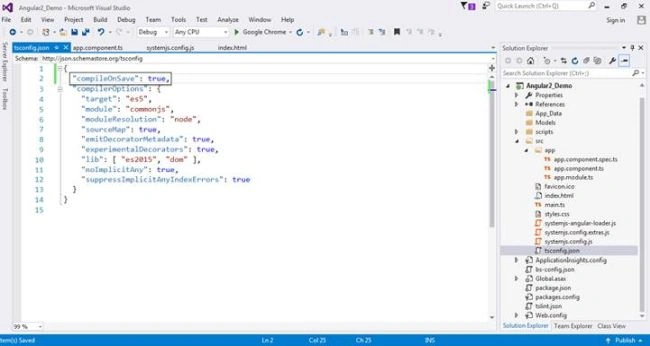
Copy the required "Starter files" to the web application project.
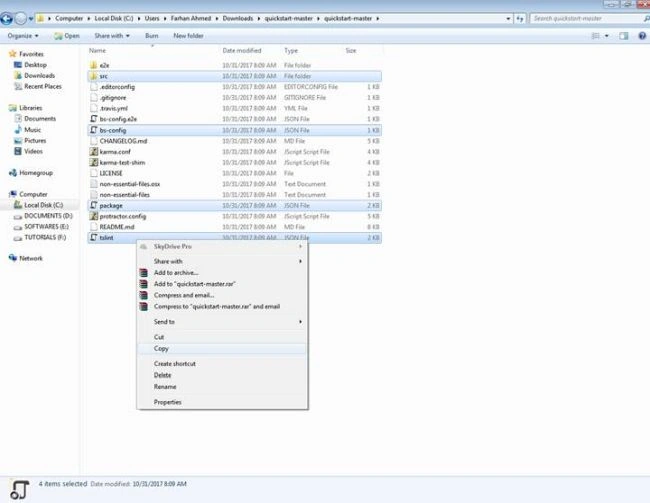
Step 9
Restore the required packages.
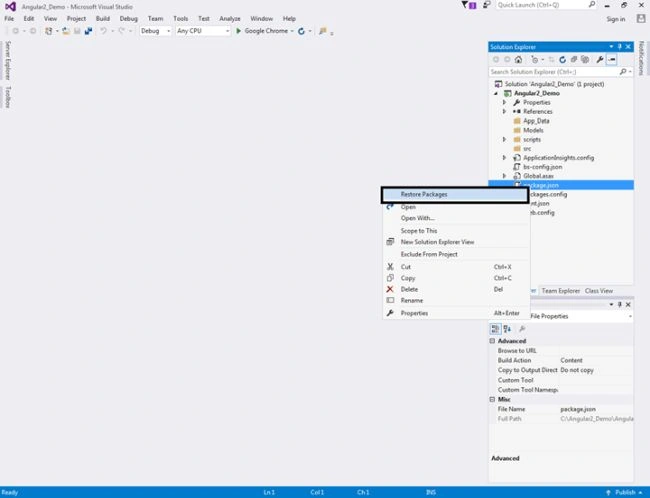
- In the "Solution Explorer" right click on "package.json" file and select "Restore Packages" from the context menu.
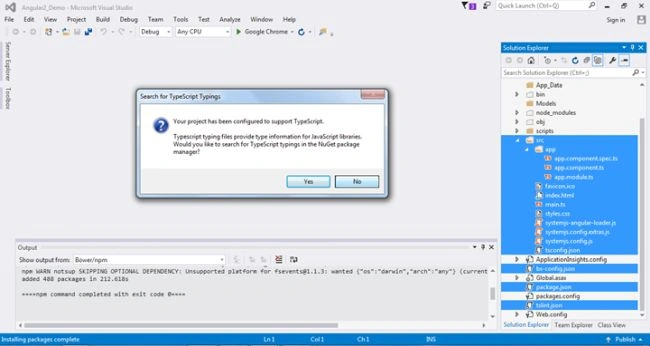
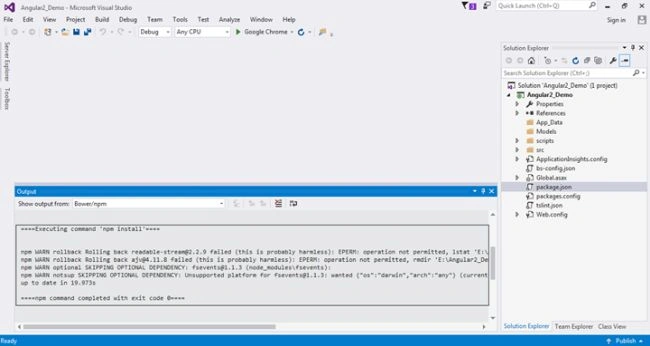
- This takes a few minutes to load all the modules. You can see the status in "Visual Studio Output" window.
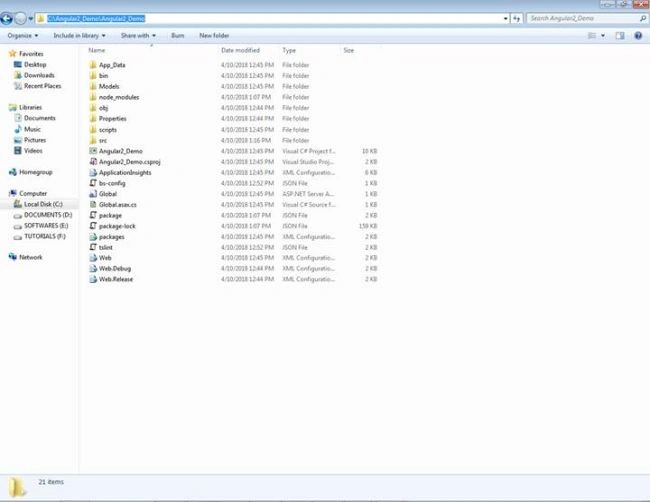
- After the restoration is complete, you will see a message "Installing Packages Complete". To see all the installed node modules, click on "Show all Files" icon in Solution Explorer.
- DO NOT include "node modules" folder in the project.
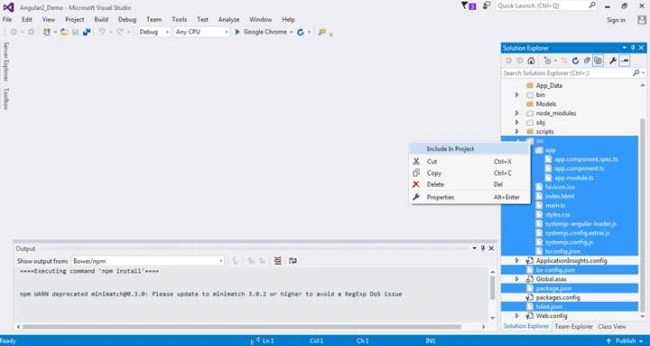
C# CornerPosted Apr 15, 2018, 9:57 AM
This is great, very well explained step-by-step. Thanks Farhan
Tridip BhattacharjeePosted Apr 13, 2018, 3:15 AM
Thanks for very nice and detail article.
Mahesh VermaPosted Apr 12, 2018, 3:42 AM
Nice article, great explanation.......
Arvind SinghPosted Apr 11, 2018, 11:19 PM
Very nice article Farhan, nice explanation...