

Introduction
In this article, we will discuss the "Azure Table Storage," i.e. "Table Services". Azure Table storage is one of the cheapest ways to store data in Azure.
Azure Table storage solves the problem of storing super larger scale of data for the industries which deal with a non-relational database that needs complex joins and queries to fetch the data, that does not need foreign key relationships, store procedures for those who want to access data with help of URL with authentication.
The concept of NoSQL is misunderstood sometimes because its name is NoSQL. It does not stand for 'None' SQL, but actually stands for 'Not Only' SQL.
What is Azure Table storage?
Azure storage is a cost-effective non-relational data store that allows us to store a large amount of structured and non-relational data. This service is a NoSQL in the cloud. This service stores data in a key/value pair manner. Its allows for authentication call from inside and outside of the Azure environment.
Types of Azure Storage
There are four types of data we can store in Azure storage:
- Blob Service
- File Service
- Table Service
- Queue Service
Let’s create a storage table
Go to the search bar and search for “Storage” as shown in Figure 1:
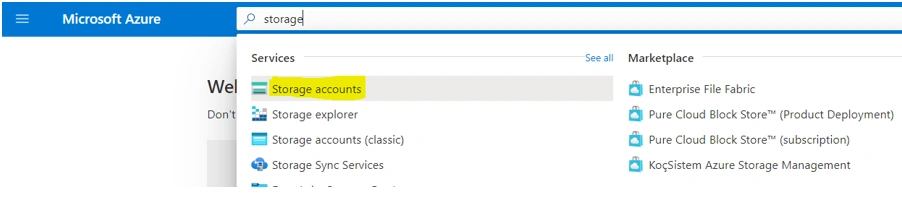
Figure 1.
Now select the subscription, resource group, region (where you want to create your storage), and type for storage. For this demo, I am going to use the "standard", account kind, "Storage V2", because is the latest one with all the features, as shown in Figure 2.
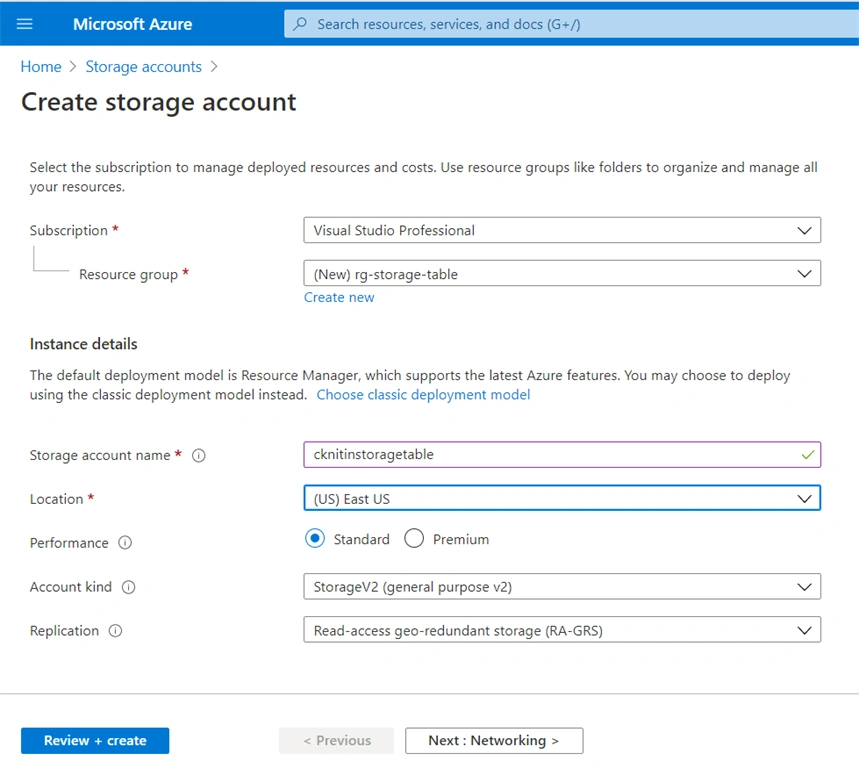
Figure 2.
In networking, the tab leaves it with its default values, as shown in Figure 3.
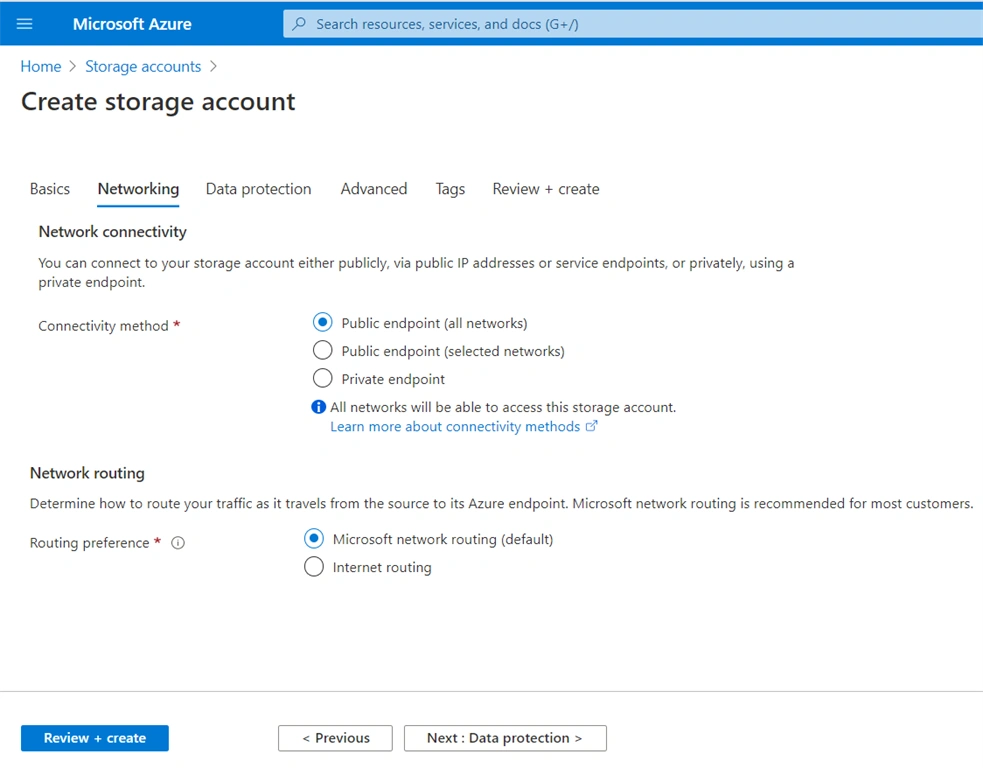
Figure 3.
In the data protection tab, we can set properties such as Soft deletion in case of deletion data will not be from physical storage. We can also set a recovery point.
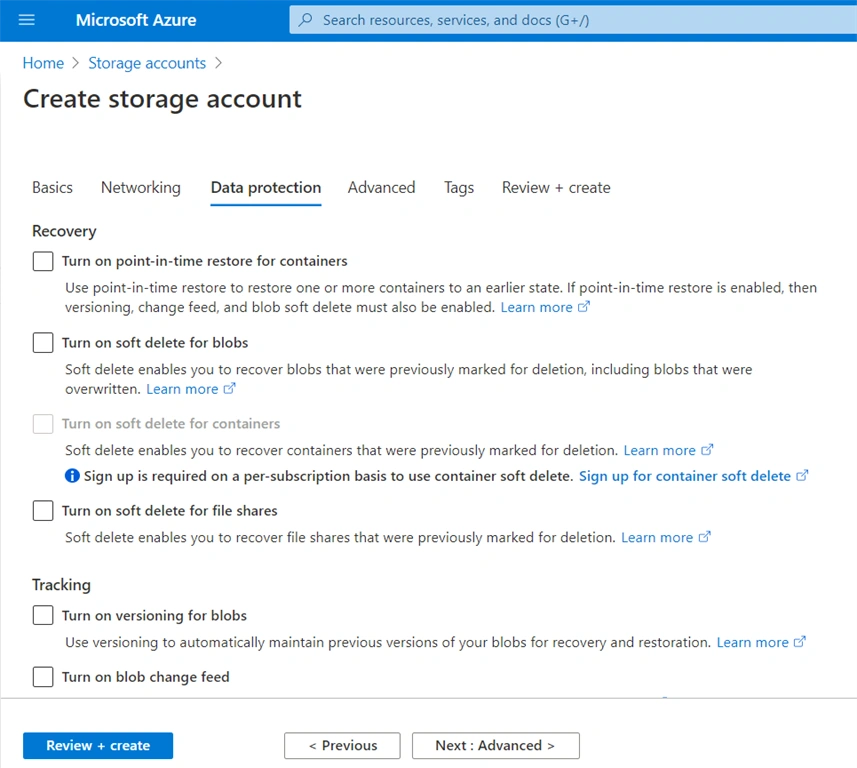
Figure 4.
As shown in Figure 5, set the blob access type. I am going with the default values for these fields because I will delete this storge after this practice.
Blob access tier.
- Hot - Optimized for storing data that is accessed frequently.
- Cool - Optimized for storing data that is infrequently accessed and stored for at least 30 days.
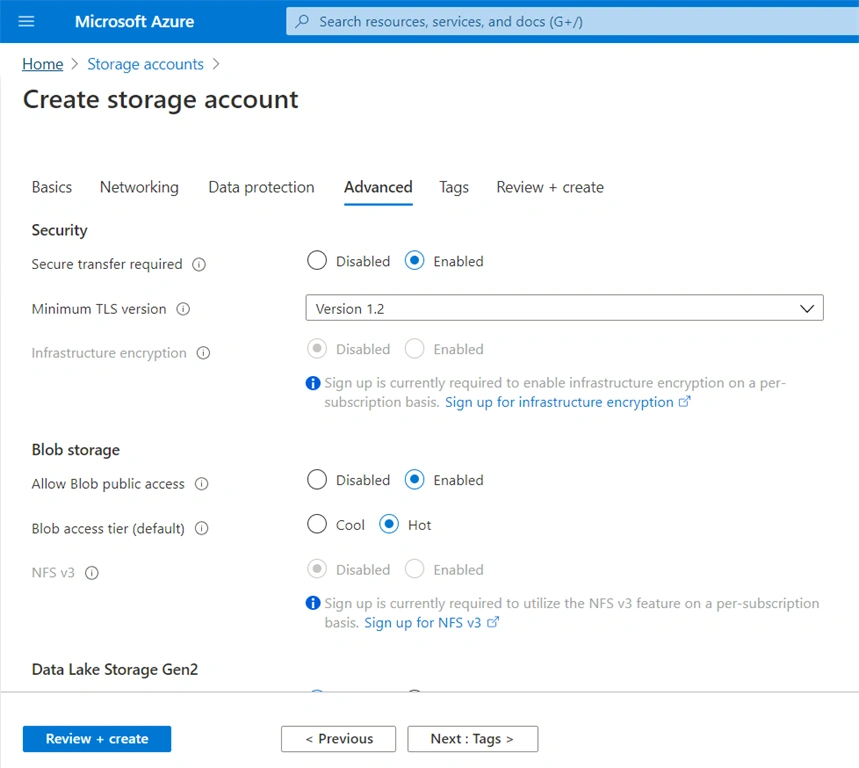
Figure 5.
Now click the "Create + Review" button, we are not going to add tags because it is not required in our case.
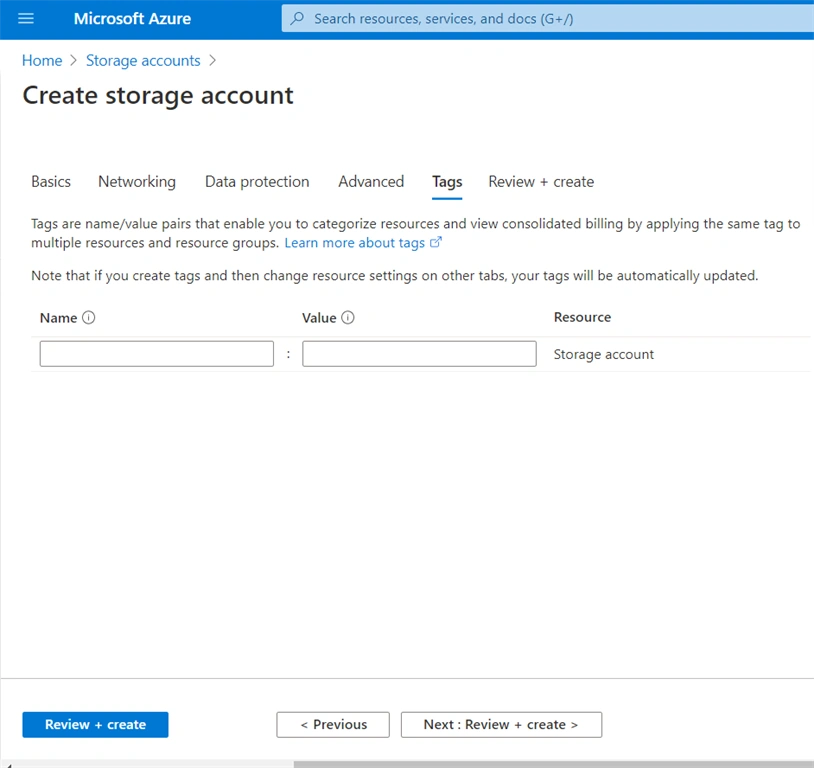
Figure 6.
Now click the "create" button to create the storage.
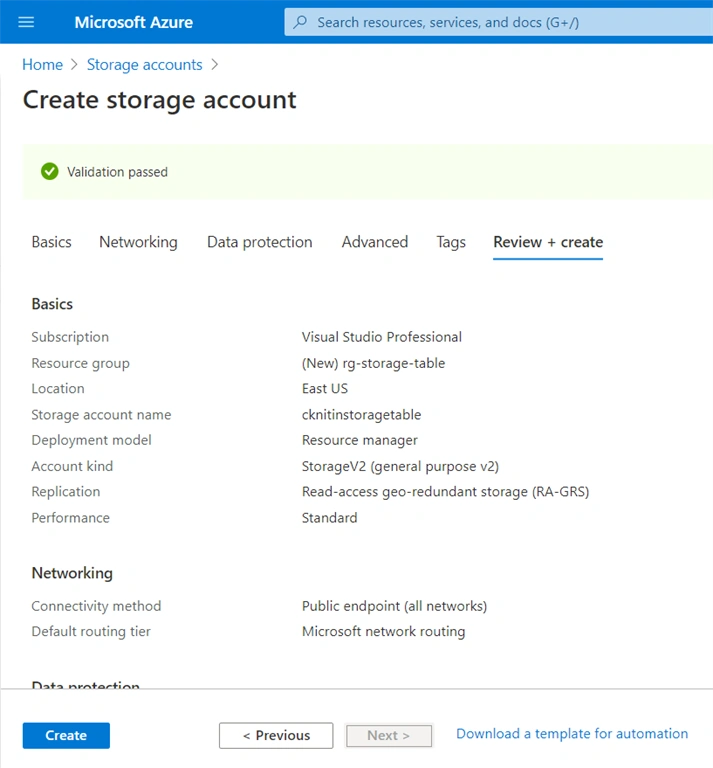
Figure 7.
Now "click" the "Go to resource" button to see our created storage.
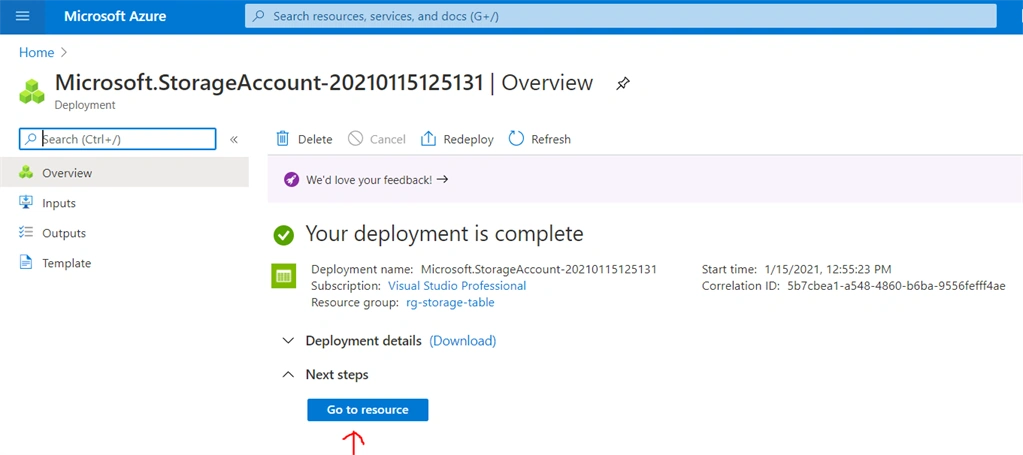
Figure 8.
Now see on the left side, you will find the "Table" click on this to create our table.
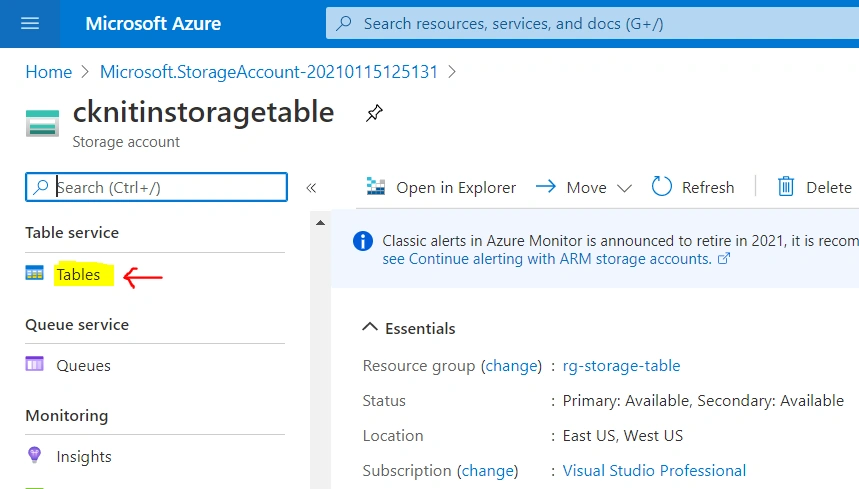
Figure 9.
Click the "+" table to create a table, as shown in figure 10 below.
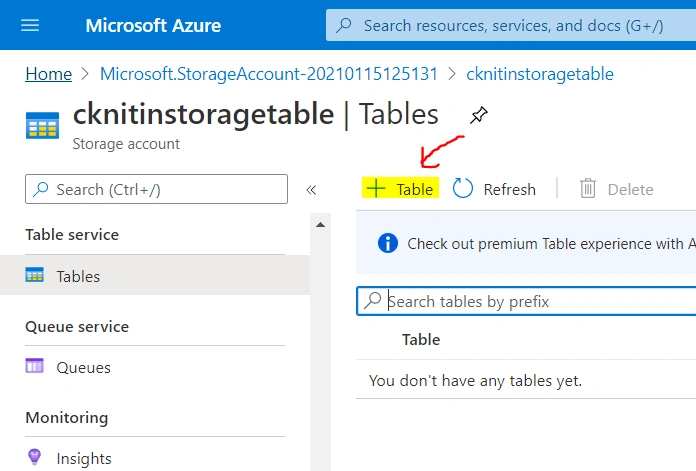
Figure 10.
Enter the table name. I am going to enter the table name "Movies" for this example.
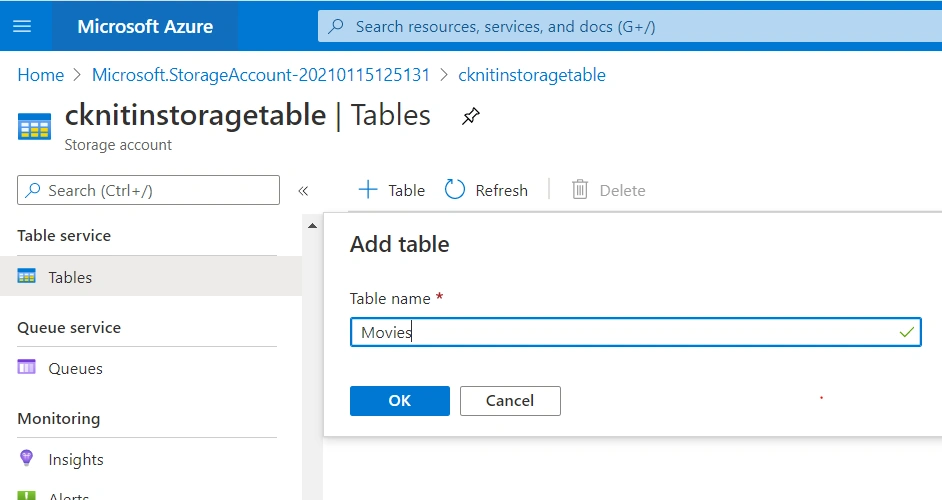
Figure 11.
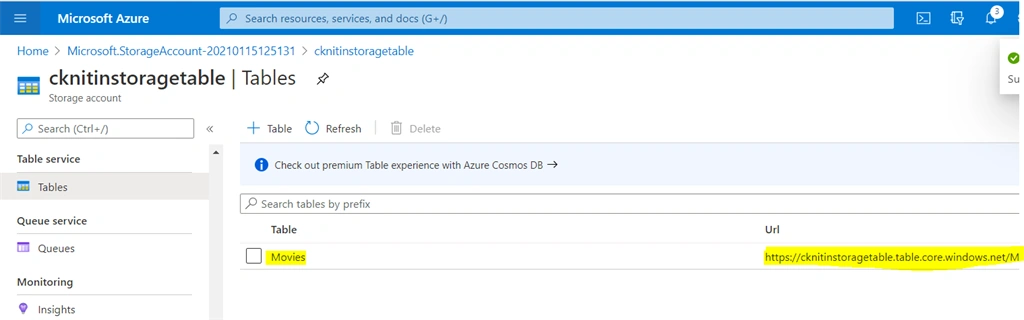
Figure 12.
Now search "storage explorer" on the left side menu search bar. Storage explorer provides the accessibility of our table to add the entities, see Figure 13 for more details.
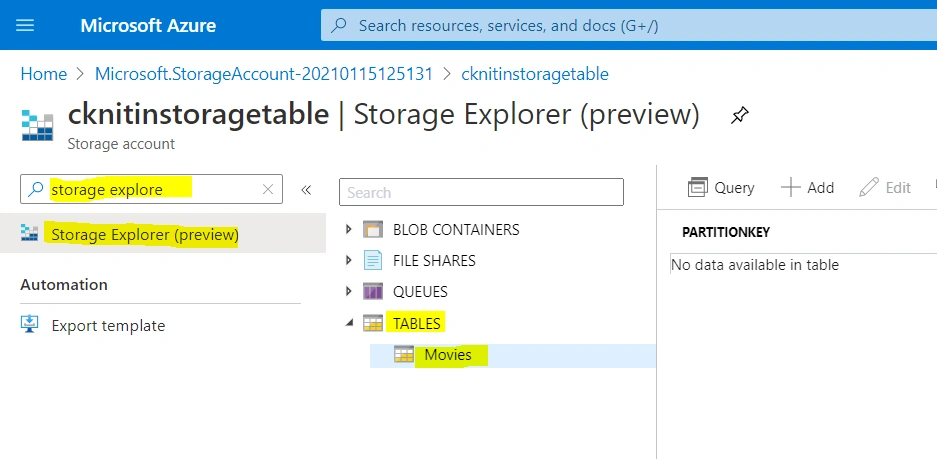
Figure 13.
Now we can set the partitionkey and rowkey of the table.
PatriationKey
It is a signal to Azure how you physical out the data in logical elements. I put the Movies as PatriationKey because all the data related to movies and I don’t accept Azure to physically separate the data in multiple servers or multiple storge
RowKey
It is a unique identifier for each row in the table.
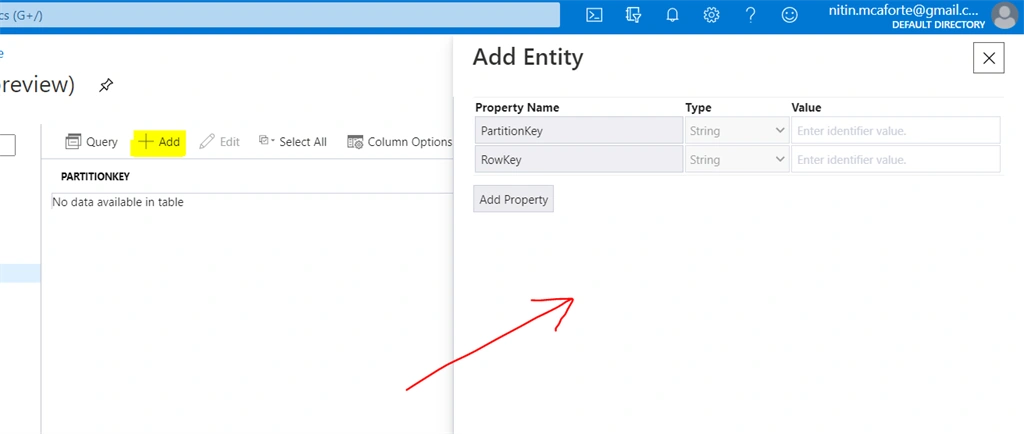
Figure 14.
Using the "Add Property" button, we can add our data in a key/value manner.
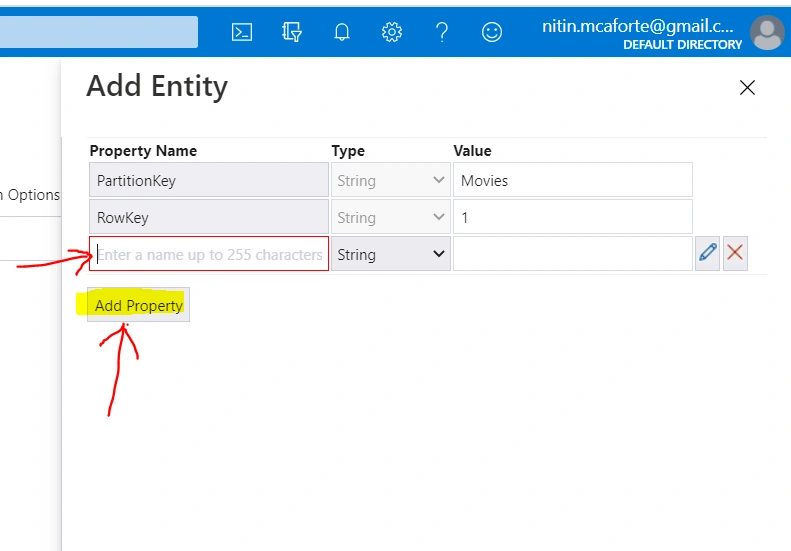
Figure 15.
In Figure 16, we are adding our data in a key and value manner, once you enter the data, click save.
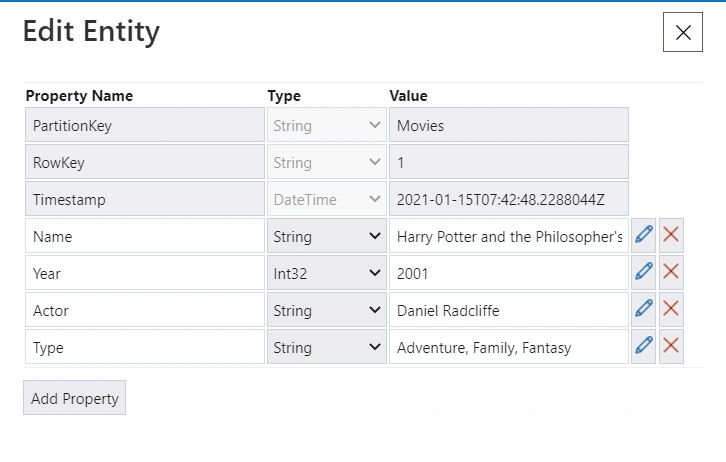
Figure 16.
Now we have our one row in the table with "Name, year, actor, type"
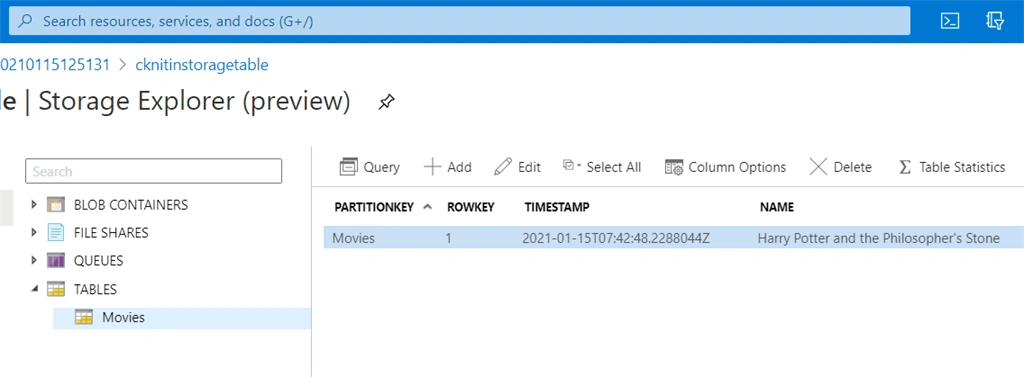
Figure 17.
Table Query
To perform the query on the table, you can use the “query” option in the storage explorer.
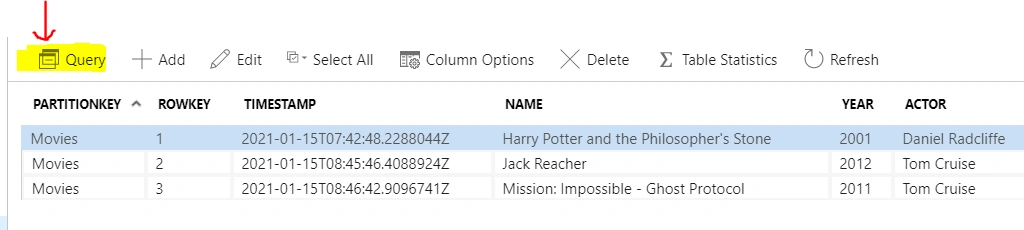
Figure 18.
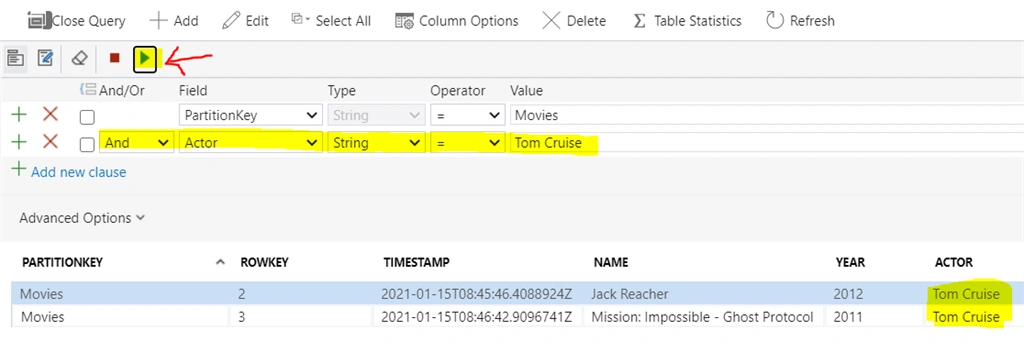
Figure 19.
Note
You are not limited to storage explorer to perform queries on the Azure storage table, but you can also use the Azure API in your code.
Advantages
For the cheapest form of storing data in Azure, you look at the below screenshot 2.9744 INR and $0.045 US per GB... This is so cheap.
In Indian Rupees (Jan 2021)
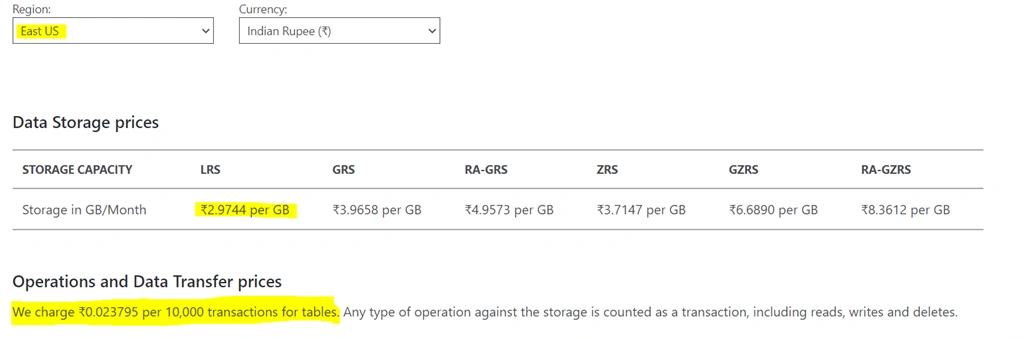
Figure 20.
In US dollars (Jan 2021):
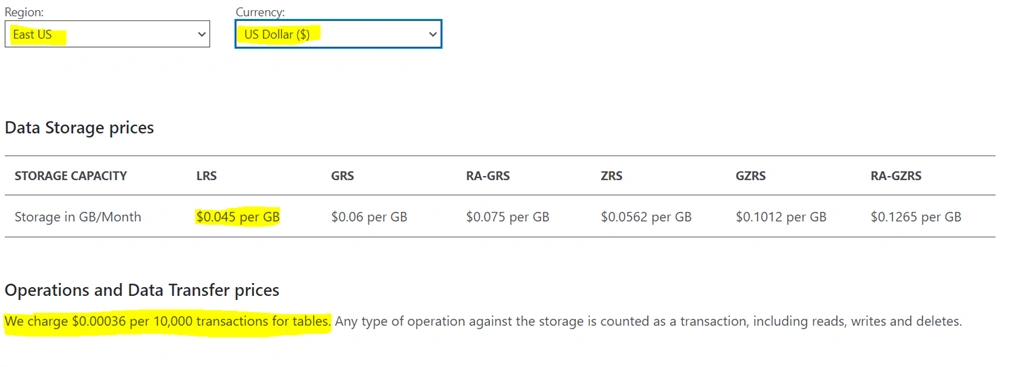
Figure 21.
For updated pricing, please refer to the below link.
Performance, Maximum processing time, Ten (10) second (to complete processing or return continuation) as shown in Figure 22.
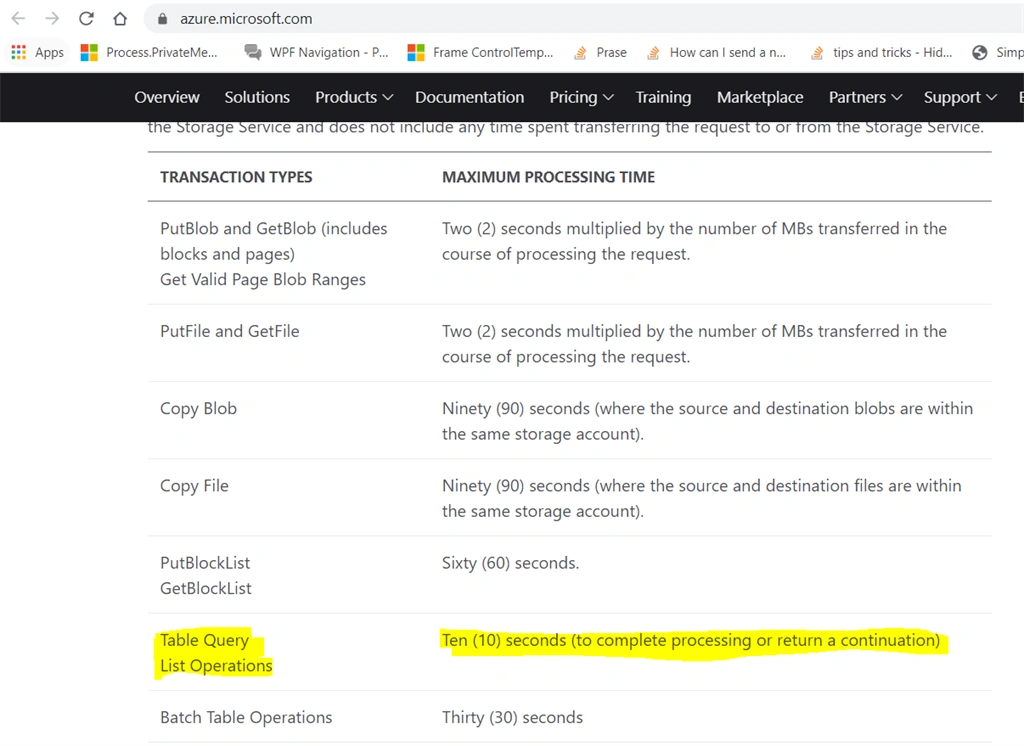
Figure 22.
Table storage is a very valid way of storing data in the cloud. If you have a super large amount of data and you want to store it in a NoSQL manner in Azure and performance is not a concern for you, you can look at the Azure storage table, which is very cheap and could fit into your budget.
MM JAckPosted Jul 17, 2024, 9:54 AM
Nyce Article