

Introduction
In this article, we will learn about ImageView and VideoView in Android with Java Programming Language. We will use Android Studio for writing the code and implement the project.
Note
All the code used during the article is attached with the article in form of a zip file. You can find the zip file at the top of the article.
ImageView in Android
ImageView is a public class in Android that is used to upload and display images in Android Applications. ImageView is used to set the height, width, id, and other attributes of the image in the application according to the screen size of the Android Device.
public class ImageView extends View
java.lang.Object
android. view.View
android.widget.ImageView
Properties of ImageView in Android
- android:id
ID is an attribute that is used to define an ImageView uniquely.- android:id="@+id/image_view"
-
android: layout_height
Height is the attribute that is used to set the height of the ImageView. It can be like wrap_content which means ImageView will be the same size as the image that is given by the user, match_parent means ImageView will consume the size of the whole screen. It is not related to the Image of the user, and we can also define the size of the image according to the user in DPs.- android:layout_height="wrap_content"
-
android:layout_width
Width is the attribute that is used to set the width of the ImageView. Like the height attribute, it is also can be like wrap_content, which means ImageView will be the same size as the image that is given by the user, match_parent which means ImageView will consume the size of the whole screen. It is not related to the image of the user, and we can also define the size of the image according to the user in DPs.- android:layout_width="wrap_content"
-
android:layout_centerInParent
centerInParent is the attribute that is used to set the image in the center of the screen. It is set as true and false by the user. - android:layout_centerInParent="true"
Note
Here we will create a new project for the ImageView example in Android. Let's start working with Android Studio.
Here we will create a new project for the ImageView example in Android. Let's start working with Android Studio.
Step 1
First of all, when we will open the Android Studio and we will choose the first option "Start a new Android Studio project".
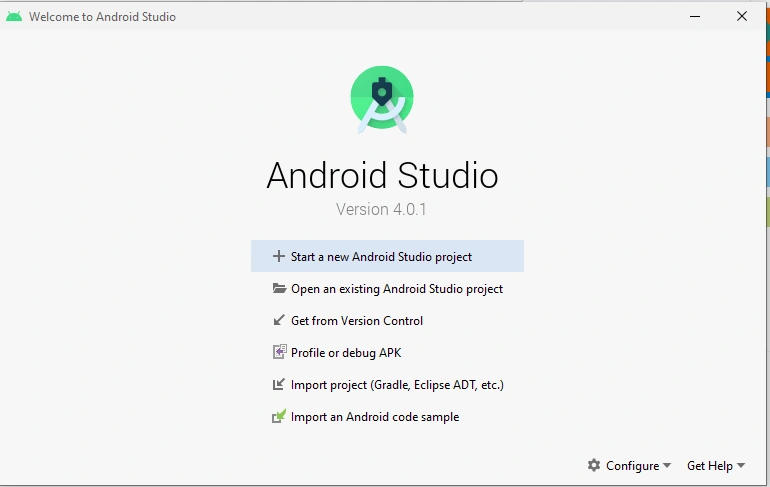
Explanation
Step 2
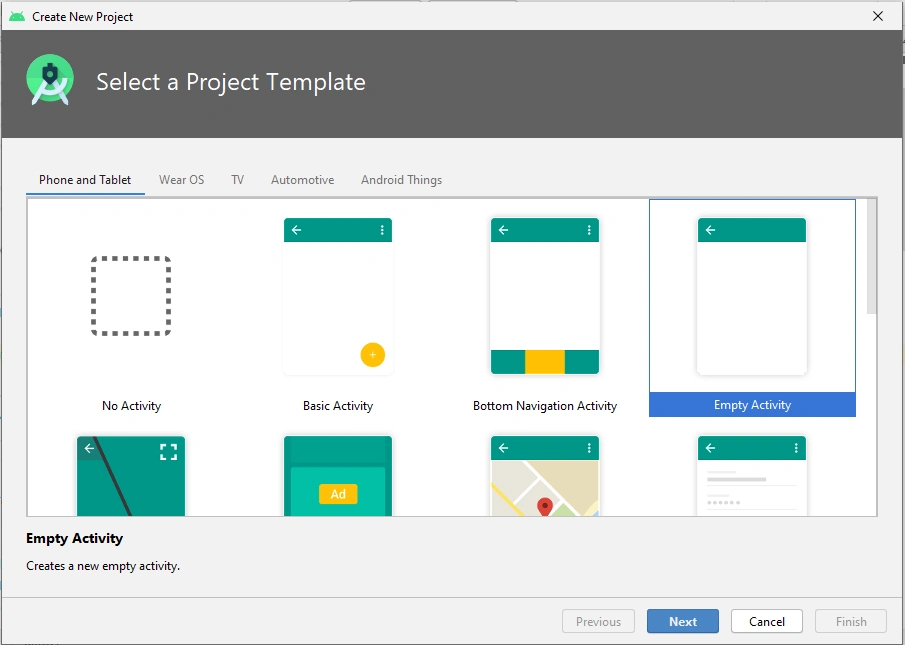
Explanation
In the above image, as we can see, there are many examples of the activities we want to create for our project. We will choose an "Empty Activity" for our example project for the ImageView in Android.
Step 3
After choosing the activity type we will create our project as shown in the below image.
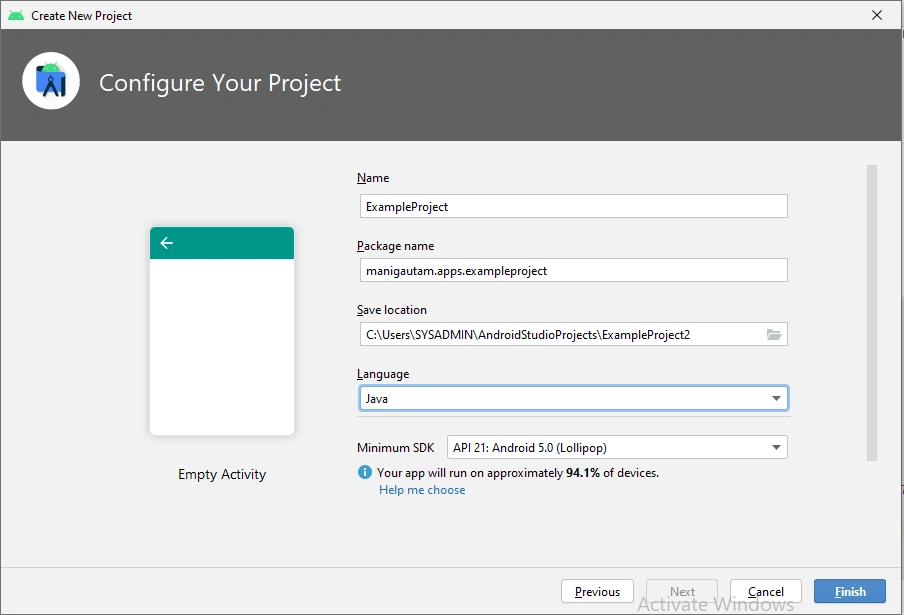
Explanation
We will give the name "ExampleProject" for our project and will click on the "Finish" button.
Android Studio will create a project named "ExampleProject". Android Studio will create two files in the project MainActivity.java and activity_main.xml.
Step 4
As we know, Android Studio creates two files. Now we will see the activity_main.xml file of the project. The code of this file is listed below.
- <?xml version="1.0" encoding="utf-8"?>
- <RelativeLayout xmlns:android="http://schemas.android.com/apk/res/android"
- xmlns:app="http://schemas.android.com/apk/res-auto"
- xmlns:tools="http://schemas.android.com/tools"
- android:layout_width="match_parent"
- android:layout_height="match_parent"
- tools:context=".MainActivity">
- <TextView
- android:id="@+id/textView"
- android:layout_width="wrap_content"
- android:layout_height="wrap_content"
- android:layout_margin="10dp"
- android:padding="8dp"
- android:text="ImageView Example"
- android:textAlignment="center"
- android:textColor="@color/black"
- android:textSize="25sp"
- android:textStyle="bold" />
- <ImageView
- android:id="@+id/image_view"
- android:layout_width="wrap_content"
- android:layout_height="wrap_content"
- android:layout_below="@id/textView"
- android:layout_centerInParent="true"
- android:layout_margin="10dp"
- android:background="@layout/image_border"
- android:padding="10dp"
- android:src="@drawable/android" />
- </RelativeLayout>
Explanation
In the above code example, as we see Android Studio provides a TextView as an example. Now, let's update the code of the layout file according to our project. In this code example, we have RelativeLayout as the root Layout. We have a TextView with the following attributes-
- id- for identification of the TextView.
- height- We set the height of the TextView as wrap_content.
- width- We set the width of the TextView as wrap_content.
- margin- Margin of the TextView is 10dp.
- padding- Paddingof the TextView is 8dp.
- text- We set the text as "ImageView Example".
- alignment- Alignment of the text is center.
- style- The style of the text is bold.
- color- The color of the text is black.
- size- The size of the text is 25sp.
We have an ImageView with the following attributes-
- id- for identification of the ImageView.
- height- We set the height of the ImageView as wrap_content.
- width- We set the width of the ImageView as wrap_content.
- margin- Margin of the ImageView is 10dp.
- padding- Paddingof the ImageView is 10dp.
- background- We set the background of the image as a layout file named image_border that is created in our layout folder.
- src- We upload the image through the src attribute which takes the String value as the location of the image. Our image named android.jpg is stored in the drawable folder of the project.
Note
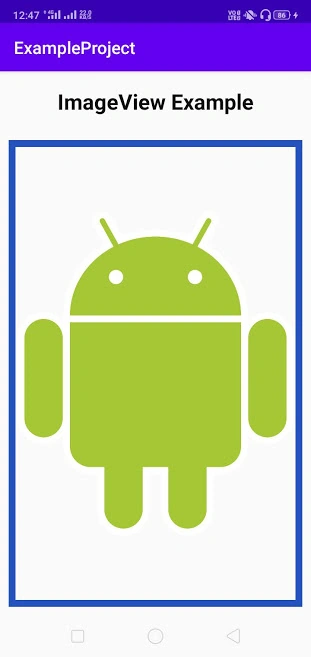
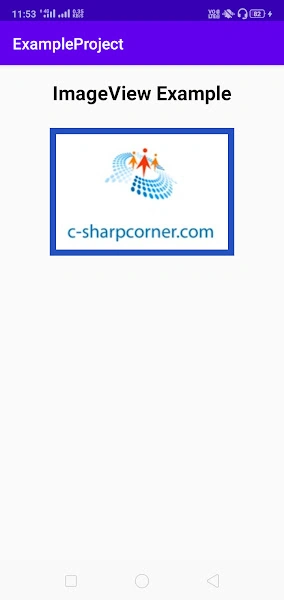
As we see we use "android:background="@layout/image_border" this line set the background of the image. We see a blue line around the image that line is created by the background attribute. For setting the background of the image we create a layout file named "image_border" located in layout folder of the Android project.
Let's see the image_border.xml file. The code of the file "image_border.xml" is listed below.
- <?xml version="1.0" encoding="utf-8"?>
- <shape xmlns:android="http://schemas.android.com/apk/res/android"
- android:layout_width="match_parent"
- android:layout_height="match_parent">
- <stroke
- android:width="8dp"
- android:color="@color/blue" />
- </shape>
Explanation
In this code file, we use width of the border is 8dp and the color of the border is blue that color is added in the colors.xml file of the project.
colors.xml
- <?xml version="1.0" encoding="utf-8"?>
- <resources>
- <color name="colorPrimary">#6200EE</color>
- <color name="colorPrimaryDark">#3700B3</color>
- <color name="colorAccent">#03DAC5</color>
- <color name="black">#111212</color>
- <color name="blue">#2752BD</color>
- </resources>
Step 5
Now we will see the MainActivity.java file. The code of the file "MainActivity.java" is listed below.
Explanation
- import androidx.appcompat.app.AppCompatActivity;
- import android.os.Bundle;
- import android.widget.ImageView;
- public class MainActivity extends AppCompatActivity {
- @Override
- protected void onCreate(Bundle savedInstanceState) {
- super.onCreate(savedInstanceState);
- setContentView(R.layout.activity_main);
- // Set the Image in ImageView
- ImageView imageView = findViewById(R.id.image_view);
- }
- }
This is the code of the MainActivity.java file of our project. Now we will run our ImageView Example project.
The above code of our project generates the following output.
How to set the image in Android Application through Java code?
Here is the example code of MainActivity.java class file.
- import androidx.appcompat.app.AppCompatActivity;
- import android.os.Bundle;
- import android.widget.ImageView;
- public class MainActivity extends AppCompatActivity {
- @Override
- protected void onCreate(Bundle savedInstanceState) {
- super.onCreate(savedInstanceState);
- setContentView(R.layout.activity_main);
- // Set the Image in ImageView
- ImageView imageView = findViewById(R.id.image_view);
- imageView.setImageResource(R.drawable.csharplogo);
- }
- }
Explanation
In the following example, we set the image in our Android project through the Java code. We set the image in the project by the line "imageView.setImageResource(R.drawable.android);.
The above code of our project generates the following output.
How to set image on click of the button in Android Studio project?
Now we will see the activity_main.xml file of the project. The code of this file is listed below.
- <?xml version="1.0" encoding="utf-8"?>
- <RelativeLayout xmlns:android="http://schemas.android.com/apk/res/android"
- xmlns:app="http://schemas.android.com/apk/res-auto"
- xmlns:tools="http://schemas.android.com/tools"
- android:layout_width="match_parent"
- android:layout_height="match_parent"
- tools:context=".MainActivity">
- <Button
- android:id="@+id/button"
- android:layout_width="match_parent"
- android:layout_height="wrap_content"
- android:layout_margin="10dp"
- android:background="@color/colorAccent"
- android:padding="10dp"
- android:text="Set Image"
- android:textAlignment="center"
- android:textColor="@color/black"
- android:textSize="25sp"
- android:textStyle="bold" />
- <ImageView
- android:id="@+id/image_view"
- android:layout_width="wrap_content"
- android:layout_height="wrap_content"
- android:layout_below="@id/button"
- android:layout_centerInParent="true"
- android:layout_margin="10dp"
- android:padding="10dp" />
- </RelativeLayout>
Explanation
In this code example, first we will create a button with the following attributes-
- id- for the identification of the button.
- width- We set the width of the Button as match_parent.
- height- We set the height of the Button as wrap_content.
- margin- Margin of the Button is 10dp.
- padding- Padding of the Button is 10dp.
- text- We set the Button as "Set Image".
- alignment- Alignment of the Image is center.
- style- The style of the Button is bold.
- color- The color of the Button is black.
- size- The size of the Button is 25sp.
We have an ImageView with the following attributes-
- id- for the identification of the image.
- width- We set the width of the image as wrap_content.
- height- We set the height of the image as wrap_content.
- layout_below- This attribute set the image below the button.
- margin- Margin of the image is 10dp.
- padding- Padding of the image is 10dp.
- alignment- Alignment of the image is center.
Now we will see the Java file. The code of the Java file is listed below.
- import android.graphics.drawable.Drawable;
- import android.os.Bundle;
- import android.view.View;
- import android.widget.Button;
- import android.widget.ImageView;
- public class MainActivity extends AppCompatActivity {
- @Override
- protected void onCreate(Bundle savedInstanceState) {
- super.onCreate(savedInstanceState);
- setContentView(R.layout.activity_main);
- Button button = findViewById(R.id.button);
- button.setOnClickListener(new View.OnClickListener() {
- @Override
- public void onClick(View view) {
- // Set the Image in ImageView on button click
- ImageView imageView = findViewById(R.id.image_view);
- imageView.setImageResource(R.drawable.csharplogo);
- }
- });
- }
- }
In the following code, first we create the object of button class and then set the click listener of the button. When we click on the button the image will be visible below the button.
The above code generates the following output.
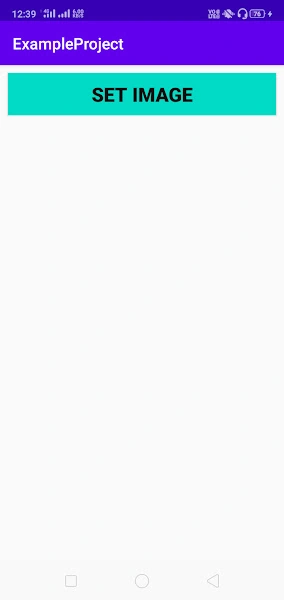
Explanation
In this image, we saw a button "Set Button" is visible on the screen of the device. when we will click on the button the image will be show. Here is the second image.
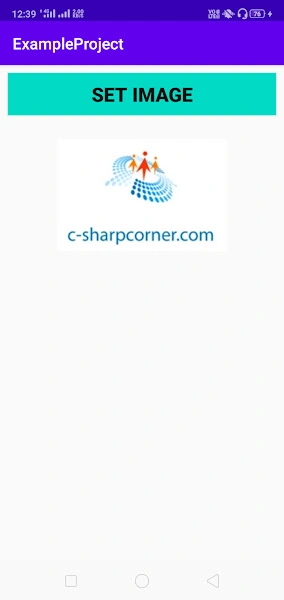
Explanation
In this image, when we click the button the image is visible on the screen.
VideoView in Android
VideoView is used to display and play a video file in Android project. It can load images from different sources to compute its measurement from the video so that it can be used to provide display choices such as scaling and tinting for any layout manager.
Note
Here we will create a project for our VideoView example in Android. Let's start working with VideoView in Android Studio.
Step 1
Now we will see the activity_main.xml file of the project. The code of this file is listed below.
- <?xml version="1.0" encoding="utf-8"?>
- <RelativeLayout xmlns:android="http://schemas.android.com/apk/res/android"
- xmlns:app="http://schemas.android.com/apk/res-auto"
- xmlns:tools="http://schemas.android.com/tools"
- android:layout_width="match_parent"
- android:layout_height="match_parent"
- tools:context=".MainActivity">
- <VideoView
- android:id="@+id/video_view"
- android:layout_width="match_parent"
- android:layout_height="match_parent"
- />
- </RelativeLayout>
Explanation
In this XML file, as a root layout we use RelativeLayout. For working with VideoView we add a VideoView in the XML file with following attributes-
Now we will see the Java file of the project. Here is the code of the Java file.
- id- Id is used for identification of the VideoView.
- width- We set the width of the VideoView is match_parent.
- height- We set the height of the VideoView as match_parent.
- package manigautam.apps.exampleproject;
- import androidx.appcompat.app.AppCompatActivity;
- import android.media.MediaPlayer;
- import android.net.Uri;
- import android.os.Bundle;
- import android.widget.MediaController;
- import android.widget.Toast;
- import android.widget.VideoView;
- public class MainActivity extends AppCompatActivity {
- MediaController mediaControls;
- VideoView videoView;
- @Override
- protected void onCreate(Bundle savedInstanceState) {
- super.onCreate(savedInstanceState);
- setContentView(R.layout.activity_main);
- videoView = findViewById(R.id.video_view);
- videoView.setVideoURI(Uri.parse("android.resource://" + getPackageName() + "/" + R.raw.video));
- if (mediaControls == null) {
- // create an object of media controller class
- mediaControls = new MediaController(MainActivity.this);
- mediaControls.setAnchorView(videoView);
- }
- // set the media controller for video view
- videoView.setMediaController(mediaControls);
- // set the uri for the video view
- videoView.setVideoURI(Uri.parse("android.resource://" + getPackageName() + "/" + R.raw.video));
- // start a video
- videoView.start();
- // implement on completion listener on video view
- videoView.setOnCompletionListener(new MediaPlayer.OnCompletionListener() {
- @Override
- public void onCompletion(MediaPlayer mp) {
- Toast.makeText(getApplicationContext(), "Thank You...!!!", Toast.LENGTH_LONG).show();
- // display a toast when an video is completed
- }
- });
- videoView.setOnErrorListener(new MediaPlayer.OnErrorListener() {
- @Override
- public boolean onError(MediaPlayer mp, int what, int extra) {
- Toast.makeText(getApplicationContext(), "Oops An Error Occur While Playing Video...!!!", Toast.LENGTH_LONG).show();
- // display a toast when an error occurs while playing an video
- return false;
- }
- });
- }
- }
Now we will run our Android project. The above code of our project generates the following output.
Summary
In this article, we learned about ImageView and VideoView in Android, its different types with examples, and how to use ImageView and VideoView in Android Application.
Join the conversation! Your thoughts help the community grow.