

Introduction
When you build a form in Power Apps (like a request form, incident form, or feedback form), you need a simple way to save the data back to your list or table. SubmitForm() is the easiest option for this when you are using an Edit Form control.
It works for both:
Creating a new record
Updating an existing record
Features
Saves data from an Edit Form to your data source
Automatically checks required fields and validations before saving
Provides built-in events to handle success and failure:
OnSuccess: runs when the record is saved
OnFailure: runs when the save fails
Lets you show user-friendly messages using Notify()
Works nicely with NewForm(), EditForm(), and ResetForm()
Advantages
Very easy for beginners
Fast to build simple apps (Create / Update)
Automatic validations reduce bad data
Clean user experience when you use OnSuccess / OnFailure properly
Ideal for SharePoint list forms and Dataverse forms
Disadvantages
Not ideal for complex apps (multi-screen save, saving to multiple lists/tables, heavy logic)
If you write Navigate() immediately after SubmitForm(), it may navigate even when save fails
You are tied to form controls and data cards (less flexible than Patch for advanced scenarios)
Step-by-Step: Build a Simple App Using SubmitForm()
Step 1: Open Power Apps
Sign in

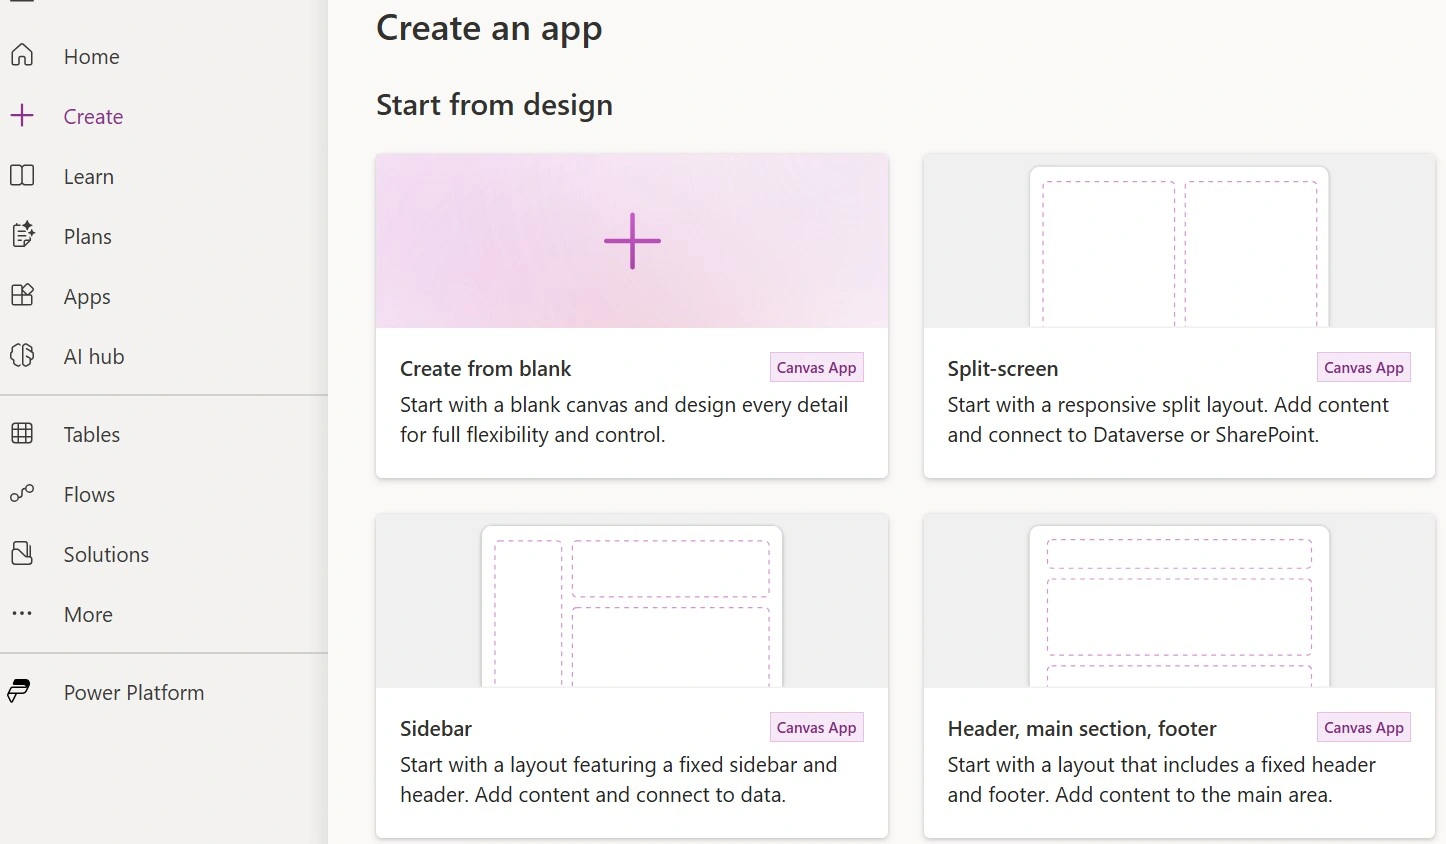
Step 2: Create a Canvas App
Click Create
Select Canvas app from blank
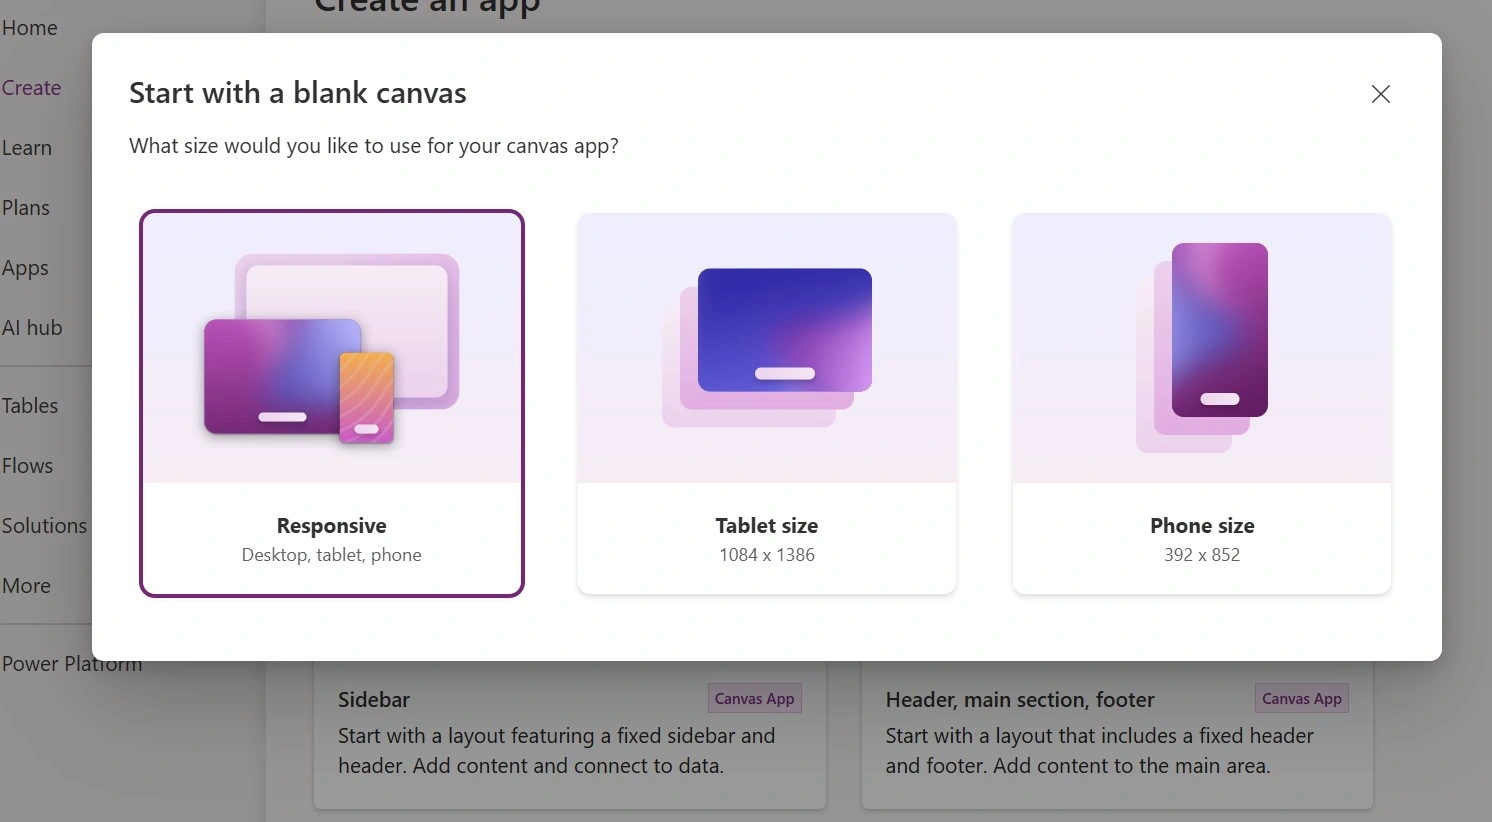
Give a name (example: MySubmitFormDemo)
Choose Responsive , Tablet or Phone
Step 3: Add a Data Source (SharePoint list )
In left menu, click Data
Click Add data
Select SharePoint
Choose your site
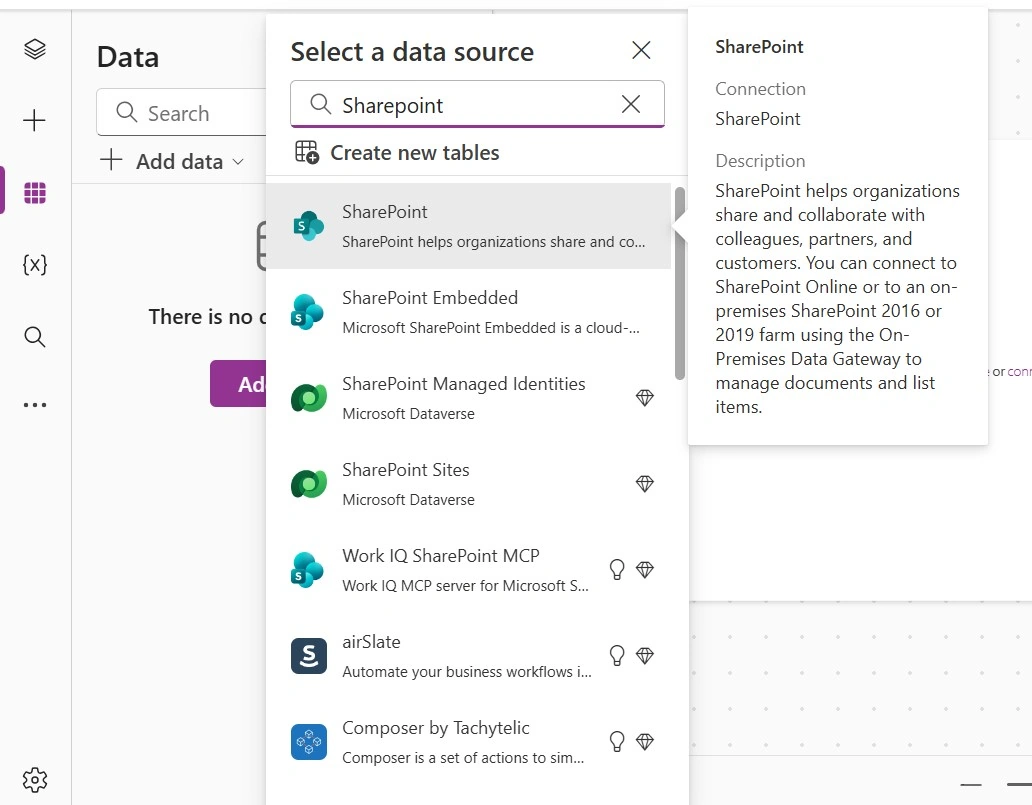
Select your list
Step 4: Add an Edit Form
Go to Insert → Forms → Edit form ( Update
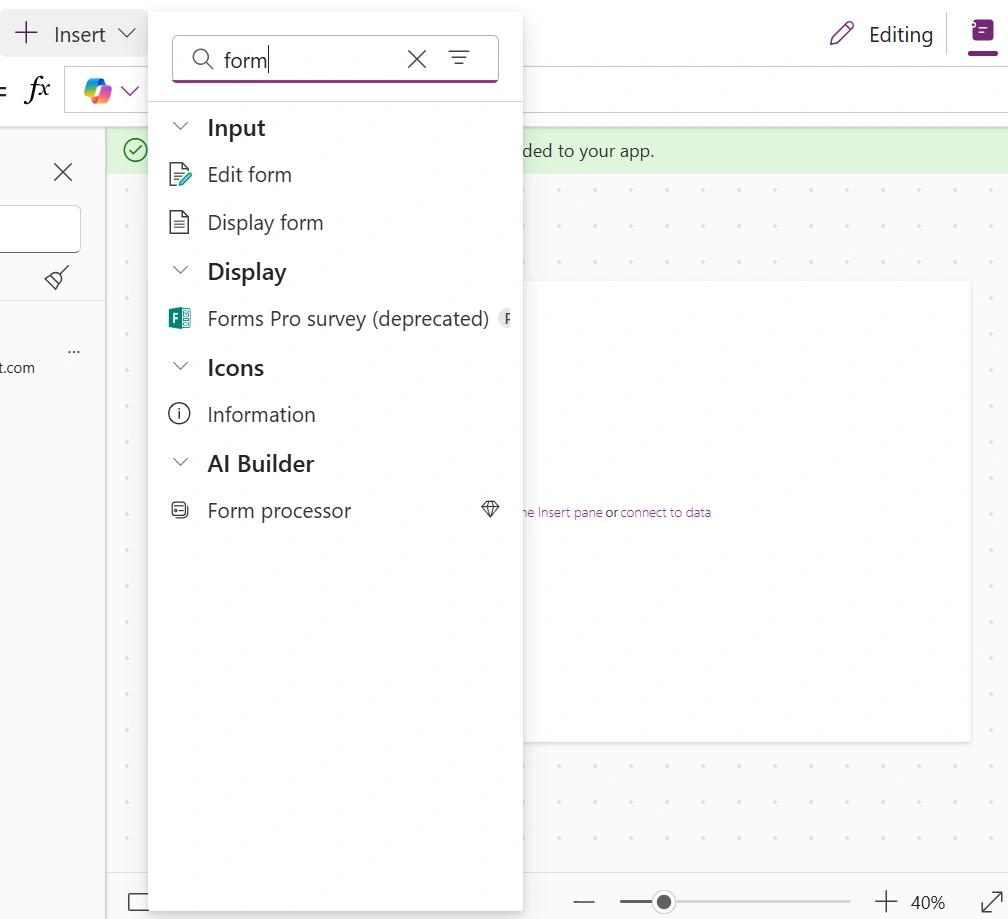
Select the form
Set Data Source to your list
Step 5: Add fields to the form
Click Edit fields
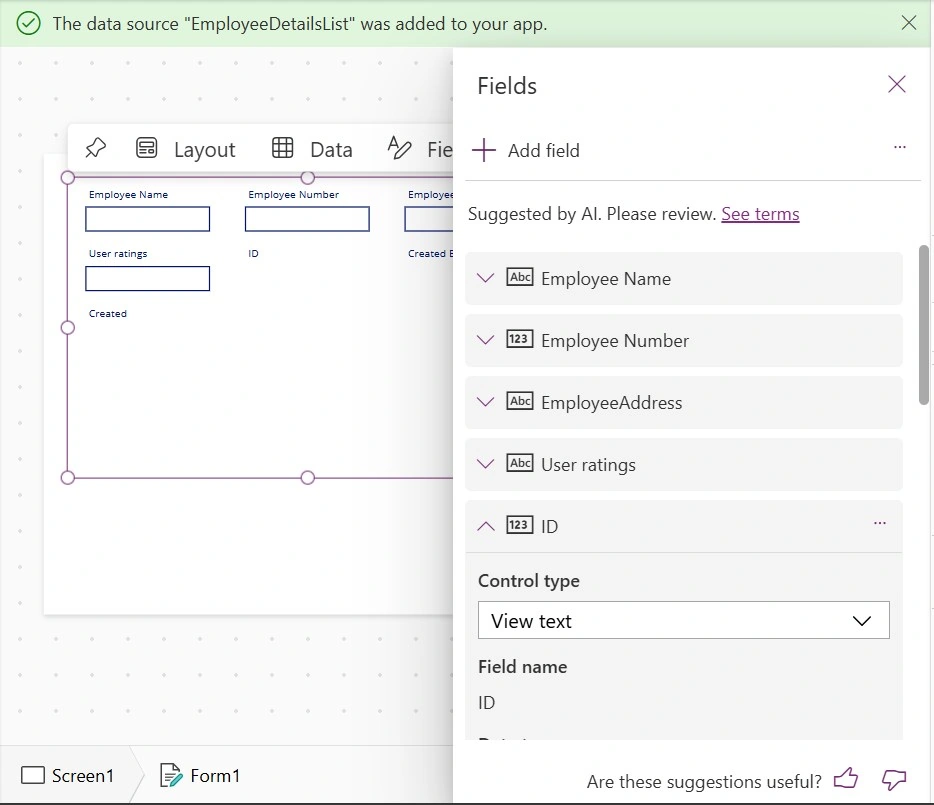
Add the columns you want
Step 6: Add a Submit button
Insert → Button
Rename it to btnSubmit
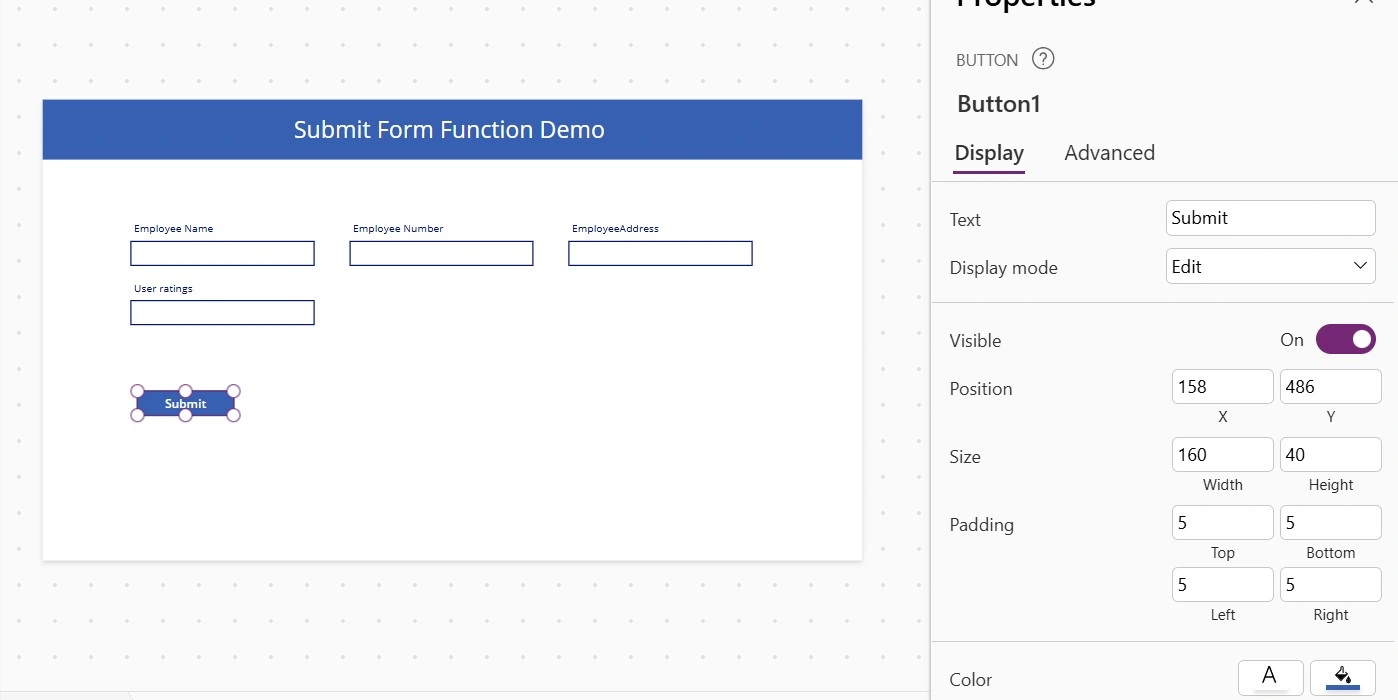
Set Text = Submit
Step 7: Use SubmitForm() on the button
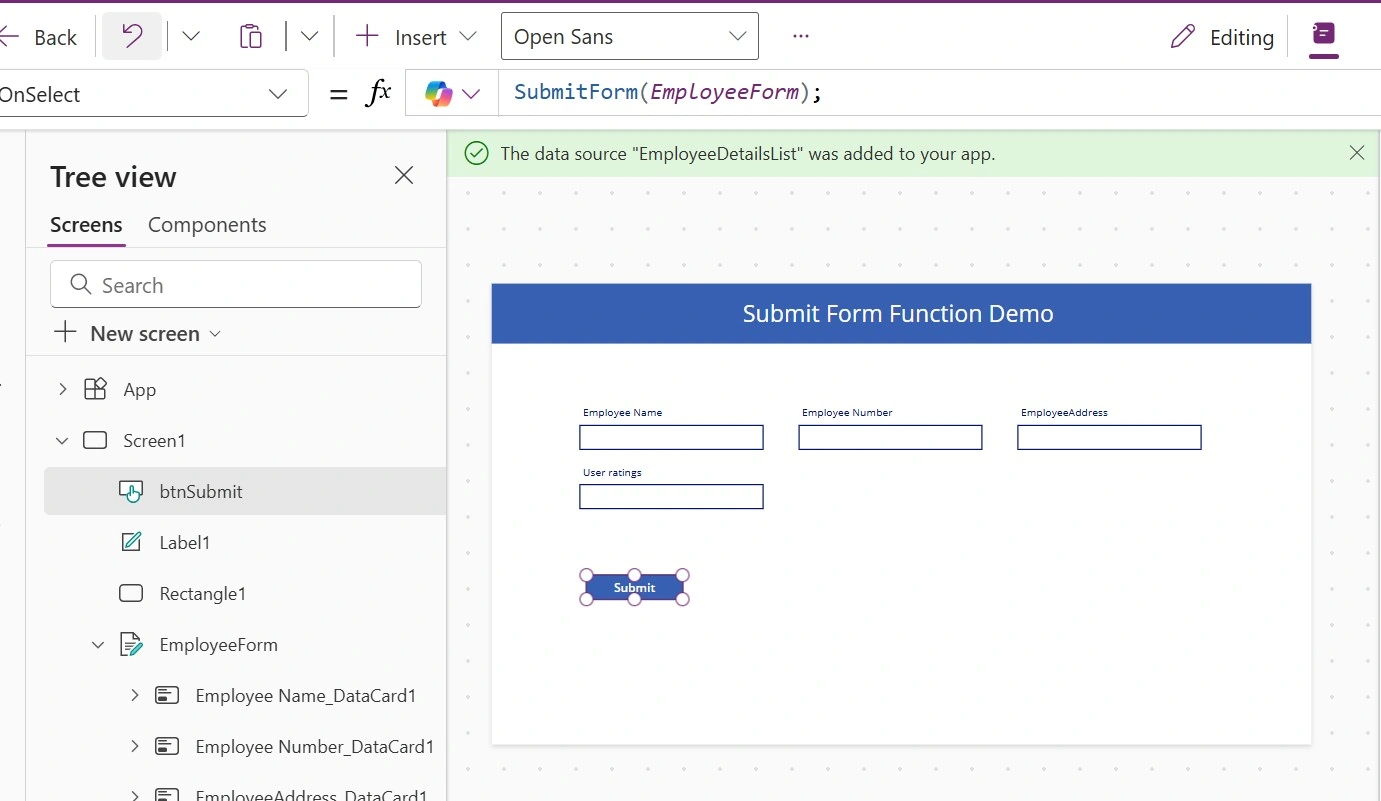
Conclusion
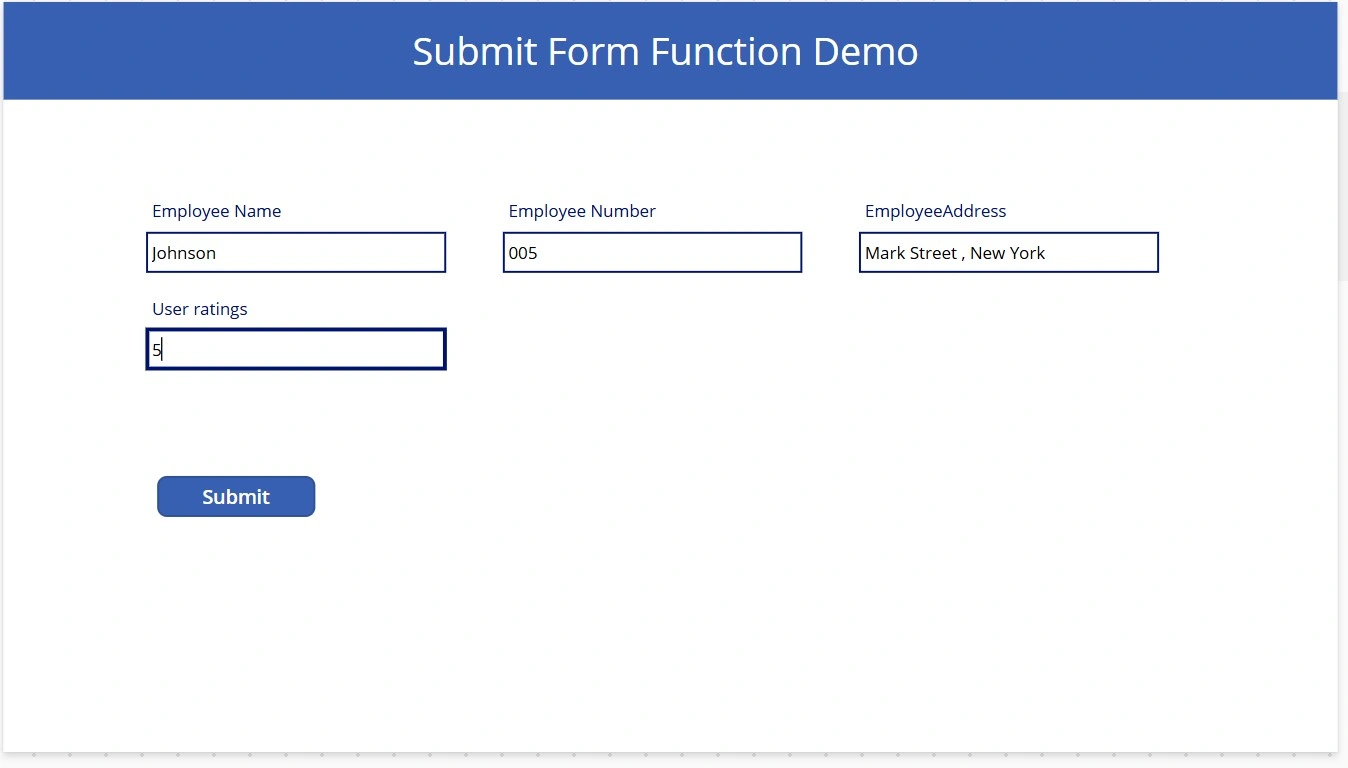
SubmitForm() is the easiest way to save form data in Power Apps. It handles validation for you, and lets you show clear messages for success or failure. For simple apps, it’s the best starting point. If your app needs more advanced logic, consider using Patch().
Join the conversation! Your thoughts help the community grow.