

Introduction
In the last article How to Open New Activity on Click Button by Existing Activity In Android, we saw how to communicate with a new activity. You know the intent is divided into the three parts Action, Data and Category. In general, an Action is something to be performed, such as the action view, action edit and action main. And Data is something to be operated on, such as a personal record, contact database, or Uri.
Today I will explain how to use an Intent in an online application in Android.
Step 1
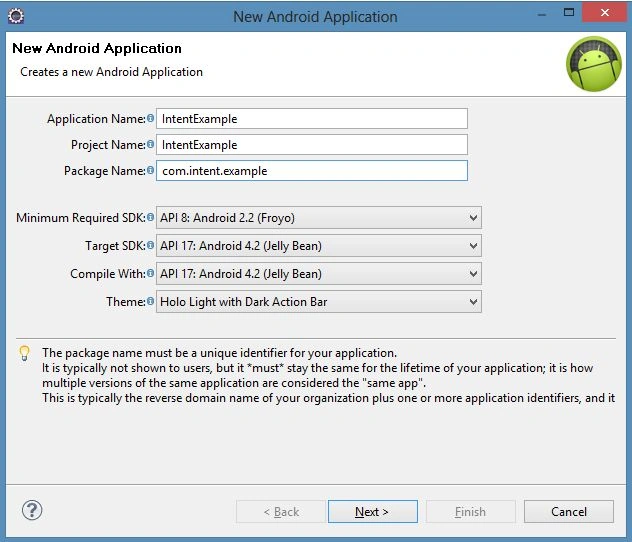
Create a new project using "File" -> "New" -> "Android Application Project" and name it "IntentExample" as shown below.
Step 2
Open "activity_main.xml" as "IntentExample/res/layout/activity_main.xml" and update it as in the following:
- <RelativeLayout xmlns:android="http://schemas.android.com/apk/res/android"
- xmlns:tools="http://schemas.android.com/tools"
- android:layout_width="match_parent"
- android:layout_height="match_parent"
- tools:context="com.intent.example.MainActivity"
- android:layout_gravity="center">
- <Button
- android:id="@+id/btn"
- android:layout_width="wrap_content"
- android:layout_height="wrap_content"
- android:onClick="openBrowser"
- android:text="@string/browser_btn" >
- </Button>
- </RelativeLayout>
Step 3
Open "string.xml" as "IntentExample/res/values/string.xml" and update it as shown in the following:
- <?xml version="1.0" encoding="utf-8"?>
- <resources>
- <string name="app_name">IntentExample</string>
- <string name="hello_world">Hello world!</string>
- <string name="menu_settings">Settings</string>
- <string name="browser_btn">Open</string>
- </resources>
Step 4
Open "MainActivity.java" as "IntentExample/src/com.intent.example" and update it with your logic; whatever you want to do.
- package com.intent.example;
- import android.app.Activity;
- import android.content.Intent;
- import android.net.Uri;
- import android.os.Bundle;
- import android.view.Menu;
- import android.view.View;
- public class MainActivity extends Activity {
- @Override
- public void onCreate(Bundle savedInstanceState) {
- super.onCreate(savedInstanceState);
- setContentView(R.layout.activity_main);
- }
- public void openBrowser(View view){
- Intent i = new Intent("android.intent.action.VIEW", Uri.parse("http://www.google.com"));
- startActivity(i);
- }
- @Override
- public boolean onCreateOptionsMenu(Menu menu) {
- // Inflate the menu; this adds items to the action bar if it is present.
- getMenuInflater().inflate(R.menu.activity_main, menu);
- return true;
- }
- }
Step 5
Open the Android manifest file using "IntentExample/mainfest.xml" and if you want to update the related permission or add a new activity UI then update it as shown below:
- <?xml version="1.0" encoding="utf-8"?>
- <manifest xmlns:android="http://schemas.android.com/apk/res/android"
- package="com.intent.example"
- android:versionCode="1"
- android:versionName="1.0" >
- <uses-sdk
- android:minSdkVersion="8"
- android:targetSdkVersion="17" />
- <application
- android:allowBackup="true"
- android:icon="@drawable/ic_launcher"
- android:label="@string/app_name"
- android:theme="@style/AppTheme" >
- <activity
- android:name="com.intent.example.MainActivity"
- android:label="@string/app_name" >
- <intent-filter>
- <action android:name="android.intent.action.MAIN" />
- <category android:name="android.intent.category.LAUNCHER" />
- </intent-filter>
- </activity>
- </application>
- </manifest>
Step 6
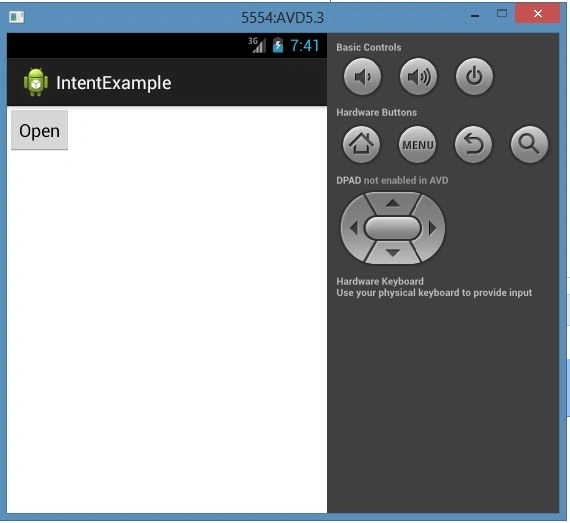
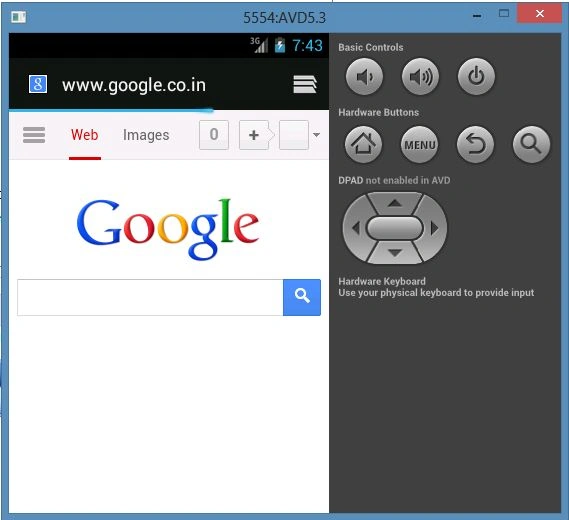
Run the application and see the output as shown below.
Click on the "Open" button:
And see:
Gowtham RajamanickamPosted Apr 12, 2016, 2:08 AM
Good One, Thanks for sharing
Amir AliPosted May 30, 2013, 4:02 AM
what type of intent is this implicit or explicit