

Introduction
In-App purchase is a payment solution of the Google Play billing system. It is a system that allows the user to sell digital products and content in our application. Google Play provides support for android applications to implement in-app purchases in android through Google Play In-App Billing API and the Play Console. In this article, we will be learning how to integrate Billing into our app for testing purposes. Later we go through the same process to implement it in a real applications through the play console.
Understanding Google Play's billing system
Google Play's billing system provides two types of billing systems to integrate
- One-time products - through this we can sell our product on the basis of one type. These also can be as follows- Consumable product and Non-consumable product. Consumable products are the products that user digest for only one time and are gone after use or spent like gaming currency or coins.
Non- consumable products are the products that are associated with your Google account and are permanently there. Like once you have achieved the level your level is up permanently with the associated id or email. - Subscriptions - A Subscription is a usage of a product where the user can use the product for a duration of period. Users can have various types of subscriptions and usage or very different of usage in a package. These products are renewable by default with a user payment option selection.
For more details follow Android documentation
Integrating In-app Purchase
Integrating the Google Play billing system needs to setup Google Play Console account that requires a fee of $25. Here we are using the free testing setup of the payment solution of google play for testing purposes. So let's get started.
Step 1
Create a new project in Android Studio with empty activity, Name your project and chose language as kotlin
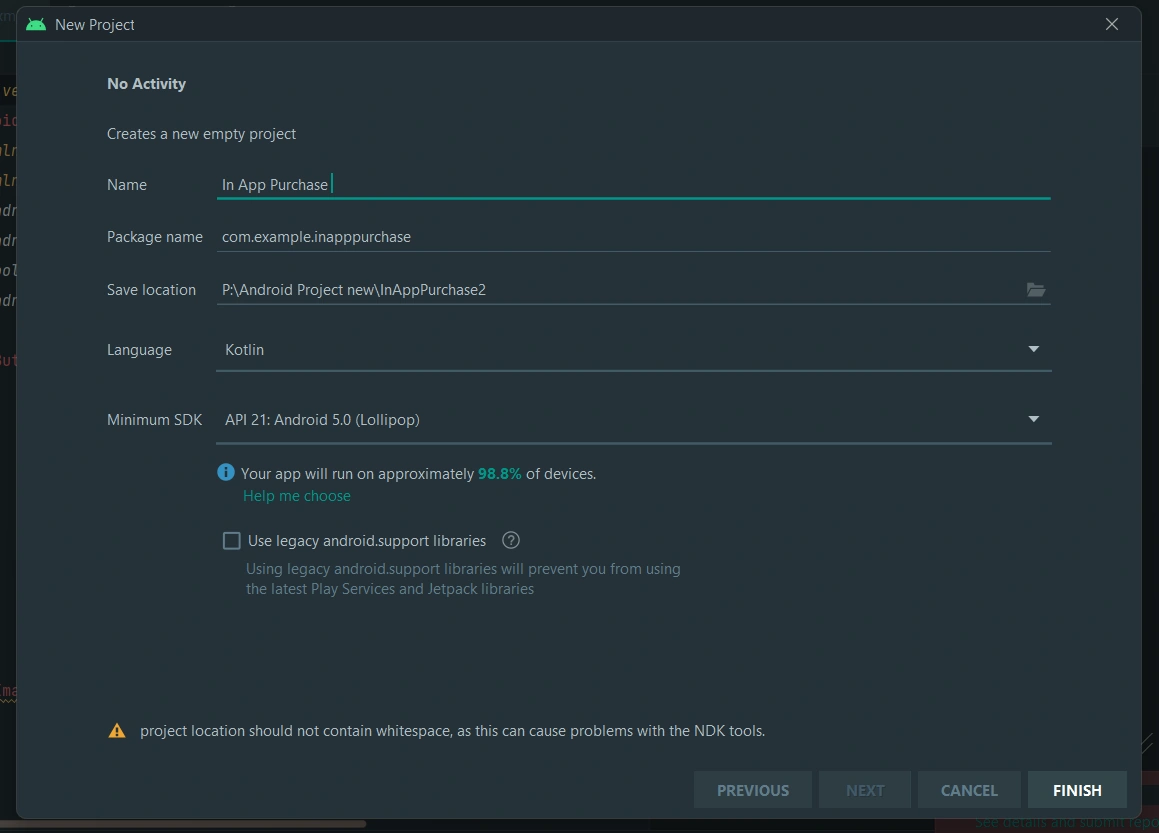
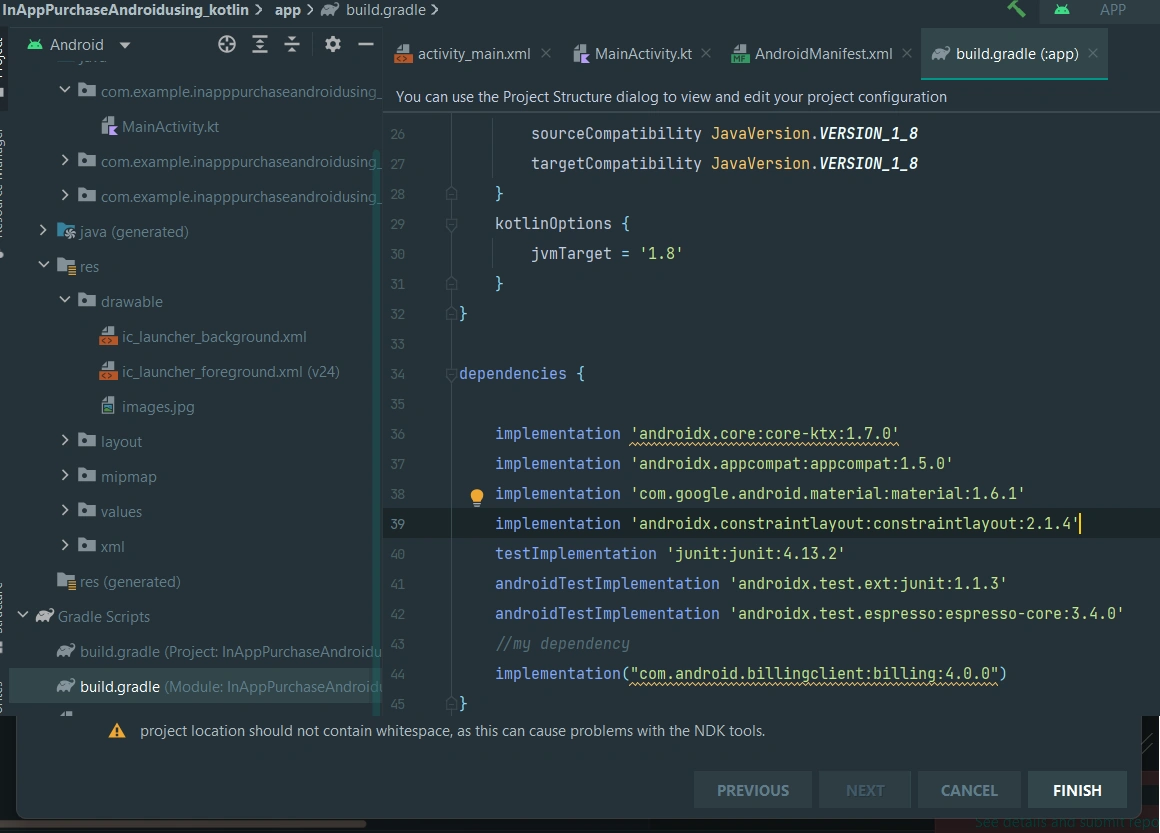
and add the following dependencies in your Build.Gradle(App level file)
implementation("com.android.billingclient:billing:4.0.0")
Step 2
Here we are preferring kotlin language, you can also create the same application in java using the same flow discussed here.
Firstly create a Button and name it "Buy now", you can also add a text view for a better appearance. The XML code is attached below
<?xml version="1.0" encoding="utf-8"?>
<androidx.constraintlayout.widget.ConstraintLayout xmlns:android="http://schemas.android.com/apk/res/android"
    xmlns:app="http://schemas.android.com/apk/res-auto"
    xmlns:tools="http://schemas.android.com/tools"
    android:layout_width="match_parent"
    android:layout_height="match_parent"
    tools:context=".MainActivity"
    android:background="@color/white">

    <Button
        android:id="@+id/btn_buynow"
        android:layout_width="wrap_content"
        android:layout_height="wrap_content"
        android:text="Buy now!"
        android:layout_marginTop="10dp"
        app:layout_constraintEnd_toEndOf="parent"
        app:layout_constraintHorizontal_bias="0.452"
        app:layout_constraintStart_toStartOf="parent"
        app:layout_constraintTop_toBottomOf="@+id/imageView3" />

    <ImageView
        android:id="@+id/imageView3"
        android:layout_width="wrap_content"
        android:layout_height="wrap_content"
        android:layout_marginTop="120dp"
        android:background="@color/black"
        android:padding="5dp"
        app:layout_constraintEnd_toEndOf="parent"
        app:layout_constraintHorizontal_bias="0.448"
        app:layout_constraintStart_toStartOf="parent"
        app:layout_constraintTop_toTopOf="parent"
        app:srcCompat="@drawable/images" />

</androidx.constraintlayout.widget.ConstraintLayout>
Step 3
Now in MainActivity.kt initialize a Button and start the process by creating an OnClickListenere on the Button.
private  lateinit var button : Button
button = findViewById(R.id.btn_buynow)
To implement In-app purchases firstly we have to initialize in-app billing by creating an object of PurchasesUpdatedListener.
val purchasesUpdatedListener =
    PurchasesUpdatedListener { billingResult, purchases ->
    // To be implemented in a later section.
}
After initializing we have to define the billing Client and set the listener on it. Now after clicking on the button we have to start a connection to Google Play. While Connecting to the Billing service we will have to implement methods onBillingServiceDisconnected() and onBillingSetupFinished(billingResult: BillingResult).
var billingClient = BillingClient.newBuilder(this)
    .setListener(purchasesUpdatedListener)
    .enablePendingPurchases()
    .build()
If the Connection was successful we will get the billing result as OK. If the response was ok.
button.setOnClickListener {
        billingClient.startConnection(object: BillingClientStateListener {
                    override fun onBillingServiceDisconnected() {}
                    override fun onBillingSetupFinished(billingResult: BillingResult) {
                            if (billingResult.responseCode == BillingClient.BillingResponseCode.OK) { // implmenting to be continue #csharpCorner  }
                            }
Now we have to provide a list of products to sell in the Application. Like this, we will provide products to the flowPurchase. Here we are testing our app so we will add a test product like below
val skuList = ArrayList<String>()
skuList.add("android.test.purchased")
Now we will feed this list to the BIlling Client and start the flow of purchase & we will get the response code from the billing Client.
Full Code Snippet
package com.example.inapppurchaseandroidusing_kotlin

import androidx.appcompat.app.AppCompatActivity
import android.os.Bundle
import android.widget.Button
import android.widget.Toast
import com.android.billingclient.api.*

private  lateinit var button : Button

class MainActivity: AppCompatActivity() {
    override fun onCreate(savedInstanceState: Bundle ? ) {
        super.onCreate(savedInstanceState)
        setContentView(R.layout.activity_main)
        setTitle("In app purchase")
        button = findViewById(R.id.btn_buynow)
        val skuList = ArrayList < String > ()
        skuList.add("android.test.purchased")
        val purchasesUpdatedListener = PurchasesUpdatedListener {
            billingResult,
            purchases - >
            // To be implemented in a later section.
        }
        var billingClient = BillingClient.newBuilder(this).setListener(purchasesUpdatedListener).enablePendingPurchases().build()
        button.setOnClickListener {
            billingClient.startConnection(object: BillingClientStateListener {
                override fun onBillingServiceDisconnected() {
                    val toast = Toast.makeText(applicationContext, "Disconnected ", Toast.LENGTH_SHORT)
                    toast.show()
                }
                override fun onBillingSetupFinished(billingResult: BillingResult) {
                    val toast = Toast.makeText(applicationContext, "connecting ", Toast.LENGTH_SHORT)
                    toast.show()
                    if (billingResult.responseCode == BillingClient.BillingResponseCode.OK) {
                        val params = SkuDetailsParams.newBuilder()
                        params.setSkusList(skuList).setType(BillingClient.SkuType.INAPP)
                        billingClient.querySkuDetailsAsync(params.build()) {
                            billingResult,
                            skuDetailsList - >
                            for (skuDetails in skuDetailsList!!) {
                                val flowPurchase = BillingFlowParams.newBuilder().setSkuDetails(skuDetails).build()
                                val responseCode = billingClient.launchBillingFlow(this @MainActivity, flowPurchase).responseCode
                            }
                        }
                    }
                }
            })
        }
    }
}

Output
Conclusion
In this article, we have integrated Google play billing for testing purposes. For more articles on this topic like how to implement Google Play Billing on the real Developer Console, you can hit me in the comment.
Join the conversation! Your thoughts help the community grow.