

Azure App Service is an HTTP-based service for hosting web applications, REST APIs, and mobile back ends. You can develop in your favorite language, be it .NET, .NET Core, Java, Node.js, Python, or PHP. Applications run and scale with ease on both Windows and Linux-based environments.
App Service adds the power of Microsoft Azure to your application, including improved security, load balancing, autoscaling, and automated management. Additionally, you can take advantage of its DevOps capabilities, such as continuous deployment from Azure DevOps, GitHub, Docker Hub, and other sources, package management, staging environments, custom domains, and TLS/SSL certificates.
With App Service, you pay for the Azure compute resources you use. The App Service plan that you run your apps on determines the computing resources you use.
Why use App Service?
Azure App Service is a fully managed platform as a service (PaaS) offering for developers. Here are some key features of App Service.
- Multiple languages and frameworks: App Service has first-class support for ASP.NET, ASP.NET Core, Java, Node.js, Python, and PHP. You can also run PowerShell and other scripts or executables as background services.
- Managed production environment: App Service automatically patches and maintains the OS and language frameworks for you. Spend time writing great apps and let Azure worry about the platform.
- Containerization and Docker: Dockerize your app and host a custom Windows or Linux container in App Service. Run sidecar containers of your choice. Migrate your Docker skills directly to App Service.
- DevOps optimization: Set up continuous integration and deployment with Azure DevOps, GitHub, Bitbucket, Docker Hub, or Azure Container Registry. Promote updates through test and staging environments. Manage your apps in App Service by using Azure PowerShell or the cross-platform command-line interface (CLI).
- Global scale with high availability: Scale up or out manually or automatically. Host your apps anywhere in the global Microsoft datacenter infrastructure, and the App Service SLA promises high availability.
- Connections to SaaS platforms and on-premises data: Choose from many hundreds of connectors for enterprise systems (such as SAP), SaaS services (such as Salesforce), and internet services (such as Facebook). Access on-premises data using Hybrid Connections and Azure Virtual Network.
- Security and compliance: App Service is ISO, SOC, and PCI compliant. Create IP address restrictions and managed service identities. Protect against subdomain takeovers.
- Authentication: Authenticate users using the built-in authentication component. Authenticate users with Microsoft Entra ID, Google, Facebook, X, or Microsoft accounts.
- Application templates: Choose from an extensive list of application templates in the Azure Marketplace, such as WordPress, Joomla, and Drupal.
- Visual Studio and Visual Studio Code integration: Dedicated tools in Visual Studio and Visual Studio Code streamline the work of creating, deploying, and debugging.
- Java tools integration: Develop and deploy to Azure without leaving your favorite development tools, such as Maven, Gradle, Visual Studio Code, IntelliJ, and Eclipse.
- API and mobile features: App Service provides turn-key CORS support for RESTful API scenarios and simplifies mobile app scenarios by enabling authentication, offline data sync, push notifications, and more.
- Serverless code: Run a code snippet or script on-demand without having to explicitly provision or manage infrastructure, and pay only for the compute time your code actually uses (see Azure Functions).
Besides App Service, Azure offers other services that can be used for hosting websites and web applications. For most scenarios, App Service is the best choice. For a microservice architecture, consider Azure Kubernetes Service or Service Fabric. If you need more control over the VMs on which your code runs, consider Azure Virtual Machines.
Let host an application on Azure Cloud using Azure Web App Service for better understandability.
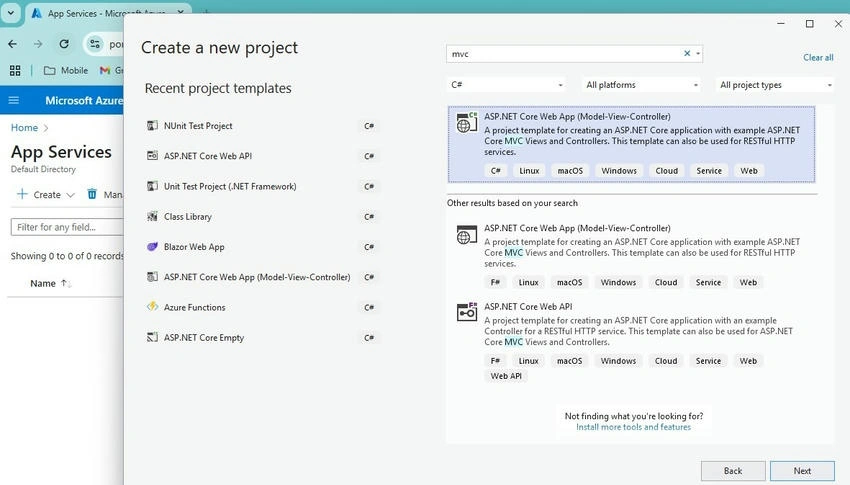
We will be creating a MVC application for a start in C#.
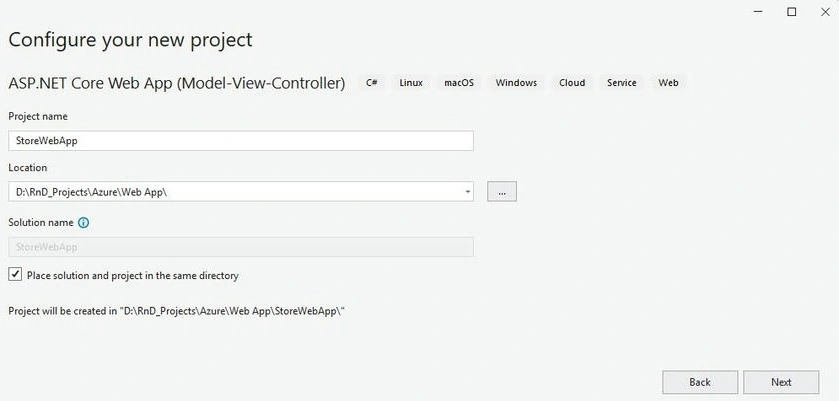
Name your project and address the preferred location and click next.
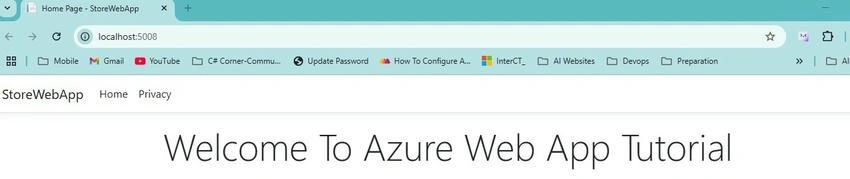
Once your project is ready then make minor change in index.view page to make little difference. Run the project on your localhost.
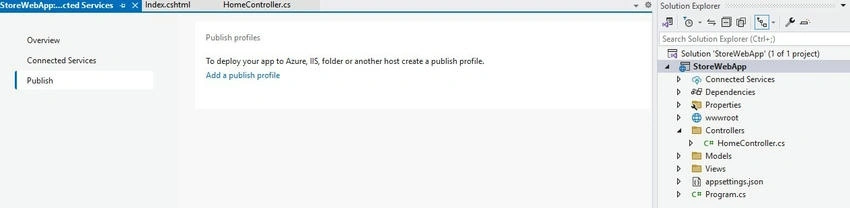
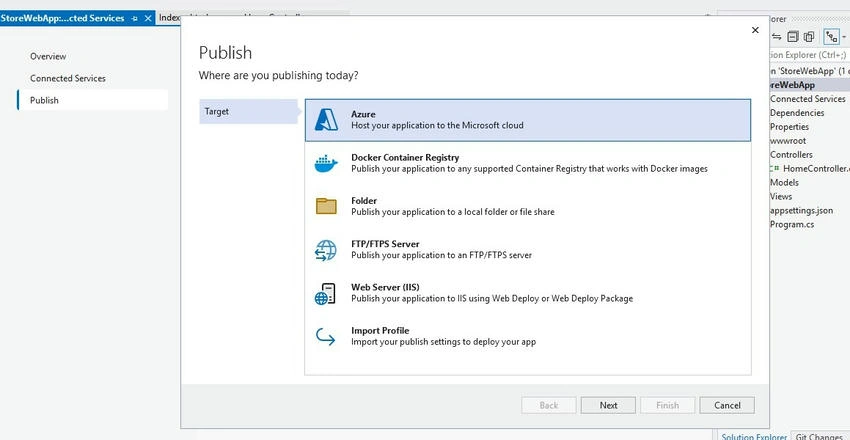
Once you are done with your project coding and ready to host then right click on your project and select publish option. If it’s your first instance, then you need to select a publish profile. After that it will be the same selection for every other publish you make until you change to new one.
In here, we are selecting Azure to host my application as shown in below snap.
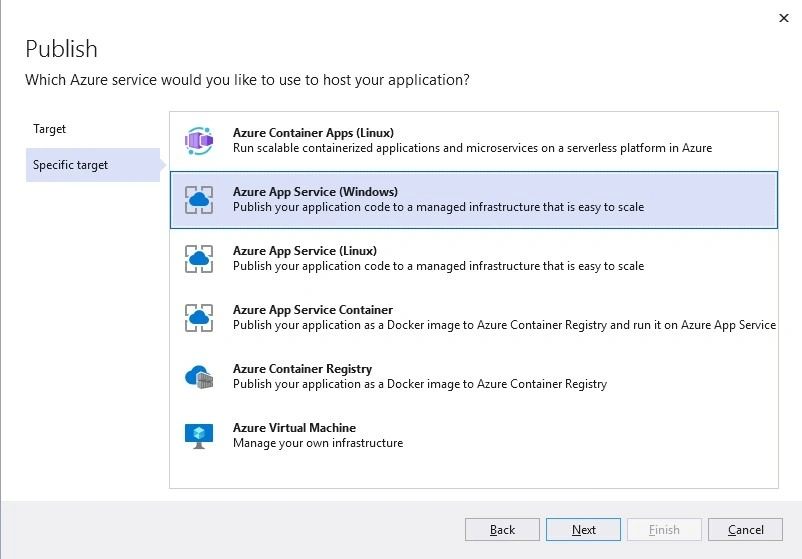
Azure provides different services as per your requirement to host your application. We will go with Azure App Service with Window OS and click next.
While working with Azure, we need to have subscription which appear automatically once you’ll login using same credential to Visual Studio.
You need to opt for subscription which is either Free or Pay-as-you go for that user’s email id.
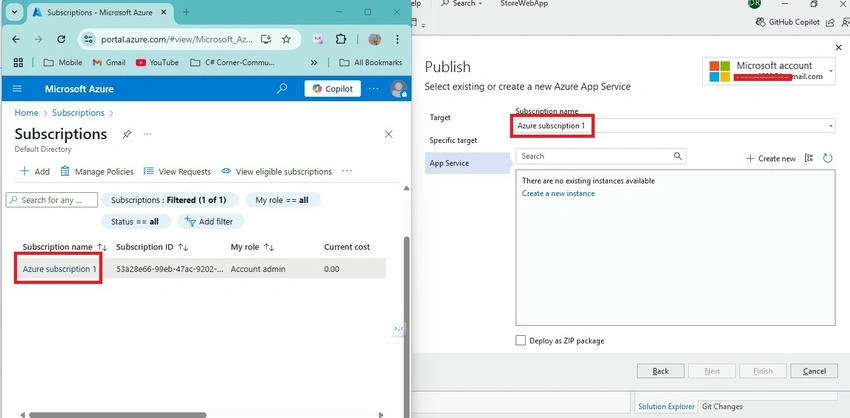
Select respective subscription you wish to work with and if any web app instance is already created will be appear on dialog to select. We can also create a new instance of it as shown in below snapshot.
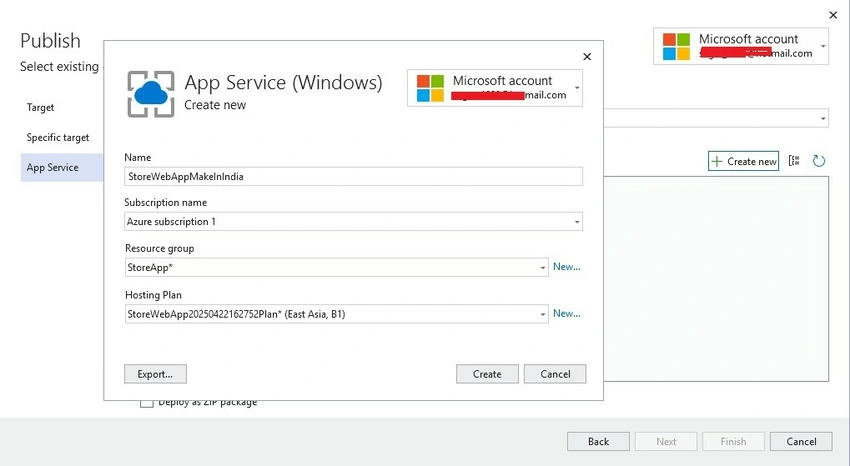
Here, we can name our application URL. Select existing Resource Group or create new one. Select Hosting plan for our application based on its usage. All this component we can also create on Azure portal too which will be appear automatically here based on your selection.
Hosting plan varies as per complexity and requirement need of an application. You can explore different plan here- Azure App Service on Windows pricing.
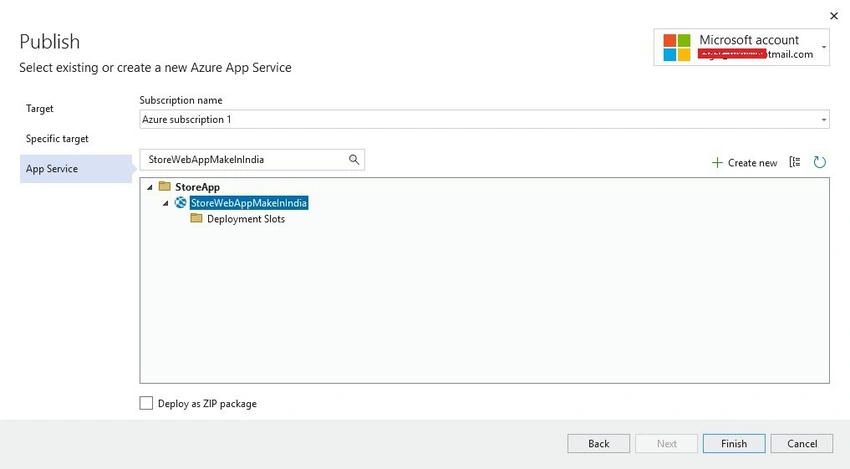
Select newly created Web App instance and click finish to start publish.
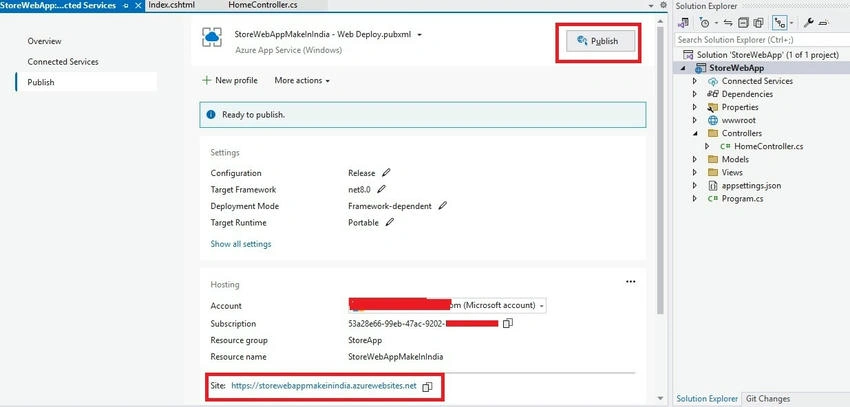
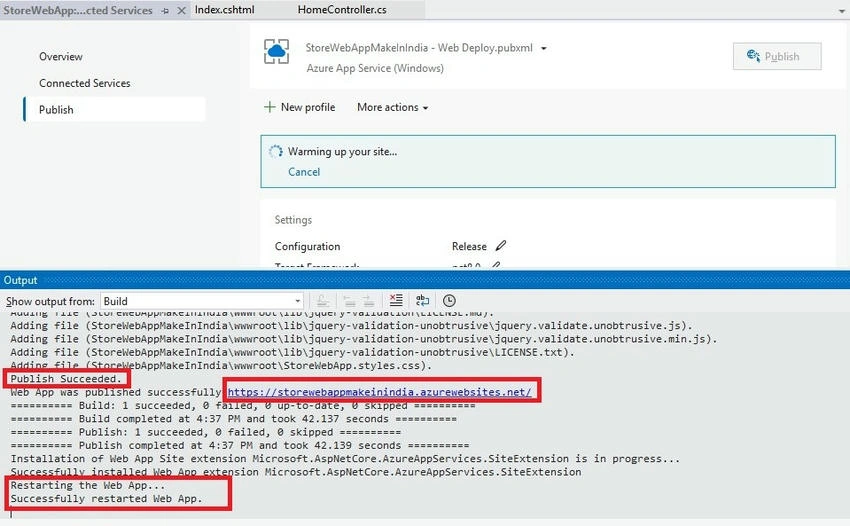
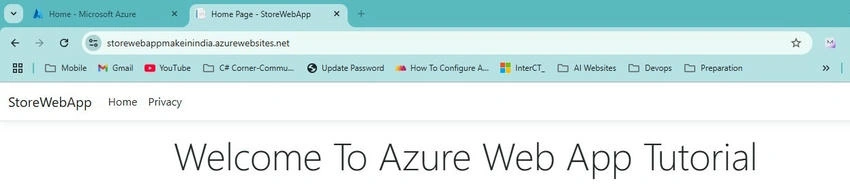
On successful Publish, we can load the given URL to load our application on browser.
Over Azure portal, in App Service section we can see the web app instance created by us with all set configuration.
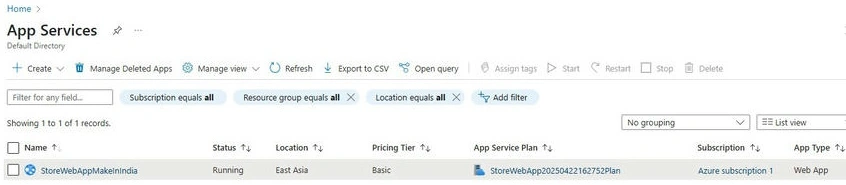
Furthermore we can handle that web app instance in detail by monitoring it at different level. We can apply the Access control, overviewing its performance, manage deployment slot etc.
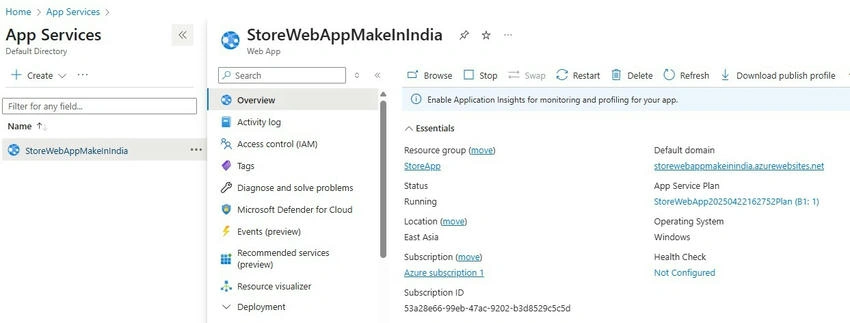
Azure Web App as PaaS provides a fine alternate to deploy/host mobile or web app in efficient way on cloud and allow multiple options to handle and mange those resource effortlessly.
Join the conversation! Your thoughts help the community grow.