

Introduction
Since I described the Model Binding in ASP.NET MVC in the previous article, we'll move further here. We learned about the model binding process with various types of models in the previous article and here we'll learn some more types such as the following:
- Binding with a List of Simple Types
- Binding with a List of Class Types
Binding with a List of Simple Types
In this process we'll receive multiple records at a time. Use the following procedure to create the sample.
Step 1: Edit the Index.cshtml page with the following code:
<div class="form-horizontal">
  <h4>Enter Details</h4>
  <hr />
  <div class="form-group">
       @Html.Label("StudentID:", new { @class = "col-md-2 control-label" })
       <div class="col-md-10">
           @Html.TextBox("StudentID")
       </div>
  </div>
  <div class="form-group">
      @Html.Label("StudentName:", new { @class = "col-md-2 control-label" })
        <div class="col-md-10">
            @Html.TextBox("StudentName")
        </div>
  </div>
   <div class="form-group">
       @Html.Label("StudentID:", new { @class = "col-md-2 control-label" })
       <div class="col-md-10">
           @Html.TextBox("StudentID")
        </div>
   </div>
   <div class="form-group">
       @Html.Label("StudentName:", new { @class = "col-md-2 control-label" })
       <div class="col-md-10">
           @Html.TextBox("StudentName")
       </div>
   </div>
   <div class="form-group">
       @Html.Label("StudentID:", new { @class = "col-md-2 control-label" })
       <div class="col-md-10">
           @Html.TextBox("StudentID")
        </div>
   </div>
   <div class="form-group">
       @Html.Label("StudentName:", new { @class = "col-md-2 control-label" })
       <div class="col-md-10">
           @Html.TextBox("StudentName")
       </div>
   </div>
   <div class="form-group">
       <div class="col-md-offset-2 col-md-10">
           <input type="submit" value="Submit" class="btn btn-default" />
           @ViewBag.Message
        </div>
   </div>
</div>
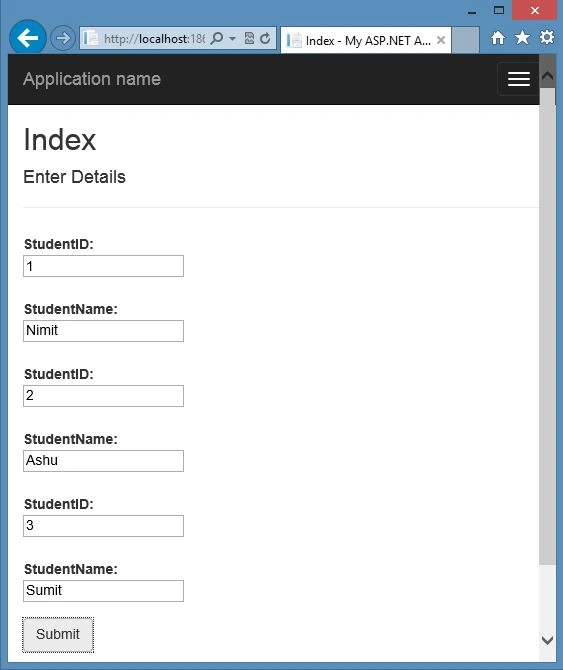
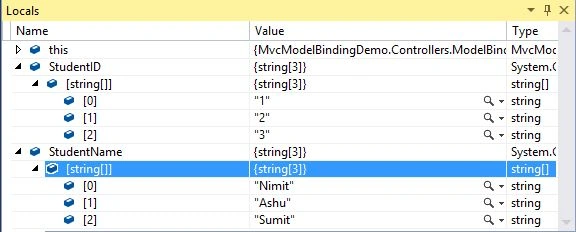
In the code above you can see that the StudentID and StudentName are used to accept the ID and Names value. Based on these names the default model binder considers all the values with same name as a part of a single collection.
Step 2: Now modify the Index() in the controller with the following code:
[HttpPost]
public ActionResult Index(IList<string> StudentID, IList<string> StudentName)
{
     ViewBag.Message = "Your Student data retrieved successfully for" + " " +  StudentID.Count + "Records!!";
     return View();
}
Step 3: Now run the application and open the controller as in the following:
Join the conversation! Your thoughts help the community grow.