

Introduction
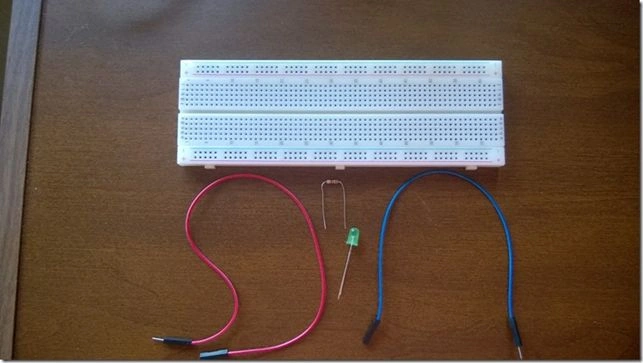
Figure 1: Requirement material
- 1 LED color you want (red, green or yellow.)
- 1 Resistance 220 Ohms.
- 2 cable connectors
- 1 Breadboard
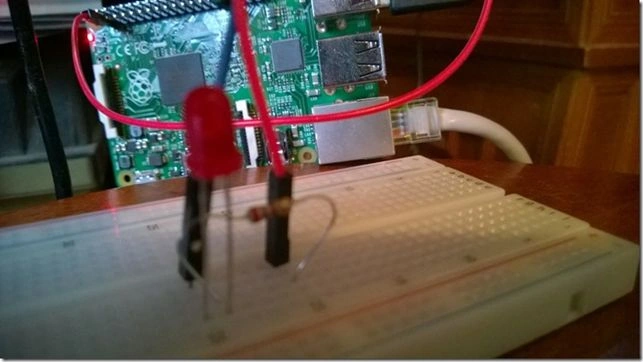
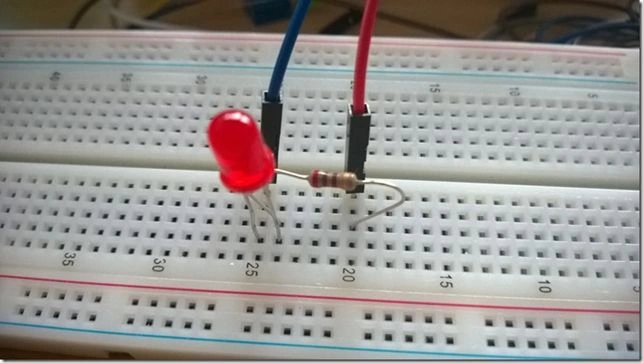
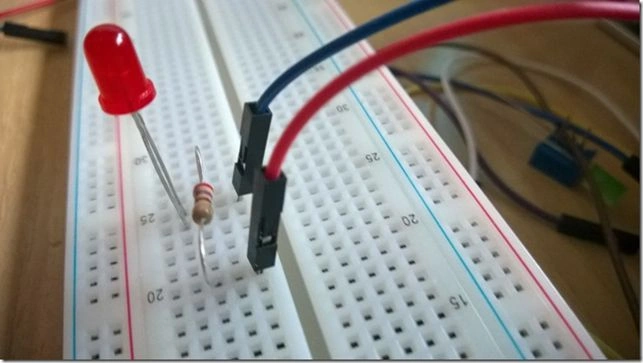
The final connection you see in the following picture:
 Below is the diagram of the electronic circuit. It states that to create a circuit or draw, are necessary for my personal experience, as well as a dedicated software and hardware parts of the bases on the basics of electronics, otherwise my advice and devote themselves to the development of the code and leave to others the task earlier.
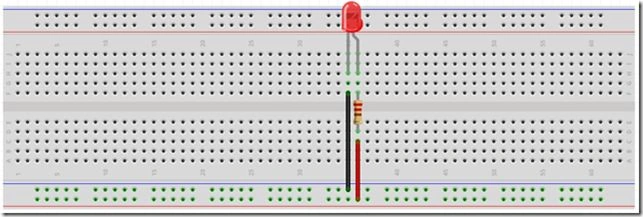 From the previous image, we note that we have two cables, one black, and one red. The black cable representing zero volt connect me to pin GPIO5 corresponding to the pin 29 that are on the GPIO card Raspberry Pi2. The red wire on pin 3.3V PWR corresponding to pin 1. Below the connector pin GPIO thus facilitate us to connect.
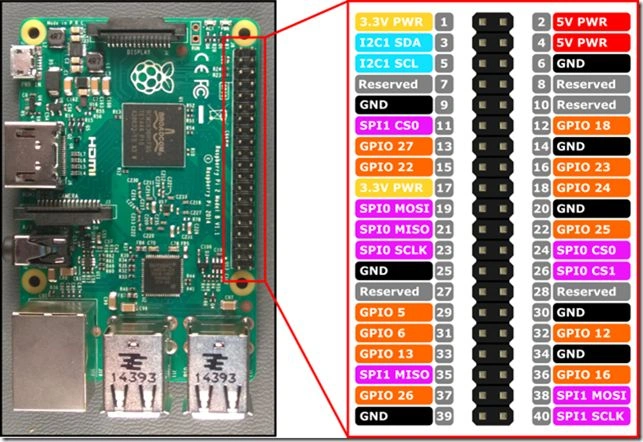 Importantly, the Led diode to work, must be properly connected, ie the katodo (because it recognizes and the shorter leg) must be connected to zero volts, the anode that is the other leg on the positive, which in this case It will be given by pin 3.3V PWR. Wrong wiring will not allow the diode LED work, you may damage the component. The resistance is important because generally, a Led diode operates at a voltage of about 3.3V dc, in this case, it means that there is a voltage drop necessary and thus provide the correct voltage.
Setting up your PC in developer mode
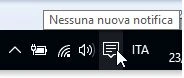
Before starting to develop code, you must set the mode "developer" of our PC, otherwise, it will not be possible to develop and test their applications. The procedure is very simple. We point the mouse on the icon of the notifications as shown.
Importantly, the Led diode to work, must be properly connected, ie the katodo (because it recognizes and the shorter leg) must be connected to zero volts, the anode that is the other leg on the positive, which in this case It will be given by pin 3.3V PWR. Wrong wiring will not allow the diode LED work, you may damage the component. The resistance is important because generally, a Led diode operates at a voltage of about 3.3V dc, in this case, it means that there is a voltage drop necessary and thus provide the correct voltage.
Setting up your PC in developer mode
Before starting to develop code, you must set the mode "developer" of our PC, otherwise, it will not be possible to develop and test their applications. The procedure is very simple. We point the mouse on the icon of the notifications as shown.
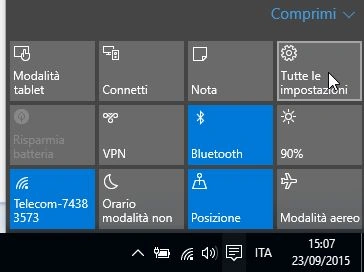
 In the next dialog box, select "All Settings".
 We will be led to the next screen, select the command "Update and security."
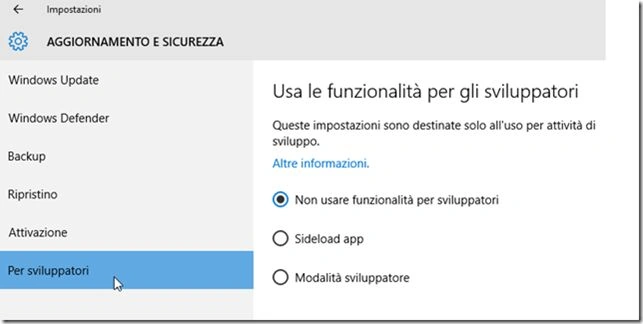
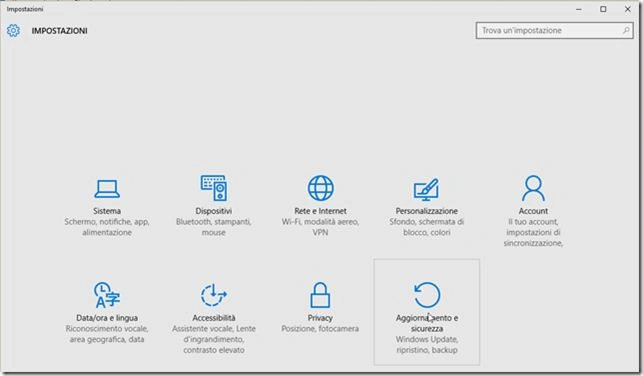 We go to the next screen select the "For developers," and soon after Developer mode.
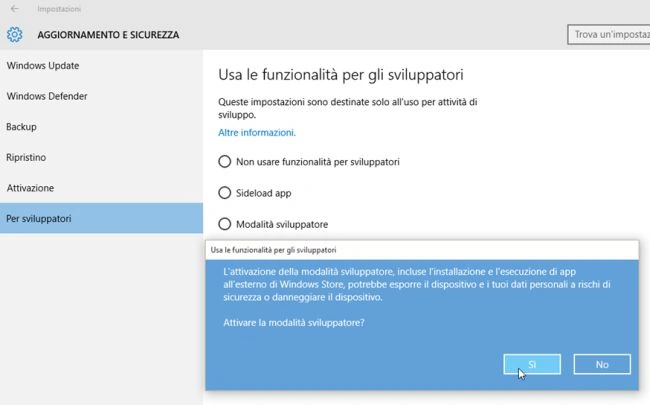
 A dialog box will appear, where we have to confirm with "Yes" key to activate this mode.
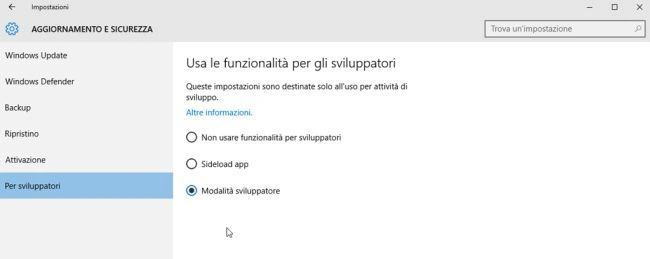
 Let's confirmation and we have enabled our PC development.
 Now we are ready to create our first project IoT.
Creating the project
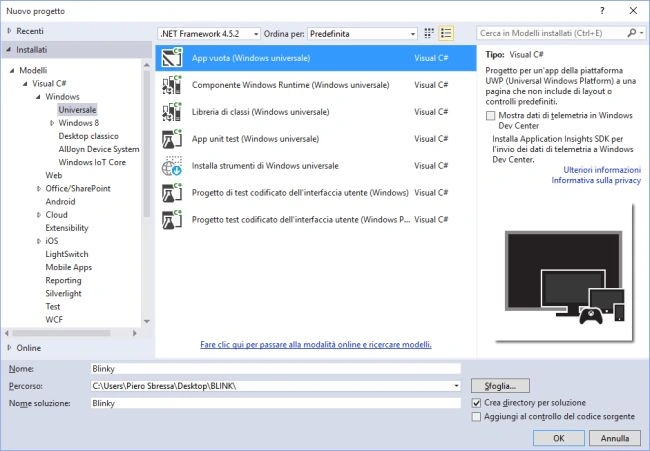
Before starting with the development, we have yet to download and install the Windows library IoT Core Project Templates found at this link. In this library, you will find everything you need for the development of Raspberry Pi2 and beyond, we will see later in the article. Now open Visual Studio, and create a new project Universal Windows App, in C#.
Now we are ready to create our first project IoT.
Creating the project
Before starting with the development, we have yet to download and install the Windows library IoT Core Project Templates found at this link. In this library, you will find everything you need for the development of Raspberry Pi2 and beyond, we will see later in the article. Now open Visual Studio, and create a new project Universal Windows App, in C#.
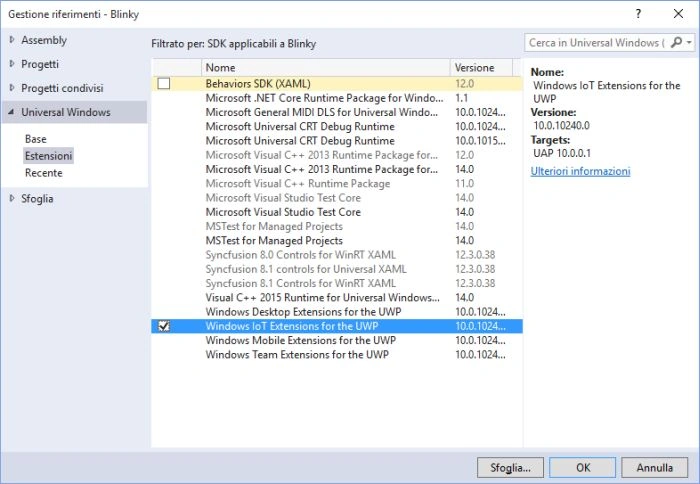
 We need at this point to add a Reference to the 'Windows SDK IoT extension for the UWP, as shown below.
 Now let's add in the Grid Xaml the following code:
Figure 2: Final connection
Figure 3: Connection
Figure 4: Pin Circuit with LED
Figure 5: Circuit with LED
Figure 6: Electronic circuit
Figure 7: GPIO thus facilitate us to connect
Figure 8: Notifications
Figure 9: Select "All Settings"
Figure 10: Select the command "Update and security"
Figure 11: Select the "For developers"
Figure 12: Confirm with "Yes" key to activate this mode
Figure 13: Enabled our PC development
Figure 14: Create a new project Universal Windows App
Figure 15: Windows SDK IoT exstension for the UWP
- < StackPanel HorizontalAlignment = "Center"
- VerticalAlignment = "center" > < Ellipse x: Name = "LED"
- Fill = "LightGray"
- Stroke = "White"
- width = "100"
- Height = "100"
- Margin = "10" / > < TextBlock x: Name = "GpioStatus"
- Text = "Waiting to initialize GPIO ..."
- Margin = "10,50,10,10"
- TextAlignment = "Center"
- FontSize = "26667" / > < Button Name = "AccendeSpegneLEDButton"
- Content = "Turn on LED"
- HorizontalAlignment = "Center"
- Click = "AccendeSpegneLEDButton_Click" / > < / StackPanel>
- While the code-behind we put the following code:
- / / Copyright(c) Microsoft.All rights reserved.
- using System;
- using Windows.Devices.Gpio;
- using Windows.UI.Xaml;
- using Windows.UI.Xaml.Controls;
- using Windows.UI.Xaml.Controls.Primitives;
- using Windows.UI.Xaml.Media;
- Blinky namespace {
- public sealed partial class MainPage: Page {
- private const int LED_PIN = 5;
- Private GpioPin pin;
- Private GpioPinValue pinValue;
- Private SolidColorBrush yellowBrush = new SolidColorBrush(Windows.UI.Colors.Yellow);
- Private SolidColorBrush grayBrush = new SolidColorBrush(Windows.UI.Colors.LightGray);
- public MainPage() {
- InitializeComponent();
- InitGPIO();
- }
- private void InitGPIO() {
- var gpio GpioController.GetDefault = ();
- // Show an error if there is no GPIO controller if (gpio == null) {pin = null; GpioStatus.Text = "There is not the GPIO controller of this device."; return; }
- pin = gpio.OpenPin(LED_PIN);
- pinValue = GpioPinValue.High;
- pin.Write(pinValue);
- pin.SetDriveMode(GpioPinDriveMode.Output);
- GpioStatus.Text = "GPIO pin properly initialized.";
- }
- private void AccendeSpegneLEDButton_Click(object sender, RoutedEventArgs e) {
- if (pinValue == GpioPinValue.High) = {
- pinValue GpioPinValue.Low;
- pin.Write(pinValue);
- LED.Fill = yellowBrush;
- AccendeSpegneLEDButton.Content = "Turn Off LED";
- } Else {
- pinValue = GpioPinValue.High;
- pin.Write(pinValue);
- LED.Fill = grayBrush;
- AccendeSpegneLEDButton.Content = "LED Light";
- }
- }
- }
- }

Figure 16: Set the ARM compilation mode

Figure 17: Select "Properties" and immediately after "Debug"

Figure 18: LED Lights on

Figure 19: LED Lights off
Kumaresh RajalingamPosted Feb 12, 2016, 8:31 PM
Nice share sir
Sr KarthigaPosted Jan 23, 2016, 6:03 AM
Good one
Sabyasachi MishraPosted Oct 13, 2015, 1:34 AM
Never used C# code for this type of application as I only uses Embedded C. Hope I will change to C# soon.And thanks for sharing this vital information.
Mohammed IbrahimPosted Oct 12, 2015, 12:17 PM
nice
Shashank RanePosted Oct 8, 2015, 1:11 AM
Very much Interesting..Thanks For sharing
Sujeet SumanPosted Oct 7, 2015, 10:29 AM
Nice Article............
Ramchand RepallePosted Oct 6, 2015, 11:53 PM
Great and good start on IOT...
Humayun Kabir MamunPosted Oct 6, 2015, 7:26 AM
Nice...
Sumit JoshiPosted Oct 3, 2015, 4:49 PM
thanks for sharing.
Mahesh ChandPosted Oct 2, 2015, 11:17 PM
Nicely done!
Pooja BaraskarPosted Oct 2, 2015, 9:45 AM
Nice Carmelo La Monica, Its good to see some breadboarding.Thanks for a detailed tutorial with lots of images. :)
Nilesh JadavPosted Oct 2, 2015, 9:10 AM
Great work sir !! Really appreciable !!
Santhakumar MunuswamyPosted Oct 2, 2015, 9:09 AM
Excellent Article. Thanks for sharing us
Avirup BasuPosted Oct 2, 2015, 9:08 AM
Great article sir. Really helpful while kick starting developing embedded application.