

Introduction
In this article we will explore how to use the Isolated Storage Explorer tool in Windows Phone 7. In further details, if we have an XML file and want to save it to the isolated storage explorer location and also want to see that file that it is really made or not. So Isolated Storage Explorer tool will make it easy that how to see that file and you can easily download that file easily on your computer. You can download that XML file from the Isolated Storage Explorer tool which is an advantage of the In this we have sure that it is stored isolated on the explorer tool and will see that path where it will located. Let's have a look on such type of functionality and for that we have to see the steps given below to implement it which is described below:
Step 1: First of all you have to download the tool named Isolated Storage Explorer tool and install it in your PC.
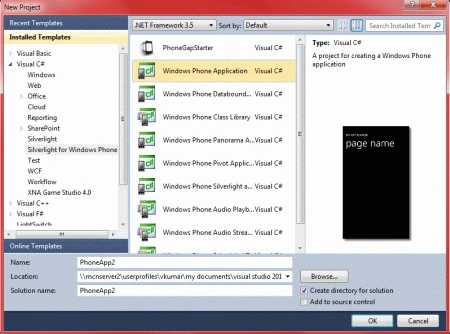
Step 2: In this step we have to take a new Windows Phone application
- Go to New-->Project
- Select template Silverlight for Windows Phone
- Choose a Windows Phone application
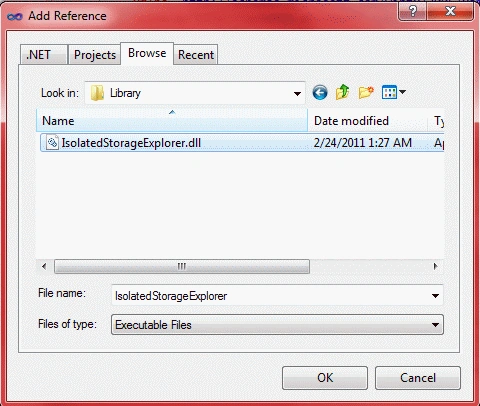
Step 3: In this step you have to add the assembly reference named IsolatedStorageExplorer.dll; let's see where you have to add that library references to.
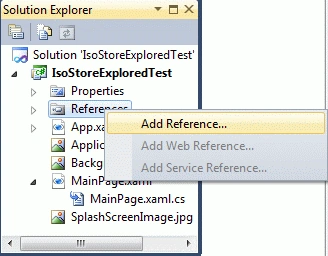
First of all we have to go to the Solution Explorer and click on References then right-click and select "Add Reference..."; let's see how to add it, which is shown below.
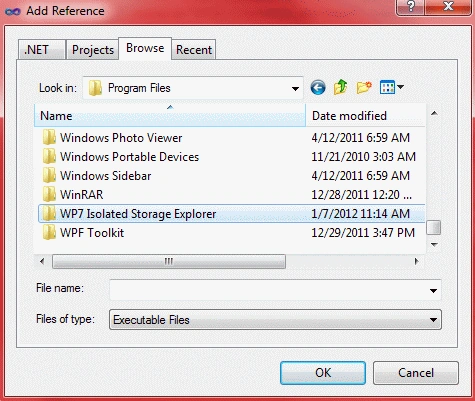
Secondly select the browse tab and go to program files and choose the "WP7 Isolated Storage Explorer" tool.
Thirdly you have to Browse to the "WP7 Isolated Storage Explorer" directory and choose the library folder.
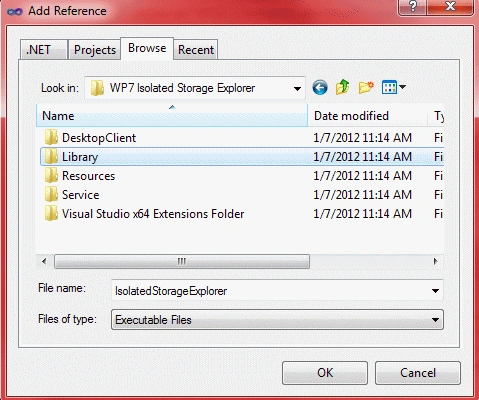
In this you just see a .dll file named IsolatedStorageExplorer.dll; you have to select it and click OK.
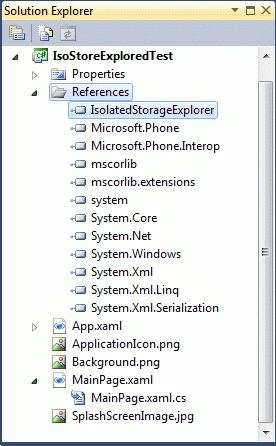
In this step you will see that there is an assembly that was added inside the references folder, as shown in figure given below.
Step 4: In this step we will write the code for the whole application code which is given below; this is for the MainPage.xaml.cs file.
Code:
using
System;
using
System.Collections.Generic;
using
System.Linq;
using System.Net;
using
System.Windows;
using
System.Windows.Controls;
using
System.Windows.Documents;
using
System.Windows.Input;
using
System.Windows.Media;
using
System.Windows.Media.Animation;
using
System.Windows.Shapes;
using
Microsoft.Phone.Controls;
using
System.IO.IsolatedStorage;
using System.IO;
using System.Xml;
using
System.Xml.Serialization;
using
System.Xml.Linq;
namespace
IsoStoreExploredTest
{
public partial
class MainPage
: PhoneApplicationPage
{
// Constructor
public MainPage()
{
InitializeComponent();
}
private void
Button_Click(object sender,
RoutedEventArgs e)
{
using (IsolatedStorageFile
myStore = IsolatedStorageFile.GetUserStoreForApplication())
{
if (!myStore.FileExists("categorie_settings.xml"))
{
using (IsolatedStorageFileStream
myStream = new
IsolatedStorageFileStream("categorie_settings.xml",
FileMode.Create, myStore))
{
XNamespace _name = "";
XDocument new_doc = new
XDocument(
new
XDeclaration("1.0",
"utf-8", ""),
new
XElement(_name +
"Root",
new
XElement("Row",
new
XElement("Name",
"Homepage2"),
new
XElement("Tipo",
"News2"),
new
XElement("URL",
"/web/xml2"),
new
XElement("Err",
"Errore2")
)));
new_doc.Save(myStream);
}
}
else
{
XDocument doc1;
using (IsolatedStorageFileStream
myStream = new
IsolatedStorageFileStream("categorie_settings.xml",
FileMode.Open, myStore))
{
doc1 = XDocument.Load(myStream);
}
var root = doc1.Element("Root");
var rows = root.Descendants("Row");
var lastRow = rows.Last();
lastRow.AddAfterSelf(
new
XElement("Row",
new
XElement("Name",
"Homepage2"),
new
XElement("Tipo",
"News2"),
new
XElement("URL",
"/web/xml2"),
new
XElement("Err",
"Errore2")));
using (IsolatedStorageFileStream
myStream = new
IsolatedStorageFileStream("categorie_settings.xml",
FileMode.Create, myStore))
{
doc1.Save(myStream);
}
}
string[] subDirectories =
myStore.GetDirectoryNames();
}
}
}
}
Step 5: In this step we will see the MainPage.xaml code that we have to write for that page, as shown below.
.xaml code:
<phone:PhoneApplicationPage
x:Class="IsoStoreExploredTest.MainPage"
xmlns="http://schemas.microsoft.com/winfx/2006/xaml/presentation"
xmlns:x="http://schemas.microsoft.com/winfx/2006/xaml"
xmlns:phone="clr-namespace:Microsoft.Phone.Controls;assembly=Microsoft.Phone"
xmlns:shell="clr-namespace:Microsoft.Phone.Shell;assembly=Microsoft.Phone"
xmlns:d="http://schemas.microsoft.com/expression/blend/2008"
xmlns:mc="http://schemas.openxmlformats.org/markup-compatibility/2006"
mc:Ignorable="d"
d:DesignWidth="480"
d:DesignHeight="768"
FontFamily="{StaticResource
PhoneFontFamilyNormal}"
FontSize="{StaticResource
PhoneFontSizeNormal}"
Foreground="{StaticResource
PhoneForegroundBrush}"
SupportedOrientations="Portrait"
Orientation="Portrait"
shell:SystemTray.IsVisible="True">
<!--LayoutRoot
is the root grid where all page content is placed-->
<Grid
x:Name="LayoutRoot"
Background="Transparent">
<Grid.RowDefinitions>
<RowDefinition
Height="Auto"/>
<RowDefinition
Height="*"/>
</Grid.RowDefinitions>
<!--TitlePanel contains the name of the application and page
title-->
<StackPanel
x:Name="TitlePanel"
Grid.Row="0"
Margin="12,17,0,28">
<TextBlock
x:Name="ApplicationTitle"
Text="MY
APPLICATION"
Style="{StaticResource
PhoneTextNormalStyle}"
FontFamily="Comic
Sans MS"
FontSize="28"
Foreground="#FF46DB98"
/>
<TextBlock
x:Name="PageTitle"
Text="My
App"
Margin="9,-7,0,0"
Style="{StaticResource
PhoneTextTitle1Style}"
Foreground="#FFF59526"
FontFamily="Comic
Sans MS" />
</StackPanel>
<!--ContentPanel - place additional content here-->
<StackPanel
x:Name="ContentPanel"
Grid.Row="1"
Margin="12,0,12,0">
<Button
Content="Save
to isostore"
Click="Button_Click"
FontFamily="Comic
Sans MS"
FontSize="48"
Foreground="#FFE2C051"
BorderBrush="#FF1A9FCE"></Button>
</StackPanel>
</Grid>
</phone:PhoneApplicationPage>
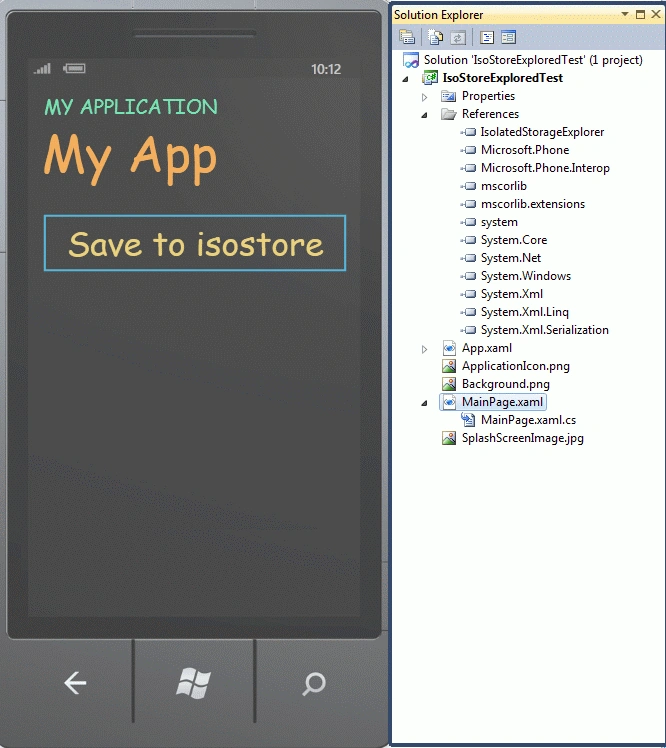
Step 6: In this step we will see the design of the Windows Phone application and the figure is given below.
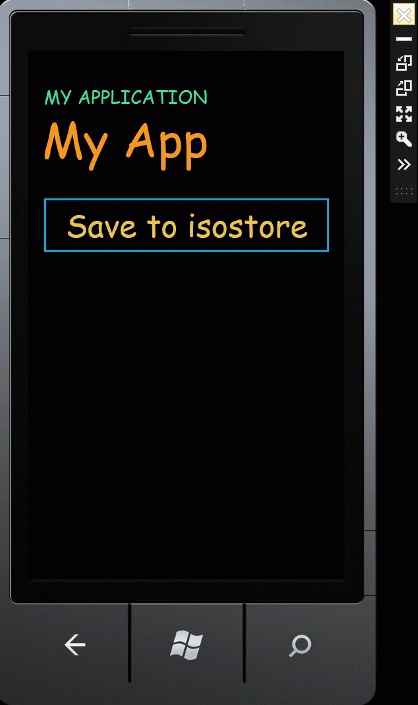
Step 7: In this step we have to run the Windows Phone application and the figure given below.
Output 1
Click on the button to save the XML file to Isolated Storage Explorer.
Step 8: Now it's time to find where the .xml file will be created. Let's have a look at the figure and see how to get access to that file.
In this figure to see the XML file we have to go to the view of the menu bar and select an option named as other window.
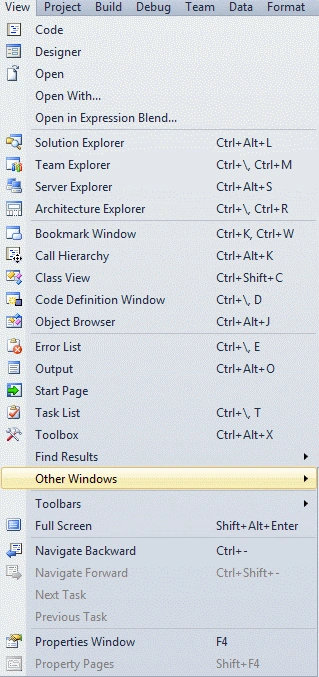
In this figure you will see that whenever you point to the other window option then another box will be opened (which is shown in the figure) and click on that.
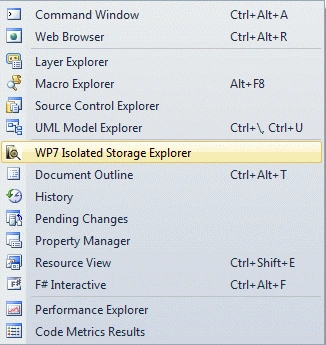
After clicking on the "WP7 Isolated Storage Explorer" then a window will open and shows you the XML file and you can download that file which is looks like as given below.
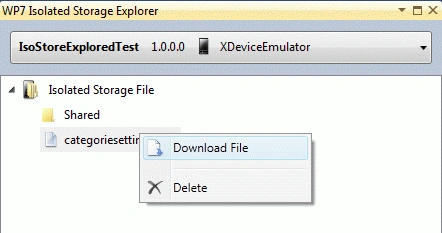
Step 9: In this step if you want to download that file from here then you will have to right click on the XML file and save it wherever you want and the related figure is given below.
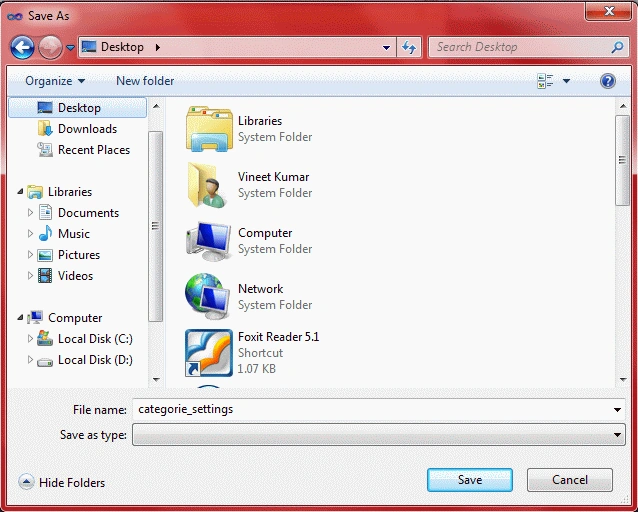
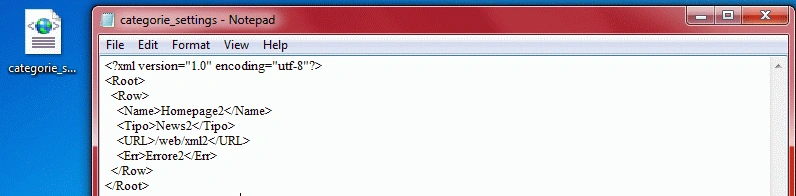
After saving it at the given location you will have to open it using a text editor such as Notepad; then the output is shown below, what it looks like.
Join the conversation! Your thoughts help the community grow.