

Use of Microsoft flow to build ticketing System in SharePoint
In this article, I have explained how to create a help desk solution using SharePoint Out of The Box functionality and Microsoft Flow. Help desks are usually created to receive “here” & “now” requests from customers. Let’s say you have a small team of 4 colleagues working on addressing the issues raised by the customer. So, we cannot send the same email to other colleagues to solve the issues of what others have done with that specific customer on that specific topic. For this, we can create our own SharePoint list to collect all customer requests under a single list. In order to keep track of the information related to the issue such as the individual who raised it, and the time period it takes can be maintained in SharePoint.
So, let’s get started.
Create web part to build help desk
- Custom list /Issue tracking web parts can be used to build the help desk. Here, I have considered a custom list.
- Here, we need to create two lists. One list will keep track of the emails & the other list will be used to assign the tasks associated with a workflow.
- Let’s create the custom list for receiving the mail content.
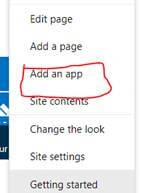
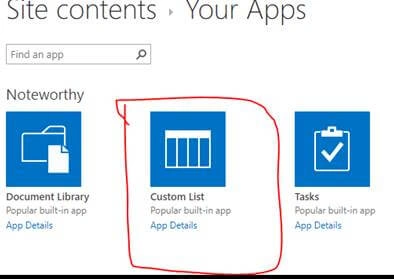
- Go to Add an app→ Custom List→ Give Name → Click "Create".
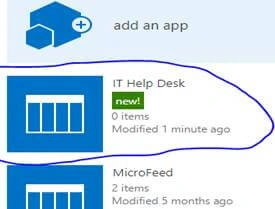
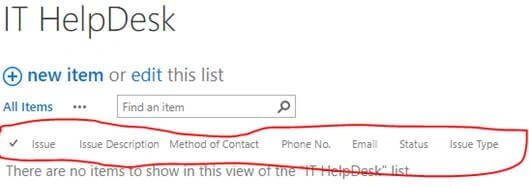
- Add columns to the IT Help Desk as below.
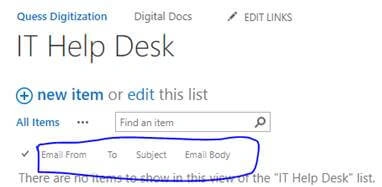
Synching Microsoft Flow with the Custom List
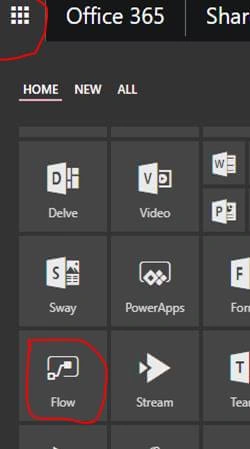
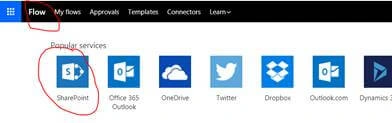
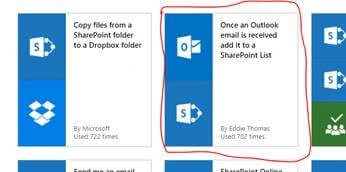
- Open Microsoft Flow. Click on App launcher→ Choose Flow→ Click on flow→ Choose SharePoint service→ Use template “Once an outlook email is received add it to a SharePoint list”. Refer to the below screenshot for a clear view.
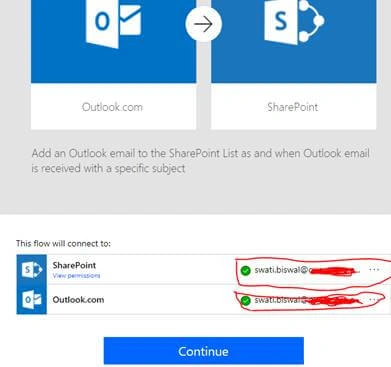
- Connect the flow with your O365 ID & click "Continue", as shown in the below screenshot.
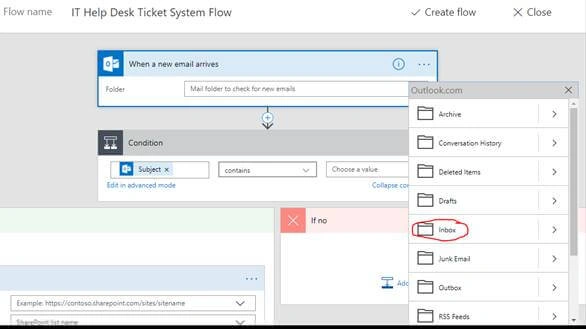
- Select the folder for which you want to track the email. Here, I have selected the inbox folder so that when an email arrives in an inbox folder, our flow will run. Refer the below screenshot.
- Click on "New Step" and click on "Add an action".
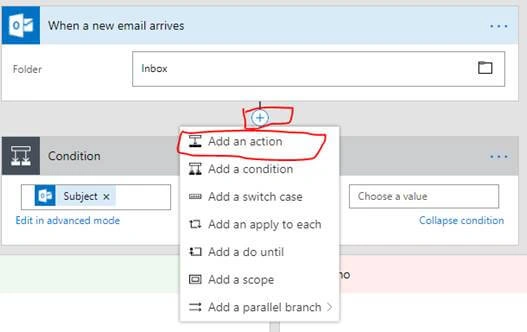
- Select “SharePoint”.
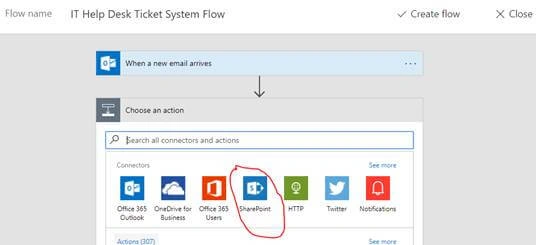
- Choose “SharePoint-Create item”. Once created, add dynamic content & provide site address, list name, email from as from, to as to, subject as subject, email body as body & save flow.
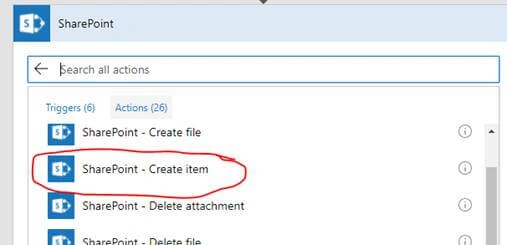
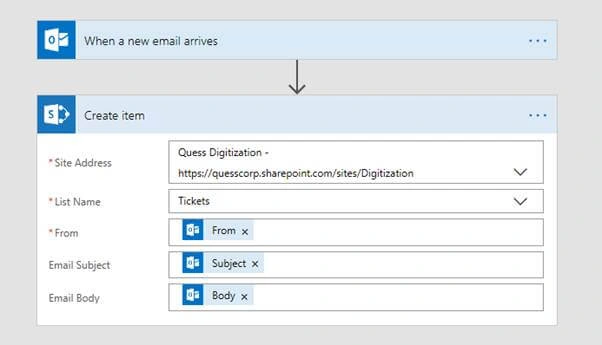
- Once the flow is saved, click on Done.
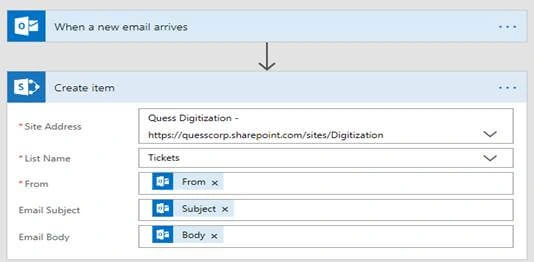
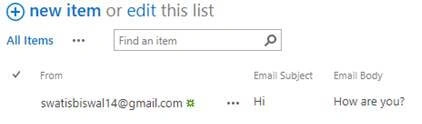
- Now, when the Outlook receives mail, it will get stored in the list.
Create List to be associated with the workflow
Here, we will create a helpdesk custom list. Follow the below steps:
- Click on “Add an app”. Select Custom list and enter the name & click on "Create".
- Adding Columns to the Custom list
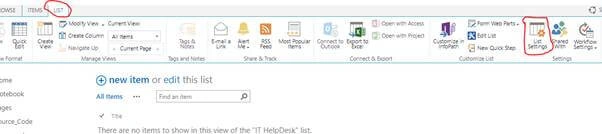
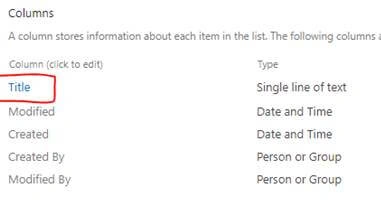
- Open the list created as “IT Helpdesk”, click on list, & then click on "List settings".
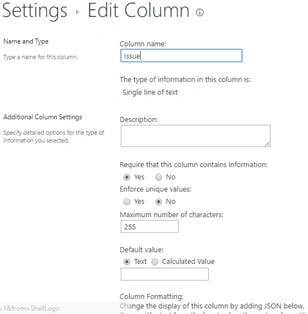
- Modify the “title” column to “issue” column, as shown in the below screenshot.
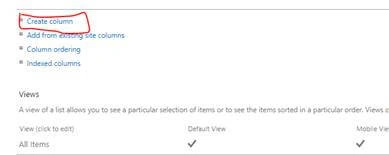
- Click on "Create column" as shown below.
- Here, we created columns such as “Issue Description” as Multiple lines of text, “Preferred method of Contact” as choice, Phone number as “Number”,” Email Address” as single line of text ,”Status” as choice, “Issue Type” as Choice, “Date of Issue Submission” as date & time.
- Create three state workflow for the above-created list
Three State Workflow tracks the status, issue or task in three states. In each state the workflow assigns a task to the SharePoint users & sends that person an email alert about the task. The workflow will update the status of the item & will process the next step once the task is completed.
So let’s get started.
Step 1
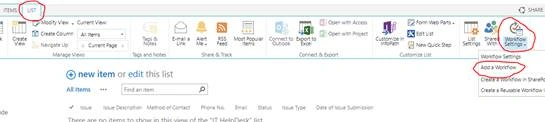
Click on the list. Select Workflow settings and choose “Add a workflow”. Refer to the below screenshot.
Step 2
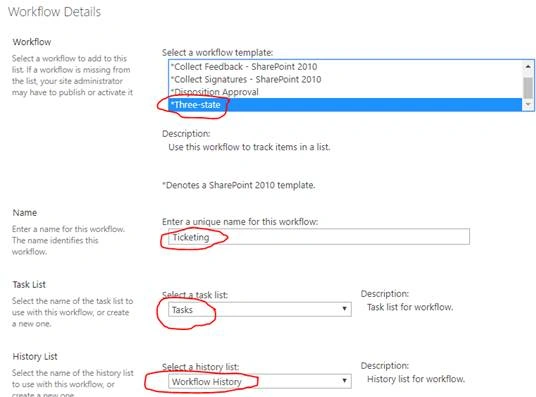
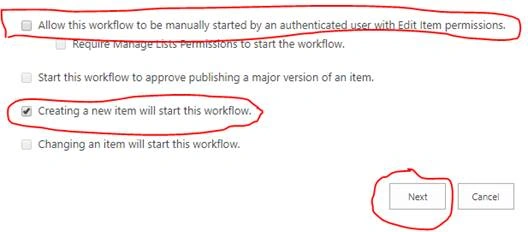
Select the workflow template as “Three-State”. Enter the name of the workflow. Select Task list as “Tasks”. Select History list as “Workflow History”. Uncheck the workflow to be manually started option and check “Creating a new item will start this workflow”. Click on next. Refer to the below screenshot.
Step 3
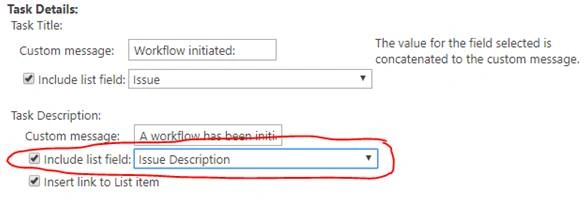
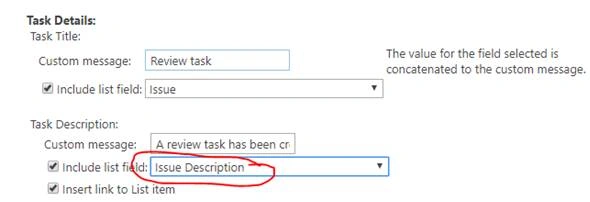
Change Task description field as “Issue Description”. Refer to the image below:
Step 4
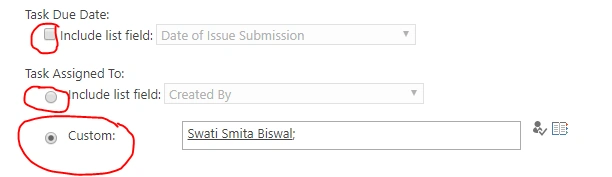
Uncheck “Task due date” & “Task assigned to”. Select custom & assign the name as shown in the screenshot:
Step 5
Change task description field to “Issue description”.
Step 6
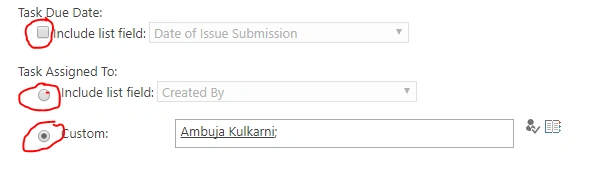
Uncheck “Task Due Date” & “Task assigned to”. Select Custom & assign the name and click ok as shown in the screenshot:
Customising Helpdesk Form
Step 1
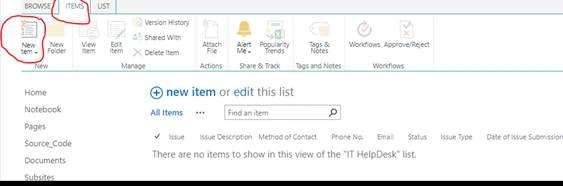
Click on Items, New items as shown in the below screenshot.
Step 2
Click on gear icon on upper right and click on “Edit page “option.
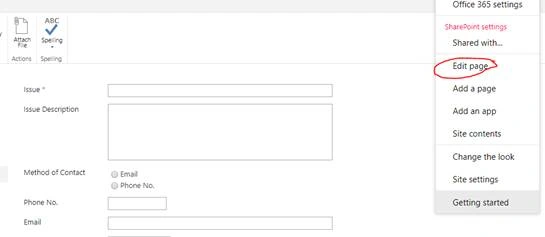
Step 3
Click on Add a Webpart and add a Content editor as shown below,
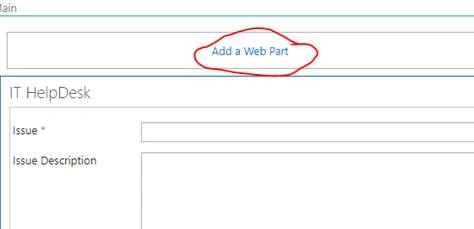
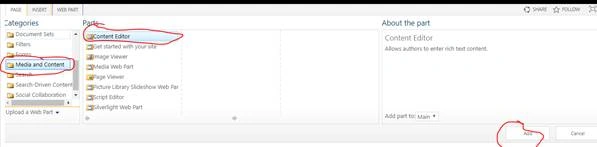
Step 4
Paste the content & stop editing the page as shown in the screenshot.

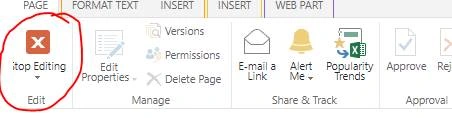
Step 5
Add new item to the form which was received through the mail in the list created using Microsoft flow:

Step 6
Once the task has been assigned you will get a mail, as shown below.
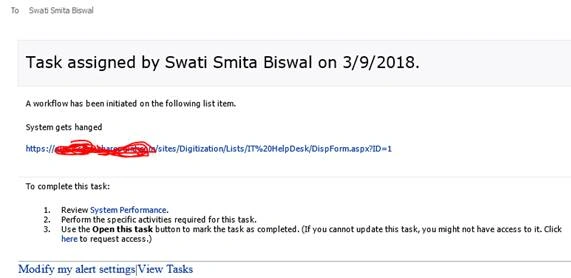
Step 7
After completing the task, the respective task assignee has to update the status, as shown in the below screenshot.
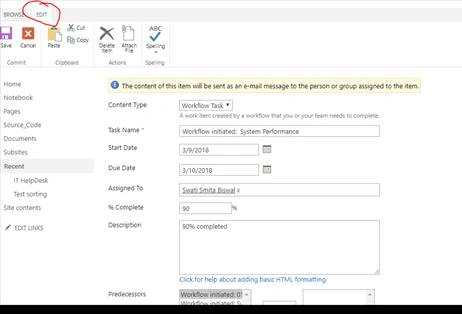
When an email is received, the issue gets stored in the list & the respective admin will assign the task to a specific user. Once the task is completed or in progress, the same will be updated by the user.
Guilleni GalindoPosted Jul 22, 2020, 5:12 PM
Hi is there any way to add a feedback option? basically, when a tech adds notes it sends an email with the note to the submitter, and when the submitter replies the context is added to the ticket?
Rudolf PietersmaPosted Jan 9, 2019, 2:28 AM
How to get attachments posted on Sharepoint as well?
Rudolf PietersmaPosted Jan 7, 2019, 10:00 AM
Any plans to update the instructions to newer Sharepoint version? And add more functionality to them?
Swatismita BiswalPosted Aug 15, 2018, 11:45 PM
Hi Rush.....I have used custom list for 1st & 2nd list.Also you can use issue tracking list here.As my columns are general columns so i have used custom list.
Rush rPosted Aug 7, 2018, 5:03 AM
Hello Swatismita .. I am confused of the list created for Help desk Ticket.. as i under stand u did create page name Helpdesk … inside this Helpdesk u have created 2 lists One list will keep track of the emails & the other list will be used to assign the tasks associated with a workflow.. what did u name the 1st and 2nd list and what type of columns you have created ??
Swatismita BiswalPosted Apr 18, 2018, 2:18 AM
Thank u everyone for your wonderful comments
Sumit DeshmukhPosted Apr 13, 2018, 7:46 AM
Very well described.Many thanks for sharing:-)
Rajkiran SwainPosted Apr 11, 2018, 12:23 AM
Nice article , explained very well...keep it up. ..
Humayun Kabir MamunPosted Apr 10, 2018, 11:42 PM
Thanks Swatismita for this nice article...