

Microsoft Azure Cloud Shell is very interactive, easy, and browser-accessible Shell platform for creating, maintaining, and managing all Azure resources using portal only. Azure Cloud Shell provides you access to Azure CLI browser-based experience which supports built in tasks. Microsoft Azure Cloud Shell comes with pre-installed command line tools and languages support, so you can work very fast and easily.
Let's start working with Cloud Shell in Azure portal. For that, open portal.azure.com and click on Cloud Shell icon available near notification bar, shown in below snap.
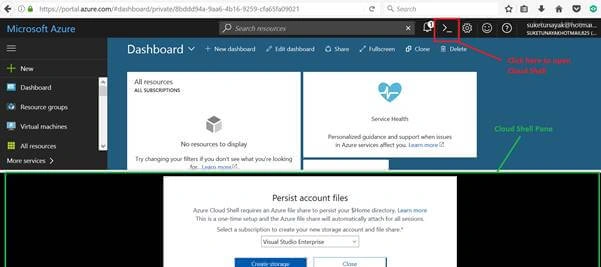
When you click on Cloud Shell icon at top, Microsoft Azure Cloud Shell will ask you to select your subscription in which you would like to work on and also, it asks you to create storage account (LRS) in which it will create one File Share of approximately 5 TB. This File Share will be available and mounted as clouddrive under our Home Directory. After selection of subscription and creation of storage account, the Cloud Shell screen available within your portal will be like the below snap.
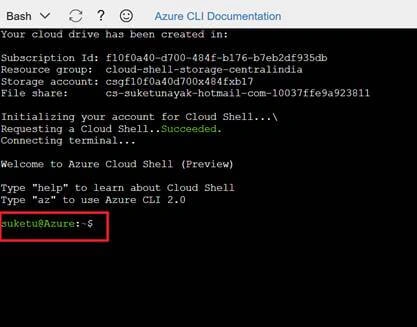
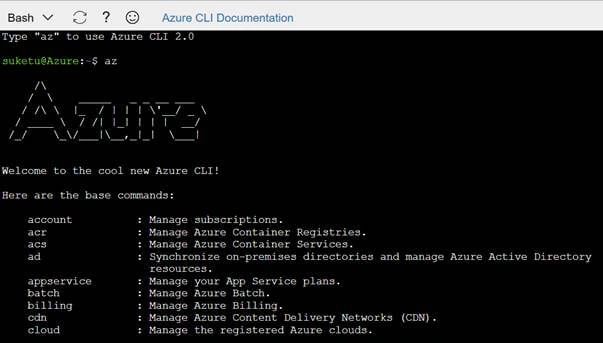
After this, let's create resource group in Azure using Cloud Shell. For that, type the following command. But before that, type az to use Azure CLI 2.0.
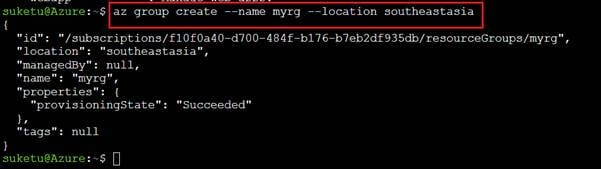
Now, to create Resource Group in Southeast Asia data center, enter the following command in Azure Cloud Shell. And you will find the provisioning state succeeded.
In Azure Cloud Shell, now we are going to create Ubuntu VM in the same resource group which we created in previous step. So, enter the following command in Shell.
az vm create --resource-group myrg --name myubuntuvm --image UbuntuLTS --generate-ssh-keys
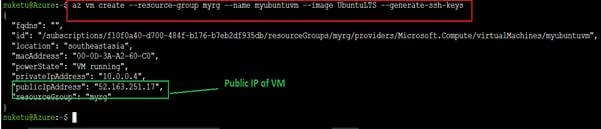
The Ubuntu Virtual Machine has been created successfully in Azure. Please note down this public IP for accessing this Virtual Machine using SSH.
az vm open-port --port 80 --resource-group myrg --name myubuntuvm
After adding port 80 in NSG of VM, we are accessing that VM using SSH in Azure Cloud Shell. Enter the following command.
ssh 52.163.251.17
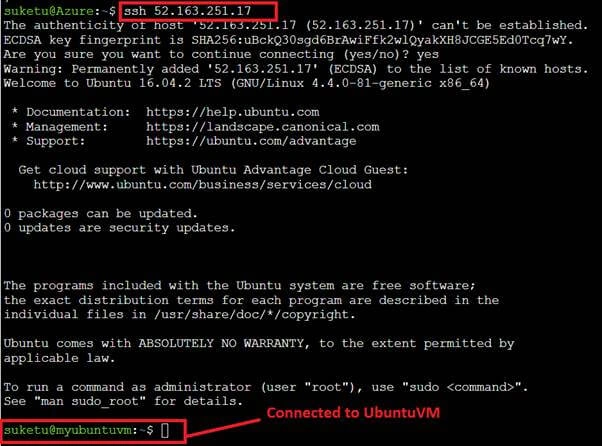
After that, become the super user of that VM and type the following command.
- sudo su
- apt-get update (To Update packages of Ubuntu)
After that, install NGINX using the following command.
- apt-get install nginx
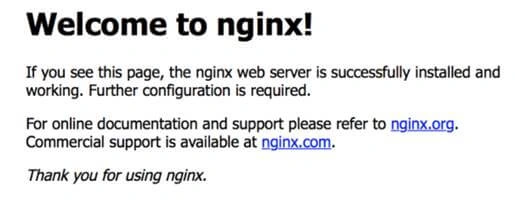
After this installation, you can copy that public IP of Virtual Machine and try to access on Browser. You will find the below welcome page of nginx.
Join the conversation! Your thoughts help the community grow.