

Objective
Our main objective is to upload multiple files at once and save them in a local folder. Also, we want to show a progress bar until the uploading is complete with a message to prompt the user that the files have been uploaded successfully.
Method
To do it, we will use an ASP.NET generic HTTP handler to get the files and save them to the local folder. Using jQuery Ajax we will pass the files to the handler using the post request. Also, to show the processing, we will be using jQueryUI Progressbar. Now, let's see how to do this.
Step 1
Create an empty ASP.NET web application in Visual Studio IDE.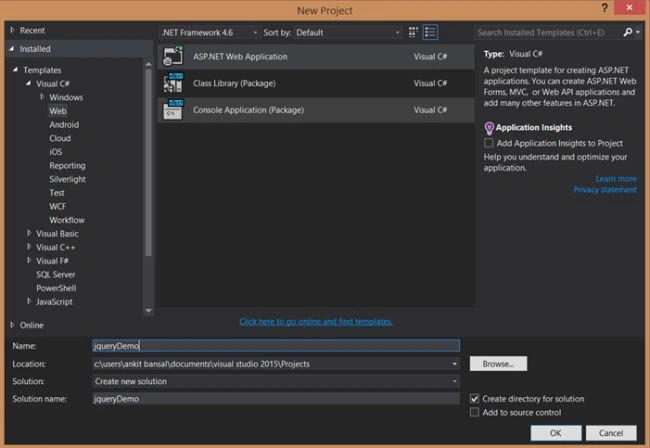
Step 2
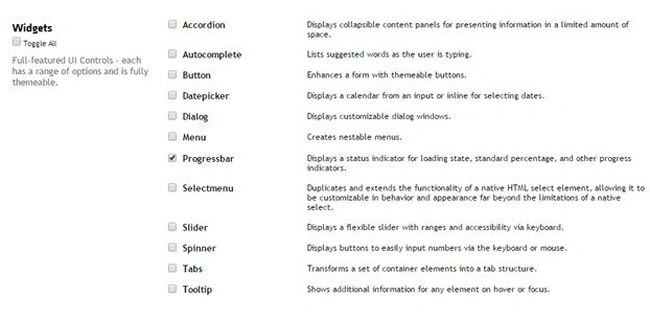
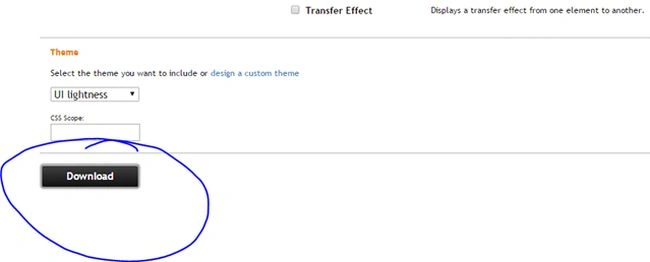
Go to jqueryui.com and select the download tab. Then, click the Progressbar checkbox and click the download button at the bottom of the page.
Step 3
A Zip file will be downloaded. Unzip this file and copy the complete folder to your project.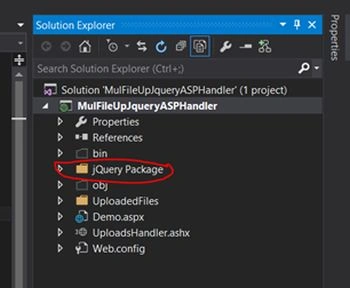
Step 4
Add a Generic Handler to the project and name it UploadHandler.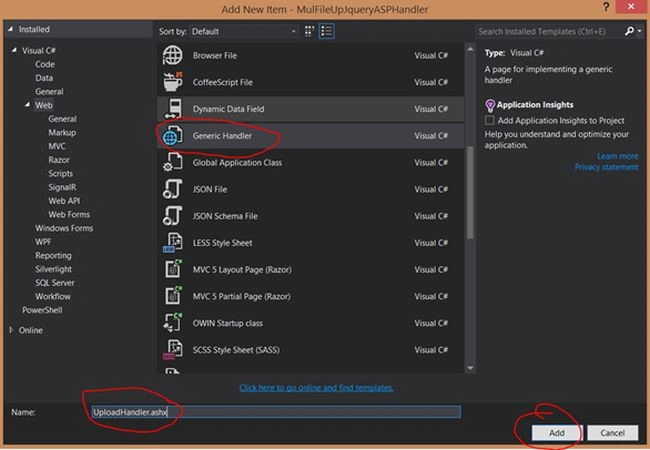
Step 5
Add a folder to the project and name it UploadedFiles.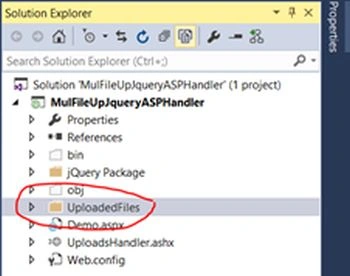
Step 6
Write the following code in UploadHandler.cs.
- using System.Web;
- namespace MulFileUpJqueryASPHandler
- {
- public class UploadsHandler : IHttpHandler
- {
- public void ProcessRequest(HttpContext context)
- {
- if (context.Request.Files.Count > 0)
- {
- HttpFileCollection UploadedFilesCollection = context.Request.Files;
- for (int i = 0; i < UploadedFilesCollection.Count; i++)
- {
- System.Threading.Thread.Sleep(2000);
- HttpPostedFile PostedFiles = UploadedFilesCollection[i];
- string FilePath = context.Server.MapPath("~/UploadedFiles/" + System.IO.Path.GetFileName(PostedFiles.FileName));
- PostedFiles.SaveAs(FilePath);
- }
- }
- }
- public bool IsReusable
- {
- get
- {
- return false;
- }
- }
- }
- }
Add a Webform to the project and name it Demo.aspx.
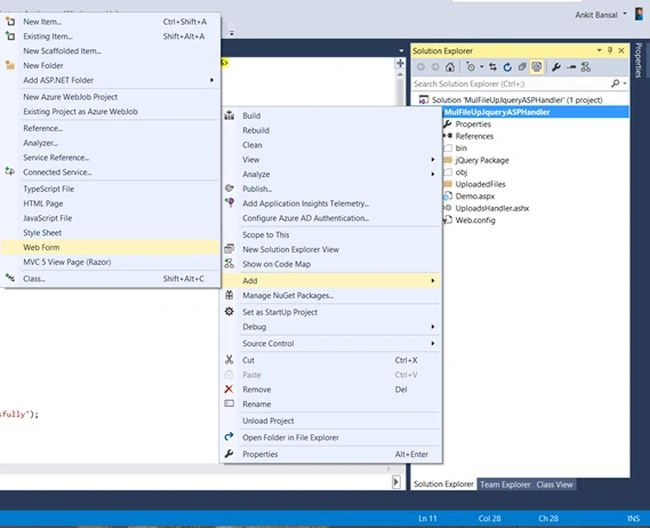
Step 8
Add the references of the following selected files in the HTML of the Demo.aspx.
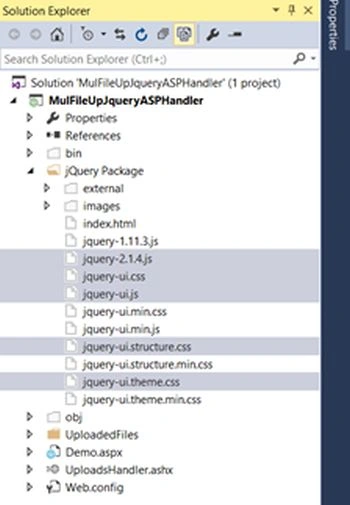
Step 9
Add the following code to the HTML.
- <%@ Page Language="C#" AutoEventWireup="true" CodeBehind="Demo.aspx.cs" Inherits="MulFileUpJqueryASPHandler.Demo" %>
- <!DOCTYPE html>
- <html xmlns="http://www.w3.org/1999/xhtml">
- <head runat="server">
- <title>jQuery Multiple File Upload</title>
- <script src="jQuery%20Package/jquery-2.1.4.js"></script>
- <link href="jQuery%20Package/jquery-ui.css" rel="stylesheet" />
- <script src="jQuery%20Package/jquery-ui.js"></script>
- <link href="jQuery%20Package/jquery-ui.structure.css" rel="stylesheet" />
- <link href="jQuery%20Package/jquery-ui.theme.css" rel="stylesheet" />
- <script type="text/javascript">
- $(document).ready(function () {
- $('#btnUpload').click(function (event) {
- var uploadedFiles = $('#uploader')[0].files;
- if (uploadedFiles.length > 0) {
- var formData = new FormData();
- for (var i = 0; i < uploadedFiles.length; i++) {
- formData.append(uploadedFiles[i].name, uploadedFiles[i]);
- }
- }
- var progressbarLabel = $('#progressbar-label');
- var progressbarDiv = $('#progress-bar');
- $.ajax
- ({
- url: 'UploadsHandler.ashx',
- method: 'post',
- contentType: false,
- processData: false,
- data: formData,
- success: function () {
- progressbarLabel.text('Uploaded Successfully');
- progressbarDiv.fadeOut(2000);
- },
- error: function (err) {
- alert(err.statusText);
- }
- });
- progressbarLabel.text('Please Wait...');
- progressbarDiv.progressbar({
- value: false
- }).fadeIn(1000);
- });
- });
- </script>
- </head>
- <body>
- <form id="form1" runat="server">
- <div>
- Select the files to be uploaded:
- <asp:FileUpload ID="uploader" runat="server" AllowMultiple="true" />
- <br />
- <br />
- <input type="button" id="btnUpload" value="Upload Now" />
- </div>
- <div style="width:500px">
- <div id="progress-bar" style="position: relative; display: none">
- <span id="progressbar-label" style="position: absolute; left: 30%; top: 20%;">Please Wait...</span>
- </div>
- </div>
- </form>
- </body>
- </html>
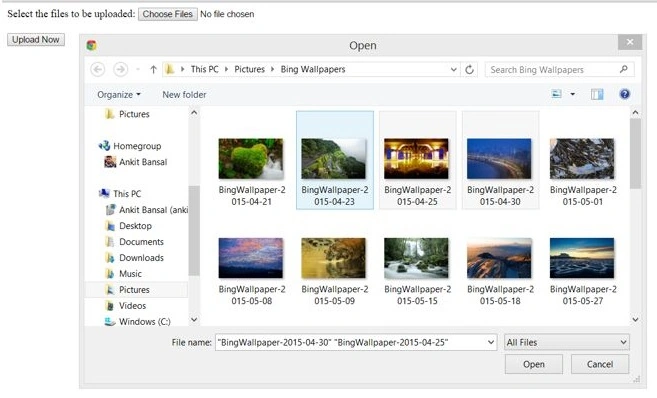
Press F5 to run the project and you will see the following screenshots like an interface.

Explanation
UploadHandler.cs
- First we are checking, that if the user has uploaded at least one file.
- We are saving the uploaded files in the HttpFileCollection Class's object.
- Using a for loop, we are iterating through each file uploaded by the user.
- Saving each file in the HttpPostedFile Object using the index values of each uploaded file.
- We are saving the filename with its path using the Server.MapPath method of and FileName Property in a string variable.
- Finally we saved the file in the HttpPostedFile Object using the SaveAs method.
Demo.aspx
- Add a file upload and a button control from toolbox.
- To display the progressbar we have created a div with 500px width.
- We have added an inline CSS making the position relative and display is none, because, we don't want to show the bar when the page first loads.
- A span is added to show the text, Please Wait and its position is taken as absolute and it is relative to the parent div.
jQuery Code
- On the click event of the button control, the files uploaded in the uploader are saved in a local variable.
- Then we appended the formData by iterating through each file uploaded.
- Now, using the Ajax options, we will send the data to the handler.
- The URL is the Handler, the requestType is Post and the data is coming from formData. When it succeeds, we changed the span text to uploaded successfully and fade out in 2 seconds.
- If an error exists, it is shown in a JavaScript alert.
- And when the page again loads, we changed the text to Please Wait and Fade in property to 1 seconds. Also its value is false, to tell the progressbar that we will pass the data using our own customizations.
Santhakumar MunuswamyPosted Jul 6, 2015, 3:50 PM
Good article! Thanks for sharing
Debasis SahaPosted Jul 6, 2015, 2:47 PM
Nice One..
Shridhar SharmaPosted Jul 6, 2015, 2:07 PM
nice one
RakeshPosted Jul 6, 2015, 9:51 AM
Good one
Naren Kumar KumaresanPosted Jul 6, 2015, 9:00 AM
Nice article
Nilesh JadavPosted Jul 6, 2015, 8:49 AM
Nice article
Sibeesh VenuPosted Jul 6, 2015, 8:14 AM
Good One.Thanks for sharing :)