

In today’s article, we are going to create entity class. In the first part, we created a data layer so add entity files into “App.Domain” project. From the previous article we already have an existing solution with two C# libraries for data and service layer.
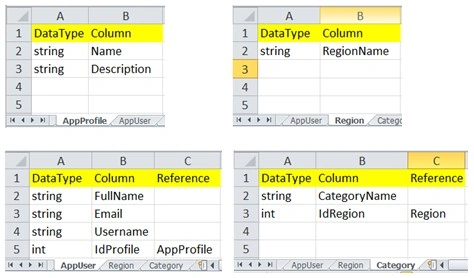
Let’s take the below example, our database structure (PFA Excel file) for application.
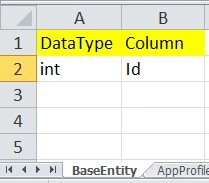
And additionally, we have BaseEntity which will be inherited in other Entities
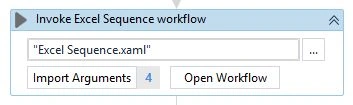
Before going further, create a sequence “Excel Sequence” in the same project which we have created in a previous article. Then invoke this sequence in the main sequence like,
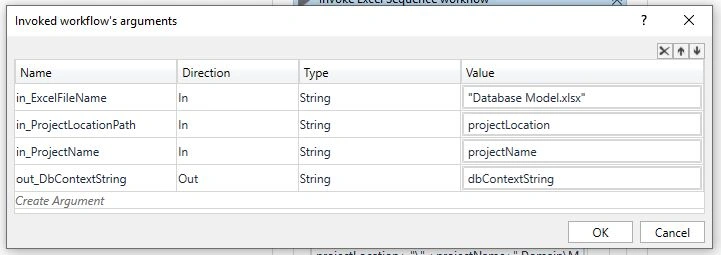
Below are the arguments required for a new sequence; the first 3 are required inside as we will be using those values and there is our argument which will be useful at the end of the process.
in_ExcelFileName is the excel file name that contains our database models.
in_ProjectLocationPath the location on system which we have mentioned in a previous article.
in_ProjectName name of project which we have mentioned in previous article.
out _DbContextString this string will contain all the required content of our DbContext
Now open “Excel Sequence” and add “Create Directory” activity three times; one for each Entities, Interface, Service. Then assign value to Path in property like,
- in_ProjectLocationPath+ "\" +in_ProjectName+".Domain\Entities"
- in_ProjectLocationPath+"\" +in_ProjectName+".Services\Interface"
- in_ProjectLocationPath+"\" +in_ProjectName+".Services\Service"
where values are coming from an argument.

Step 1
To read excel we must use Excel Application Scope activity and use “in_ExcelFileName” argument as input. We can read all sheets one by one or if you want to read only a specific one then we have to provide its name.
Note
To use this activity we need Microsoft Excel to be installed on our machine.
If it is not installed you will get an error.

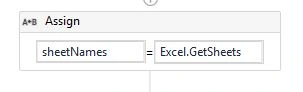
Using “Assign” activity, get the result of “Excel.GetSheets” into variable “sheetNames” of IEnumerable type.
Step 2
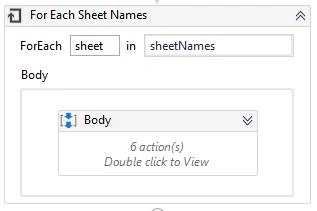
Apply “For Each” activity on “sheetNames”, just like below image. Regarding actions in “Body”, will explain in next steps.
Step 3
Now in “sheet” we get the first Entity which is “BaseEntity”, and then we must read all data of this sheet using “Read Range” it will give output as data table.

And if you give it a range then it will read only those specific columns/rows.
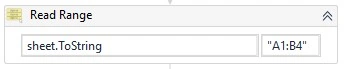
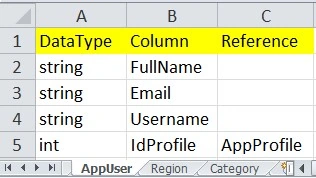
So if we read the below sheet with above range then it will ignore row number 5.
Step 4
We will create a .cs file for each sheet name including its different properties.
- Firstly, we have read base entity sheet from Excel, using read range activity we get all data of that sheet in data table “dtSheet”.
- Normally entity class structure in C# is like below,
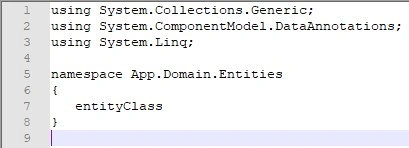
- We have “entity.txt” file which contains above structure. Read file using “Read Range” activity and assign this text to one variable “classString”.
Step 5
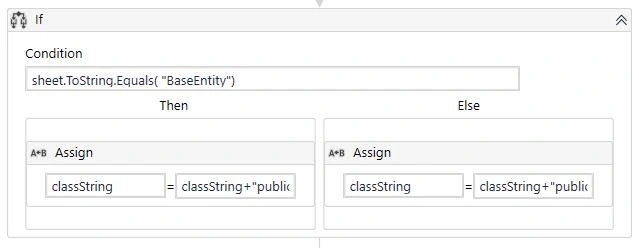
Now add activity and check if the Excel sheet which we are currently getting used is “BaseEntity” or not.
If yes then assign
- classString+"public class "+sheet.ToString & vbNewLine & "{"
Else
- classString+"public class "+sheet.ToString +": BaseEntity" & vbNewLine & "{"
As we need to inherit base entity in other entities so this condition was required.
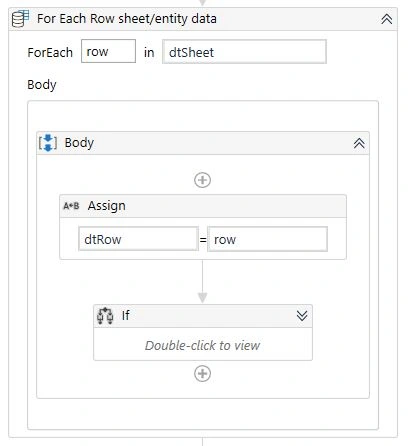
Now add for each row activity, and assign row to variable “dtRow” of data row type.
As we must give reference of one entity to another, for that we have “Reference” column in excel.
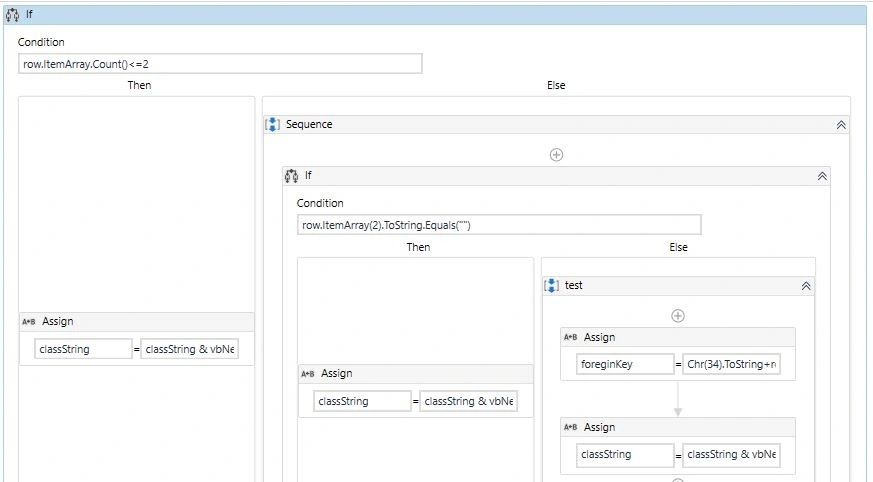
To read this column value only when value exists, so to achieve this we need if condition. Pseudo code is,
- If row.ItemArray.Count()<2
- then
- classString & vbNewLine & "public "+ row.ItemArray(0).ToString+ " " +row.ItemArray(1).ToString+"{ get; set; }"
- else
- if row.ItemArray(2).ToString.Equals("")
- then
- classString & vbNewLine & "public "+ row.ItemArray(0).ToString+ " " +row.ItemArray(1).ToString+"{ get; set; }"
- else
- foreginKey = Chr(34).ToString+row.ItemArray(1).ToString +Chr(34).ToString
- classString & vbNewLine & "public "+ row.ItemArray(0).ToString+ " " +row.ItemArray(1).ToString+"{ get; set; }" & vbNewLine &
- "[ForeignKey("+foreginKey+")]" & vbNewLine & "public "+row.ItemArray(2).ToString+ " "+row.ItemArray(2).ToString+
- "{ get; set; }"
Our if activity will look like,
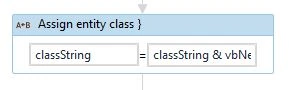
Then outside of for each row assign “}” to the existing “classString” which now contains properties of an entity.
- classString & vbNewLine & "}" & vbNewLine & "}"
Step 6
As the out class content is ready now we will save it as .cs file using Append activity.
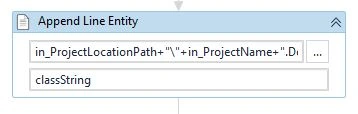
- in_ProjectLocationPath+"\"+in_ProjectName+".Domain\Entities\"+sheet.ToString+".cs"
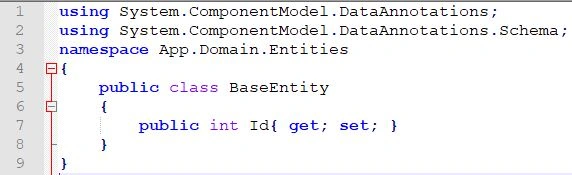
This expression will give this value “F:\Nakul\UiPath\2019\DotNetCoreUiPath\ App.Domain\Entities\BaseEntity.cs” and it will be like
And AppUser will be stored like,
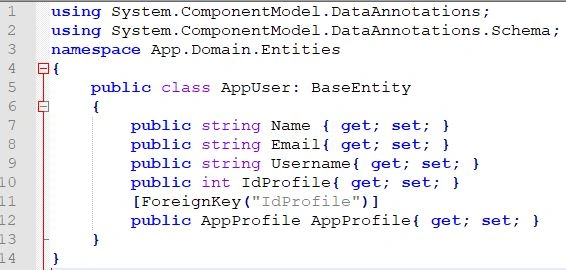
Likewise other entities will be created.
Step 7
Now we need to create interface with CRUD methods for each entity. (Except BaseEntity).
As we have txt file “interface.txt” which contains normal structure of interface as we saw for entity.
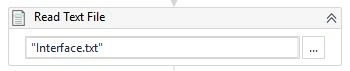
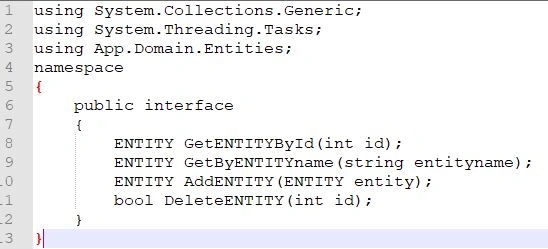
And then using Append File we will stored .cs file under services project under Interface folder,
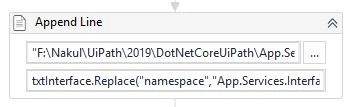
We will be replacing namespace, ENTITY, entity using
- txtInterface.Replace("namespace","namespace "+in_ProjectName+".Services.Interface").Replace("interface","interface I"+sheet.ToString+"Service").Replace("ENTITY",sheet.ToString).Replace("entity",sheet.ToString.ToLower)
After this step Interface will look like,
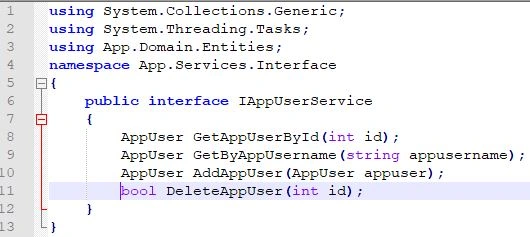
Do the same thing for service, read “service.txt” then replace namespace, ENTITY, entity. After this step Interface will look like,
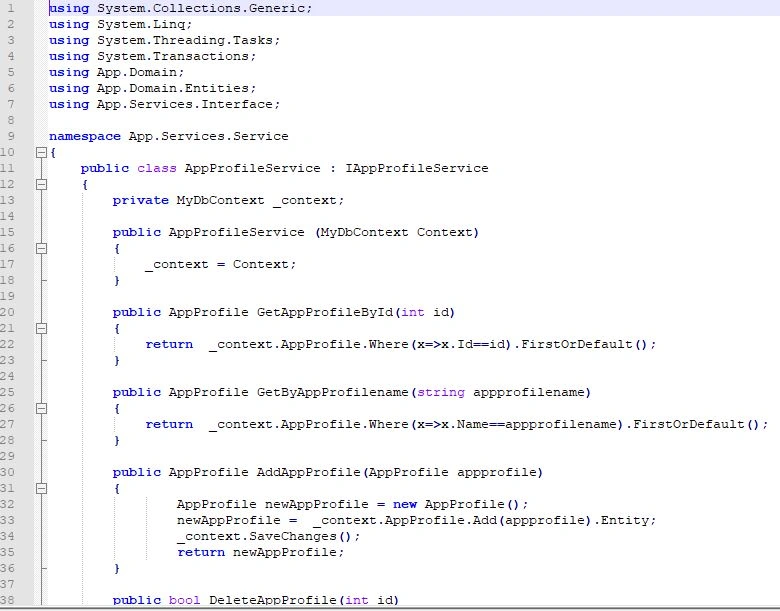
Need to create DbContext class, read text file (generic structure of DbContext) using read text file, this gives output as string in variable “txtDbContext”.
Inside for each row body assign “dbContextString” variable and set its value like this
- dbContextString & vbNewLine & "public virtual DbSet<" +sheet.ToString+ "> "+sheet.ToString +" { get; set; }"
And assign it to out_DbContextString argument.
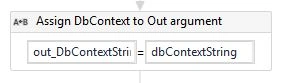
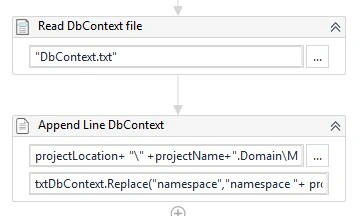
Now go back to Main sequence and use this out argument to stored DbContext file.
So just read DbContext respective txt file as we had it for entity, interface and service. Then append file in Domain project.
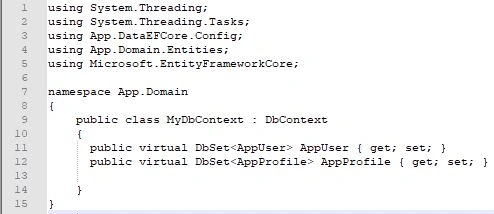
Final output will be as follows,
Now if we check in VS, the out solution has all these different entities and services added to it.
In our next step we will create, API controllers.
Summary
We have used excel application scope to read excel data sheets. Then using that data we have created entity classes for each entity. We learned how to read text files and replace their content. So, the output of this step is ready to use data and service layer.
This was a small step towards automation.
Rohan PatidarPosted Oct 21, 2019, 9:39 AM
Previous article link is not working.