

Security Groups are a crucial part of any system as they define the authorization on the available resources for the users requesting access. They are also important to categorize permission boundaries for the set of users at once. Thus, it is really important to streamline the process of managing Security Groups for any system.
Though the management activities are repetitive and boring, if we need to repeat same steps again and again over the period of time.
Thankfully we can automate these repetitive tasks, using PowerShell Scripts, which can take the inputs from CSV or text files for the input values and perform necessary actions.
In this article, we will discuss the automation scripts, which are required to manage Security Groups in Office 365, using PowerShell.
If you want to follow along, then the prerequisites for this article are given below.
- Creating a O365 account
- Configuring PowerShell for Office 365
If the prerequisites given above are not met, then I would recommend you read one of my earlier articles “Office 365: How to Configure PowerShell for O365” to get to know the steps of installing prerequisites.
Let's login to O365 account and visit Admin Center

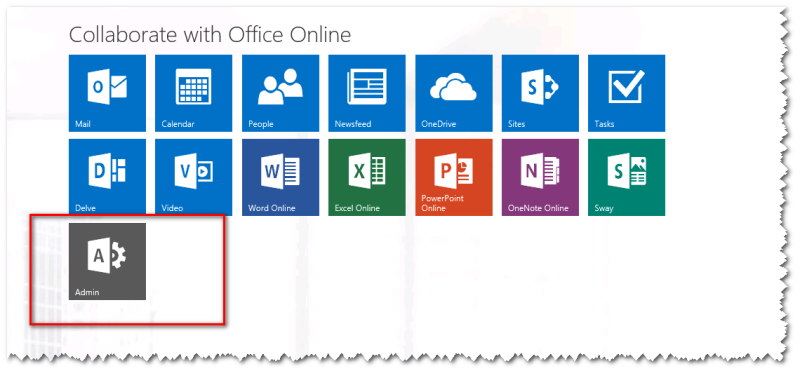
Navigate to Admin Center by clicking Admin tile on the Application dashboard, as shown below.
Now, in the upcoming sections, we will see the respective PowerShell commands to deal with each of the management tasks.
How to Add new Security Groups
Navigate Admin Center => Groups
For the first time in my case, there are no Security Groups present since this is a new O365 account.

Run New-MsolGroup command, where DisplayName specifies the name of the Security Group and Description specifies the description for the group, as shown below.
New-MsolGroup -DisplayName “Test Security Group” -Description “This is created for testing.”

Once the command gets executed successfully, navigate Admin Center => Groups to verify that new group has been added.
It is worth noting that Default Group Type for any group added, using the command given above will be Security.

How to export all Security Groups
We can export all the Security Groups from the O365 account by using Get-MsolGroup command, as shown below.
Get-MsolGroup

Once the command is executed successfully, we can see the details of all the available Security Groups on the Host Window. Alternatively, we can export the results to text files by piping the results to Out-File command.
How to export all Security Groups filtered by Group properties
We can export a filtered set of Security Groups from O365 account based on any property of the Group. In the example given below, I am using DisplayName property to filter the results, as shown below.
Get-MsolGroup | Where-Object {$_.DisplayName -eq “Test Security Group”}

Once the command is executed successfully, we can see the details of the specific Security Groups matching the filter criteria.
How to export all Security Groups filtered by Group Type
We can export Security Groups, which are based on its type also by using GroupType. In the example given below, we are going to filter all Security Groups, which are of type Security from O365 account.
Get-MsolGroup -GroupType “Security” | Where-Object {$_.DisplayName -eq “Test Security Group”}

Once the command is executed successfully, we can see the details of all Security Group of type Security and with DisplayName = Test Security Group.
How to add users to Security Groups
Run the command given below to check the existing members, which are present in Security Group.
$securityGroup = Get-MsolGroup -GroupType “Security” | Where-Object {$_.DisplayName -eq “Test Security Group”}
Get-MsolGroupMember -GroupObjectId $securityGroup.ObjectId

Once the command is executed successfully, we will get the list of users already added to the group
We can see the same information by editing the group with in the Browser, as shown below.








Join the conversation! Your thoughts help the community grow.