

Using QVD files in the QlikView application
The following is the procedure for using and reading data from QVD files.
Step 1: Open the QlikView application
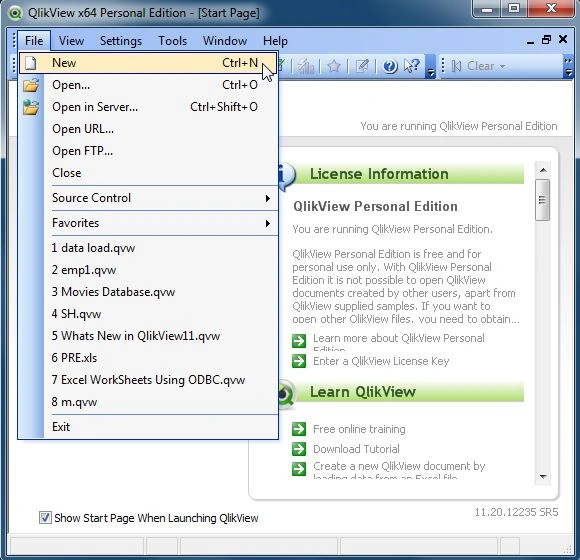
It is the first step, in this step you need to open the QlikView application then go to "File" -> "New" then this window will be opened.
 Step 2: Open Edit Script
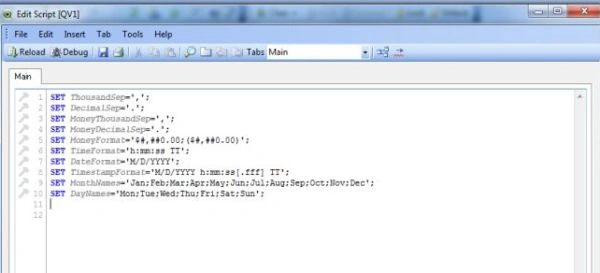
The second step is to open the edit script window from, "File" -> "Edit Script".
Step 2: Open Edit Script
The second step is to open the edit script window from, "File" -> "Edit Script".
Step 3: Click on table files
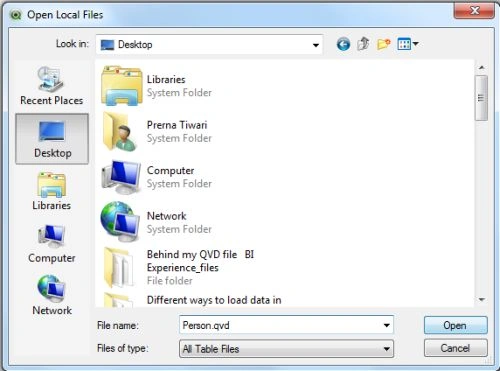
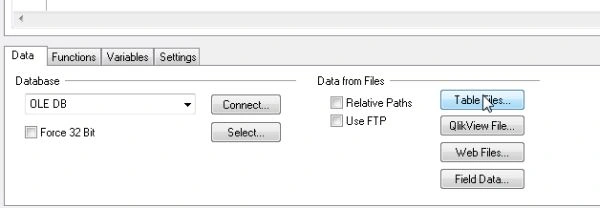 In this step, we open our QVD file and click on the Open button.
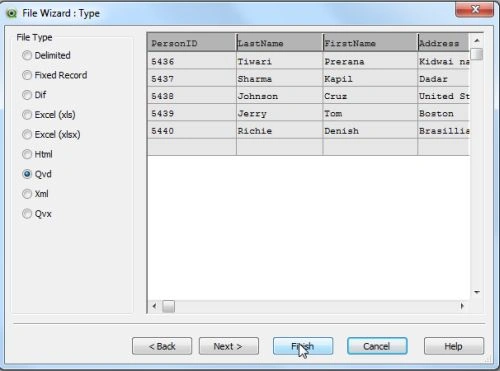
 Step 4: File wizard type
Then this window will be opened. Here you can see your QVD file table and click on the Finish button.
Step 4: File wizard type
Then this window will be opened. Here you can see your QVD file table and click on the Finish button.
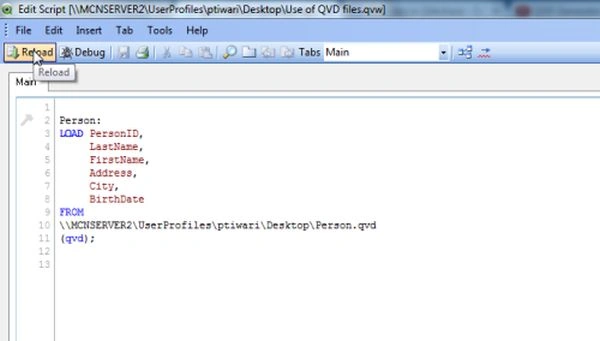
 Step 5: Code of the edit script
Now, in the edit script, the Excel file was uploaded successfully and reload.
Step 5: Code of the edit script
Now, in the edit script, the Excel file was uploaded successfully and reload.
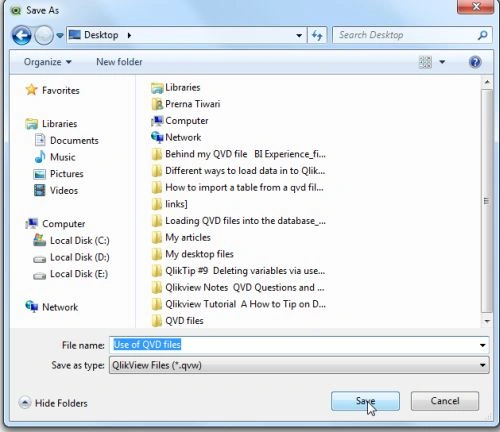
Step 6: Save the file
The next step is we must save our QlikView file.
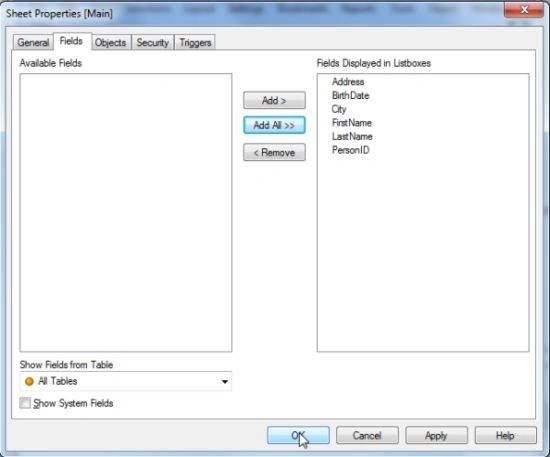
 Step 7: Sheet property window
The sheet property window will be opened. In this window, you add the fields that you want to display as a table and click on the OK button.
Step 7: Sheet property window
The sheet property window will be opened. In this window, you add the fields that you want to display as a table and click on the OK button.
Then you will see the data imported from QVD files.
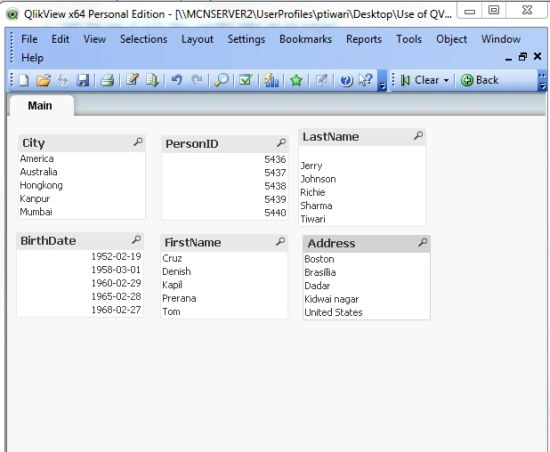
Step 8: Select the table box
If you want to show the data in a table format, then right-click anywhere in the main window and select the table box.
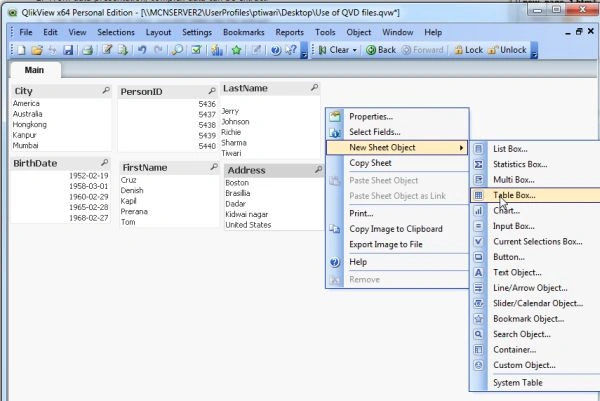 Step 9: New table box
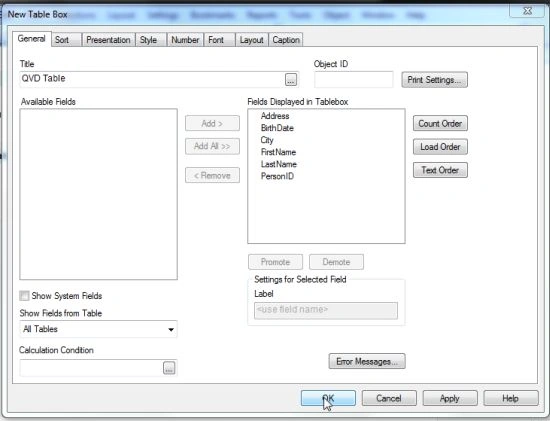
In this window, we add fields that we want to show in the table box and click on the OK button.
Step 9: New table box
In this window, we add fields that we want to show in the table box and click on the OK button.
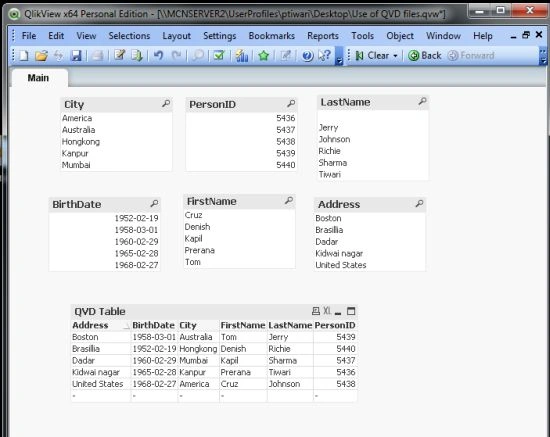
 Then you will see this window.
 This article describes how to use QVD files in a QlikView application and how to read data.
Join the conversation! Your thoughts help the community grow.