

Introduction
Remote Data Source for Kendo UI List Box
I am going to use the API response given below to construct my remote datasource for Kendo List Box which was created in my previous article.
API - http://github-ci-staging.azurewebsites.net/api/Technologies/TechnologiesList
Type - GET.
Testing the APIs, using POSTMAN.
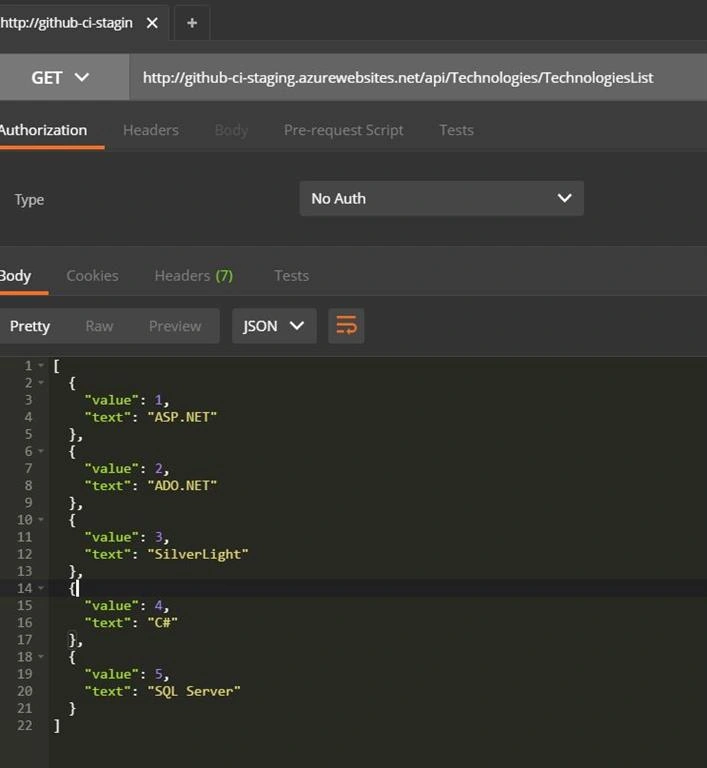
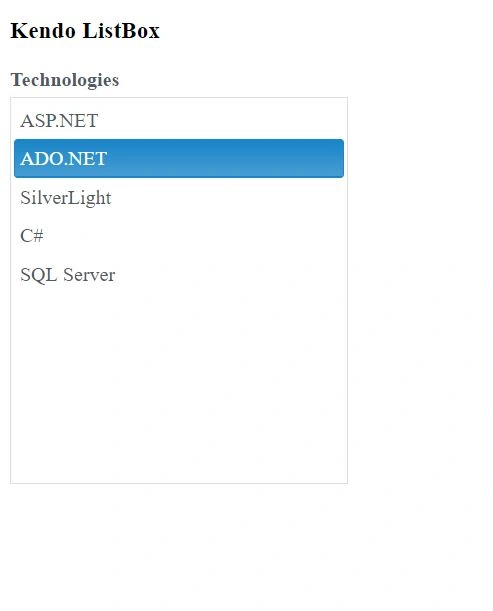
Create a new HTML page. In my case, I named it KendoListBox.cshtml
KendoListBox.cshtml
- <!DOCTYPE html>
- <html>
- <head>
- <meta charset="utf-8" />
- <title>Kendo List Box</title>
- <link rel="stylesheet" href="http://kendo.cdn.telerik.com/2017.2.504/styles/kendo.common.min.css" />
- <link rel="stylesheet" href="http://kendo.cdn.telerik.com/2017.2.504/styles/kendo.rtl.min.css" />
- <link rel="stylesheet" href="http://kendo.cdn.telerik.com/2017.2.504/styles/kendo.silver.min.css" />
- <link rel="stylesheet" href="http://kendo.cdn.telerik.com/2017.2.504/styles/kendo.mobile.all.min.css" />
- <script src="http://code.jquery.com/jquery-1.12.4.min.js"></script>
- <script src="http://kendo.cdn.telerik.com/2017.2.504/js/kendo.all.min.js"></script>
- </head>
- <body>
- <h3> Kendo ListBox</h3>
- <div id="example" role="application">
- <div class="demo-section k-content">
- <div>
- <label for="listBox" id="technology">Technologies</label>
- <br />
- <select id="listBox" title="Technologie"></select>
- </div>
- </div>
- <script>
- $(document).ready(function () {
- var dataSource = new kendo.data.DataSource({
- transport: {
- read: {
- url: "http://github-ci-staging.azurewebsites.net/api/Technologies/TechnologiesList",
- dataType: "json"
- },
- }
- });
- $("#listBox").kendoListBox({
- dataSource: dataSource,
- dataTextField:"text",
- dataValueField:"value",
- autoBind:false,
- });
- dataSource.read(); // "read()" will fire the "change" event of the dataSource and the widget will be bound
- });
- </script>
- <style>
- .demo-section label {
- margin-bottom: 5px;
- font-weight: bold;
- display: inline-block;
- }
- #employees {
- width: 270px;
- }
- #example .demo-section {
- max-width: none;
- width: 515px;
- }
- #example .k-listbox {
- width: 236px;
- height: 310px;
- }
- #example .k-listbox:first-of-type {
- width: 270px;
- margin-right: 1px;
- }
- </style>
- </body>
- </html>
From the code given above, it is obvious that we have constructed a datasource for the Kendo ListBox using our API, http://github-ci-staging.azurewebsites.net/api/Technologies/TechnologiesList
dataTextField is the field of the data item that provides the text content for the list item.
dataValueField is the field of the dataitem that provides the value of the widget.
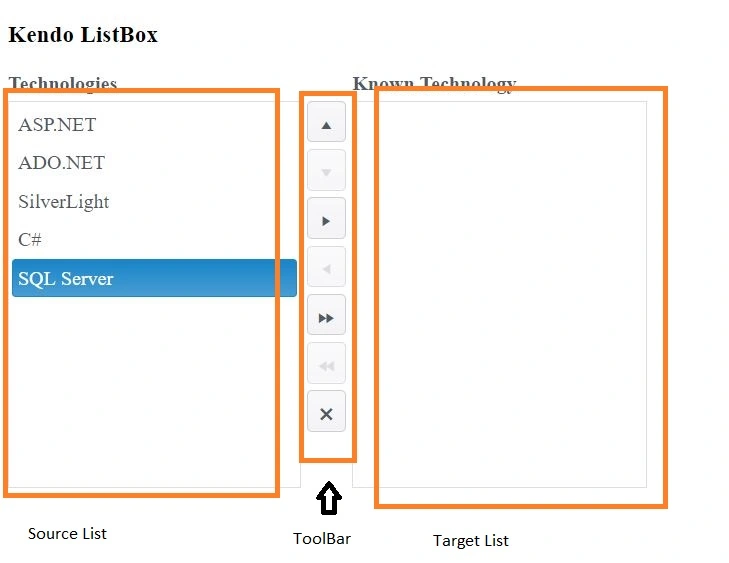
Implement the toolbar in Kendo ListBox
The toolbar provides lot of tools to navigate the list item from one ListBox to another.
KendoListBox.html
- <!DOCTYPE html>
- <hBml>
- <head>
- <meta charset="utf-8" />
- <title>Kendo List Box</title>
- <link rel="stylesheet" href="http://kendo.cdn.telerik.com/2017.2.504/styles/kendo.common.min.css" />
- <link rel="stylesheet" href="http://kendo.cdn.telerik.com/2017.2.504/styles/kendo.rtl.min.css" />
- <link rel="stylesheet" href="http://kendo.cdn.telerik.com/2017.2.504/styles/kendo.silver.min.css" />
- <link rel="stylesheet" href="http://kendo.cdn.telerik.com/2017.2.504/styles/kendo.mobile.all.min.css" />
- <script src="http://code.jquery.com/jquery-1.12.4.min.js"></script>
- <script src="http://kendo.cdn.telerik.com/2017.2.504/js/kendo.all.min.js"></script>
- </head>
- <body>
- <h3> Kendo ListBox</h3>
- <div id="example" role="application">
- <div class="demo-section k-content">
- <div>
- <label for="listBox" id="technology">Technologies</label>
- <label for="targetListBox" id="knownTech" style="margin-left:184px">Known Technology </label>
- <br />
- <select id="listBox" title="Technologie"></select>
- <select id="targetListBox" title="Known Technology "></select>
- </div>
- </div>
- <script>
- $(document).ready(function () {
- var dataSource = new kendo.data.DataSource({
- transport: {
- read: {
- url: "http://github-ci-staging.azurewebsites.net/api/Technologies/TechnologiesList",
- dataType: "json"
- },
- }
- });
- $("#listBox").kendoListBox({
- dataSource: dataSource,
- connectWith: "targetListBox",
- dataTextField:"text",
- dataValueField:"value",
- autoBind:false,
- toolbar: {
- tools: ["moveUp", "moveDown", "transferTo", "transferFrom", "transferAllTo", "transferAllFrom", "remove"]
- },
- });
- dataSource.read(); // "read()" will fire the "change" event of the dataSource and the widget will be bound
- $("#targetListBox").kendoListBox();
- });
- </script>
- <style>
- .demo-section label {
- margin-bottom: 5px;
- font-weight: bold;
- display: inline-block;
- }
- #employees {
- width: 270px;
- }
- #example .demo-section {
- max-width: none;
- width: 515px;
- }
- #example .k-listbox {
- width: 236px;
- height: 310px;
- }
- #example .k-listbox:first-of-type {
- width: 270px;
- margin-right: 1px;
- }
- </style>
- </body>
- </html>
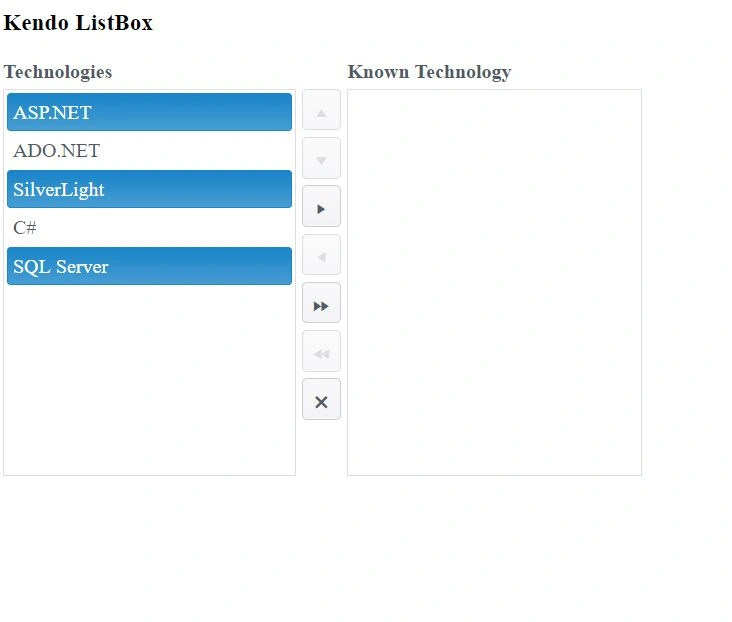
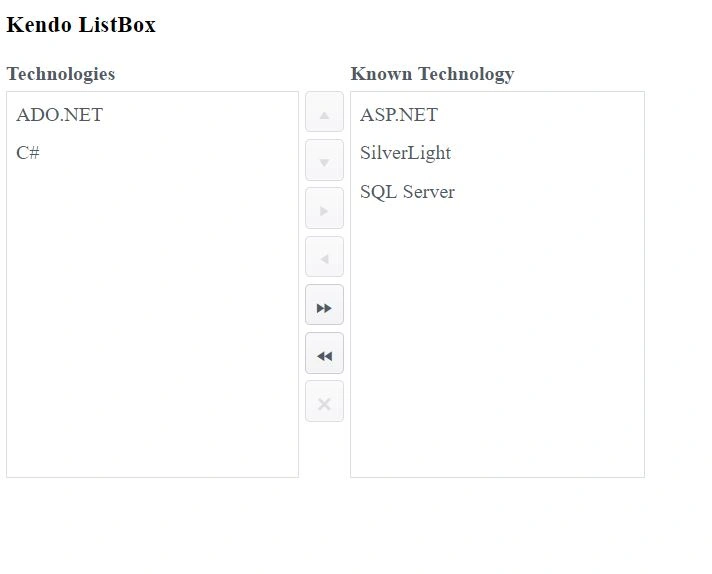
From the above code, you can notice that I have created a new List box called targetListBox which the target List box
Toolbar property is used to get the tools provided for Kendo listBox.
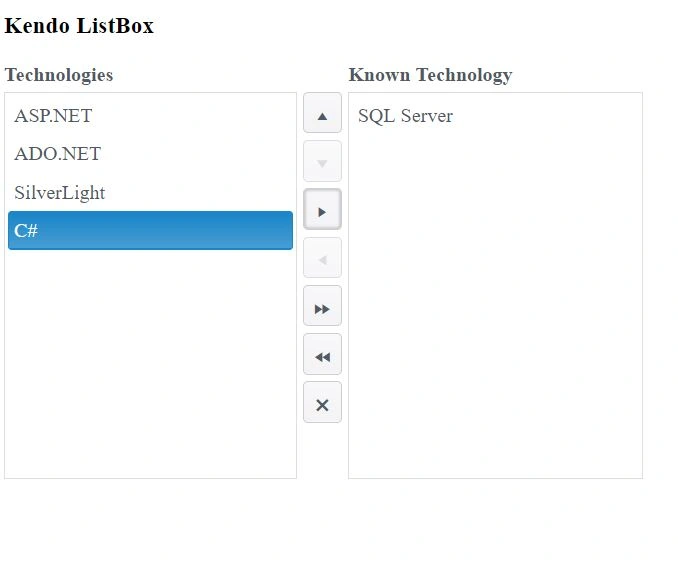
Multi Select
We can make the List box as multiselect by making the selectable property as multiple.
- <!DOCTYPE html>
- <html>
- <head>
- <meta charset="utf-8" />
- <title>Kendo List Box</title>
- <link rel="stylesheet" href="http://kendo.cdn.telerik.com/2017.2.504/styles/kendo.common.min.css" />
- <link rel="stylesheet" href="http://kendo.cdn.telerik.com/2017.2.504/styles/kendo.rtl.min.css" />
- <link rel="stylesheet" href="http://kendo.cdn.telerik.com/2017.2.504/styles/kendo.silver.min.css" />
- <link rel="stylesheet" href="http://kendo.cdn.telerik.com/2017.2.504/styles/kendo.mobile.all.min.css" />
- <script src="http://code.jquery.com/jquery-1.12.4.min.js"></script>
- <script src="http://kendo.cdn.telerik.com/2017.2.504/js/kendo.all.min.js"></script>
- </head>
- <body>
- <h3> Kendo ListBox</h3>
- <div id="example" role="application">
- <div class="demo-section k-content">
- <div>
- <label for="listBox" id="technology">Technologies</label>
- <label for="targetListBox" id="knownTech" style="margin-left:184px">Known Technology </label>
- <br />
- <select id="listBox" title="Technologie"></select>
- <select id="targetListBox" title="Known Technology "></select>
- </div>
- </div>
- <script>
- $(document).ready(function () {
- var dataSource = new kendo.data.DataSource({
- transport: {
- read: {
- url: "http://github-ci-staging.azurewebsites.net/api/Technologies/TechnologiesList",
- dataType: "json"
- },
- }
- });
- $("#listBox").kendoListBox({
- dataSource: dataSource,
- connectWith: "targetListBox",
- dataTextField:"text",
- dataValueField:"value",
- selectable: "multiple",
- autoBind:false,
- toolbar: {
- tools: ["moveUp", "moveDown", "transferTo", "transferFrom", "transferAllTo", "transferAllFrom", "remove"]
- },
- });
- dataSource.read(); // "read()" will fire the "change" event of the dataSource and the widget will be bound
- $("#targetListBox").kendoListBox();
- });
- </script>
- <style>
- .demo-section label {
- margin-bottom: 5px;
- font-weight: bold;
- display: inline-block;
- }
- #employees {
- width: 270px;
- }
- #example .demo-section {
- max-width: none;
- width: 515px;
- }
- #example .k-listbox {
- width: 236px;
- height: 310px;
- }
- #example .k-listbox:first-of-type {
- width: 270px;
- margin-right: 1px;
- }
- </style>
- </body>
- </html>
I hope, you have enjoyed this article. Your valuable feedback, questions or comments about this article are always welcome.
Karthik KasulaPosted Apr 6, 2020, 10:17 AM
Hi Gowtham ,I have binded data for two listbox's from database when I am sending data from one listbox to another listbox the data becomes undefined how to solve that issue
Avinash ThakurPosted May 30, 2017, 7:28 AM
Very Nice Article :)