

In this article we can explore Connected Web Parts which is an advanced SharePoint Web Part feature. The connected web parts denote communication between 2 web parts.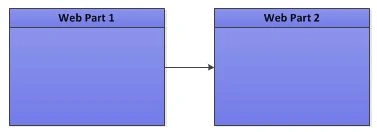
The connected web part resolves the following requirements:
- Master Web Part and Slave web part data exchange
- Data Selection and Data Display web part communication
Summary of the application is:
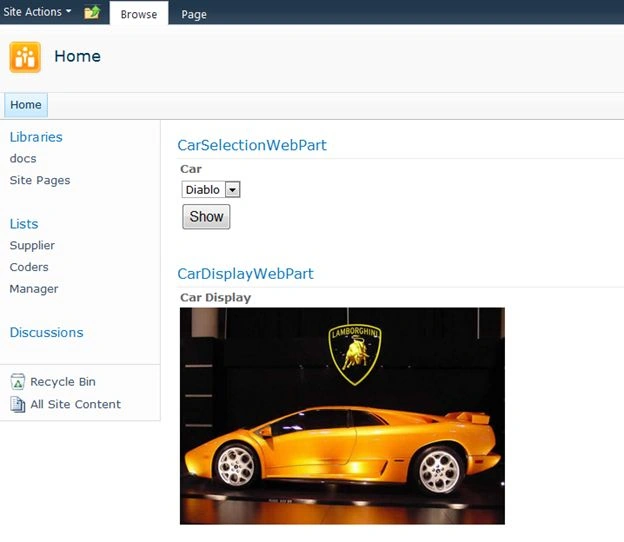
- There are 2 web parts
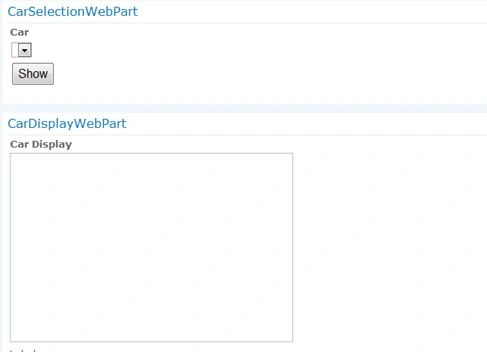
- Web Part 1 has a drop down list for selecting Car
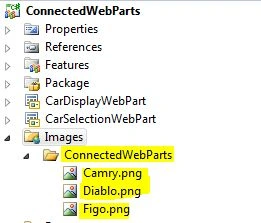
- Web Part 2 displays the car picture based on selection
Steps Involved
Following are the steps involved in creating connected web parts:
- Create Project
- Create Communication Interface
- Create Web Part 1 (Provider) implementing Interface
- Create Web Part 2 (Consumer)
- Build and Deploy
Create Project
We can experiment with a Car showcase application where there are 2 web parts.
- The first web part allows selecting a Car from the drop down list.
- The second web part displays the image of the car.
to begin, create a new Web Part project in Visual Studio.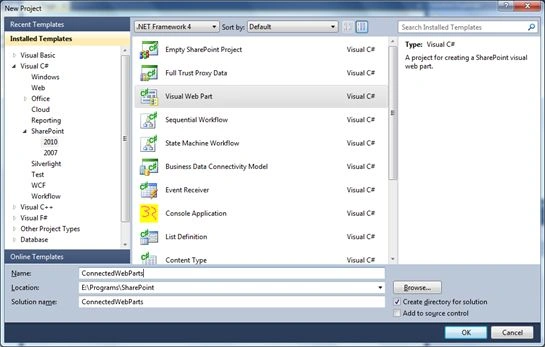
Remove the default VisualWebPart1 web part. We will be adding our own web parts.
Create Interface
For communication between the 2 web parts we need to create an interface. Please create the following interface, which returns the selected Car name:
public interface ICar
{
string Car { get; }
}
Create Provider Web Part implementing Interface
Now you can create a new web part named CarSelectionWebPart. Expand the webpart item and in the User Control (CarSelectionWebPartUserControl.ascx) class file:
- Add a drop down list control
- Place the following code
public partial class CarSelectionWebPartUserControl : UserControl
{
protected void Page_Load(object sender, EventArgs e)
{
if (!this.IsPostBack)
{
DropDownList1.Items.Clear();
DropDownList1.Items.Add("Camry");
DropDownList1.Items.Add("Figo");
DropDownList1.Items.Add("Diablo");
}
}
// Property to expose selected car outside
public string Car
{
get;
set;
}
// Set the Car property
protected void Button1_Click(object sender, EventArgs e)
{
if (DropDownList1.SelectedItem != null)
Car = DropDownList1.SelectedItem.Text;
}
}
In the CarSelectionWebPart.cs (web part class file) add the following code:
// Property to return the selected Car
public string Car
{
get
{

mohit singhPosted Jan 31, 2014, 5:56 AM
I also faced the same issue.. "Connections" option is not available in CarDisplayWebPart
Jean PaulPosted Jan 16, 2014, 12:15 PM
You a Welcome Dear Kiran! :)
Kiran Kumar TalikotiPosted Jan 16, 2014, 6:49 AM
Good Work JP,Thanks for Sharing :)
Jean PaulPosted Jun 20, 2013, 1:39 PM
Hello Durga.. Please send me your project @ jeanpaulvaATgmail.com.. i will have a look
Durga SekaranPosted Jun 20, 2013, 1:01 PM
I have followed the steps mentioned in this blog. But, there is no luck for me. How to set the attribute or interface properly in my code. I need to find out issue in my code. Please give me some clue to find out the solution.
Durga SekaranPosted Jun 20, 2013, 12:55 PM
Hi, Nice Article. I implemented the same code in my end. But, I am facing the same issue which Praveen faced it. "Connections" option is not available in CarDisplayWebPart. Please suggest me the solution
Jean PaulPosted Jan 15, 2013, 6:38 AM
Thank You Rojin. Great to hear that everything worked good.. Usually connected web parts, a simple step missing will end with non-working web parts.
Rogin RobertPosted Jan 15, 2013, 5:15 AM
Good work Jean. It worked perfect for me when i used the code attached in the site.
pinaki bhattacharyyaPosted Nov 18, 2012, 2:01 AM
Thanks a lot..
Jean PaulPosted Jun 10, 2012, 2:16 PM
Then it means that the Interface or Attribute are not properly set. Can you please try using the article source code?
praveen kumarPosted Jun 10, 2012, 2:05 PM
Hi i implemented the same program, but connections option is not there for CarDisplayWebPart. when i check the webpart settings connections are allowed. what could be the reason? Please let me know. Anyhow thanks for sharing nice article
Jean PaulPosted May 30, 2012, 2:51 PM
Thanks a lot my friend!!
Vijay PrativadiPosted May 30, 2012, 2:45 PM
Good Work Jean!!