

In our previous article we learned about FileStream in SQL Server. If you wish to go through the article, below is the link for the same.
On my machine, I’ve already installed 3 named instances of SQL 2008 and 2012 and now I’ll be installing default instance of SQL 2008. You can see, there’s a little difference in installation steps when you do a fresh installation.
As this will be my 4th instance, it'll not be a fresh installation. But no worries, we’ll also see the steps for fresh installation.
So, I’ve divided this in 2 sections as listed below.
- No fresh installation steps
- Fresh Installation steps
No fresh installation
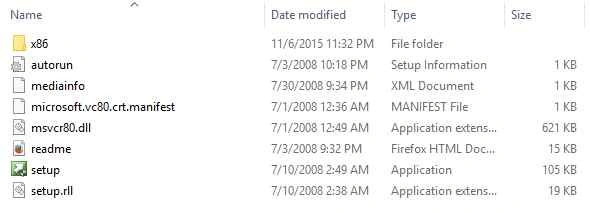
Step 1: Open explorer and you’ll see setup file as shown below.
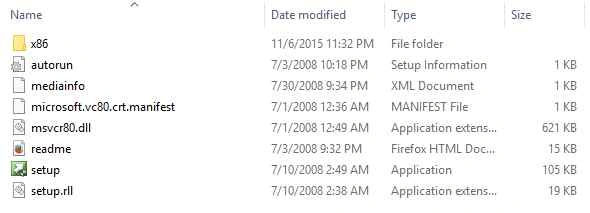
Right click on the setup and run it as Administrator.
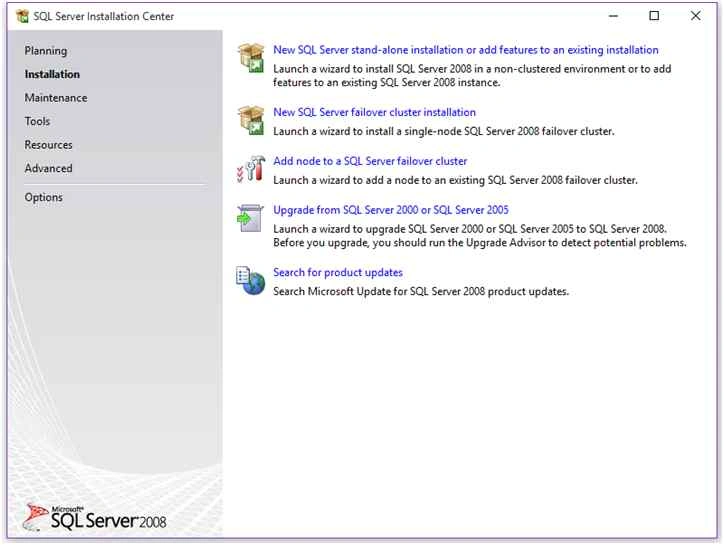
Step 2: SQL Server Installation Center.
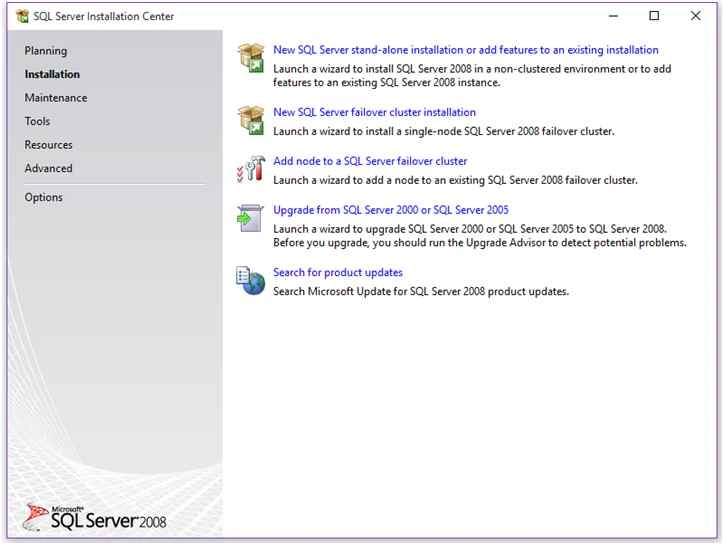
Go to installation section, here you’ll find various options to install instance, add new features and upgrade your SQL Server. As we’re doing a fresh installation, we’ll select first option i.e. “New SQL Server stand-alone installation”.
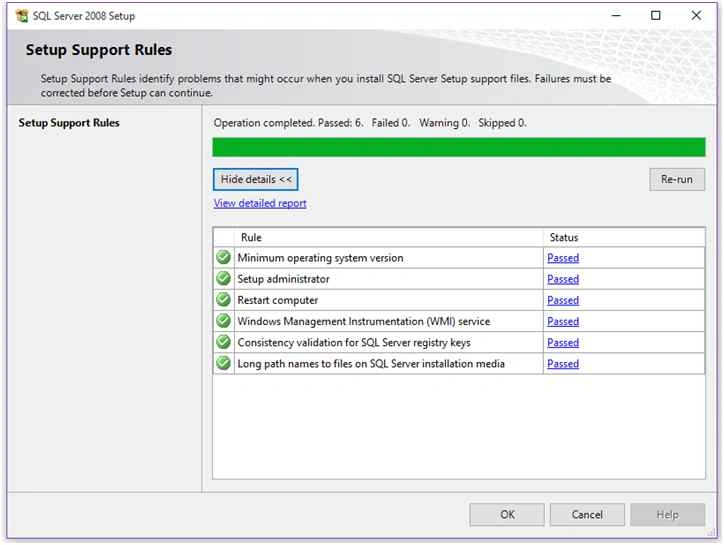
Step 3: Setup Support Rules
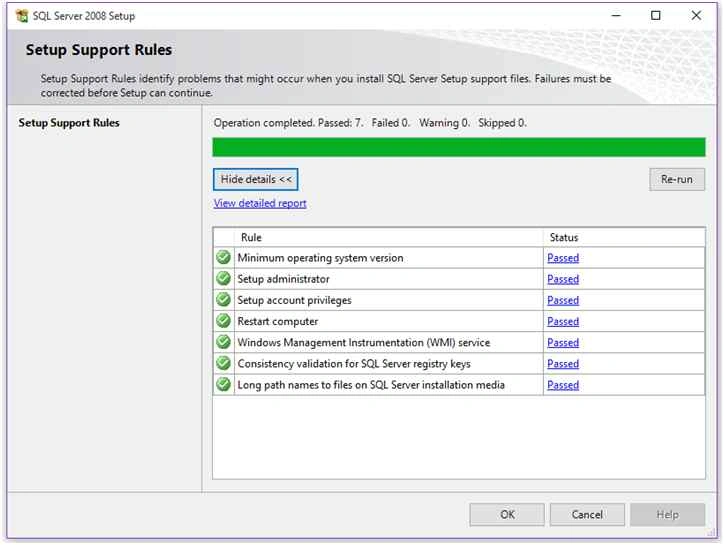
Here setup will perform a check to ensure whether you can proceed with the installation or not. If check fails on any step listed in the rules, you won’t be able to continue the installation.
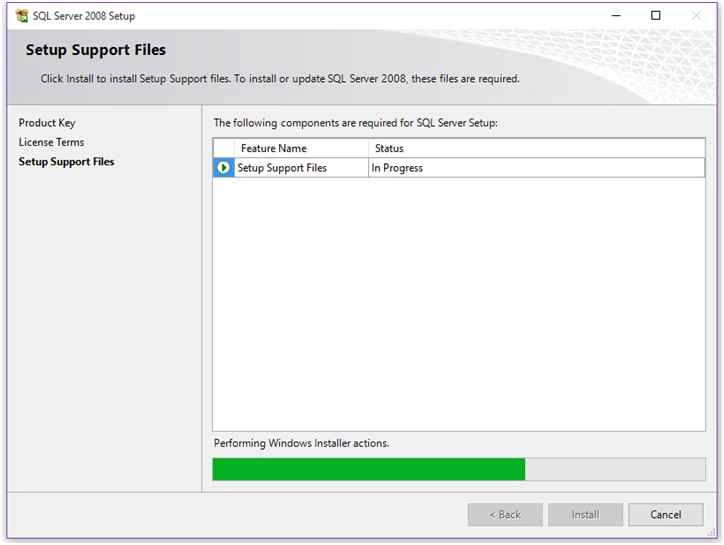
Step 4: Setup Support Files.
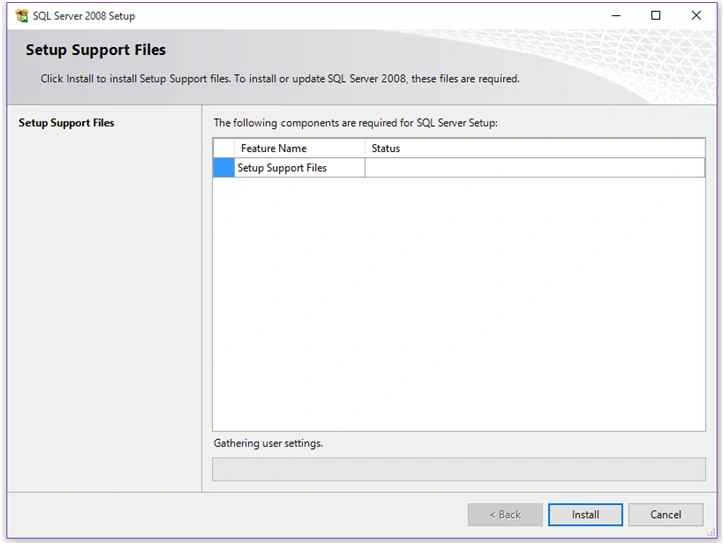
At this step SQL Server Setup look for some components required during installation. After successful check you’ll get Install button to proceed further. Click on Install Button.
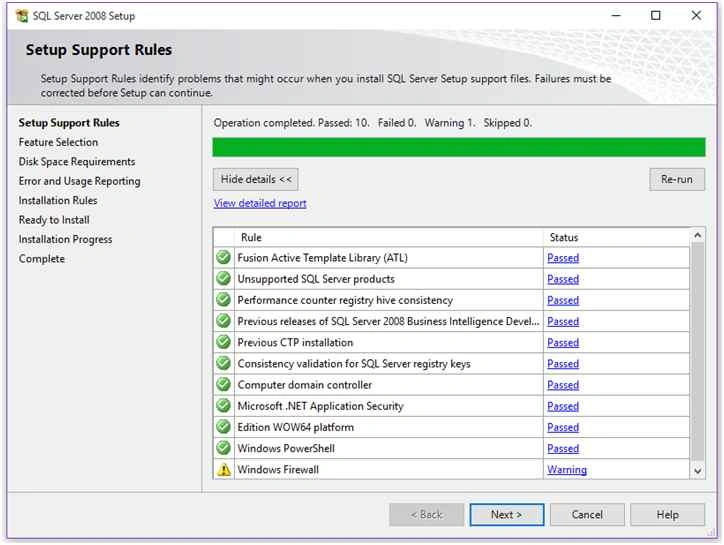
Step 5: Setup Support Rules.
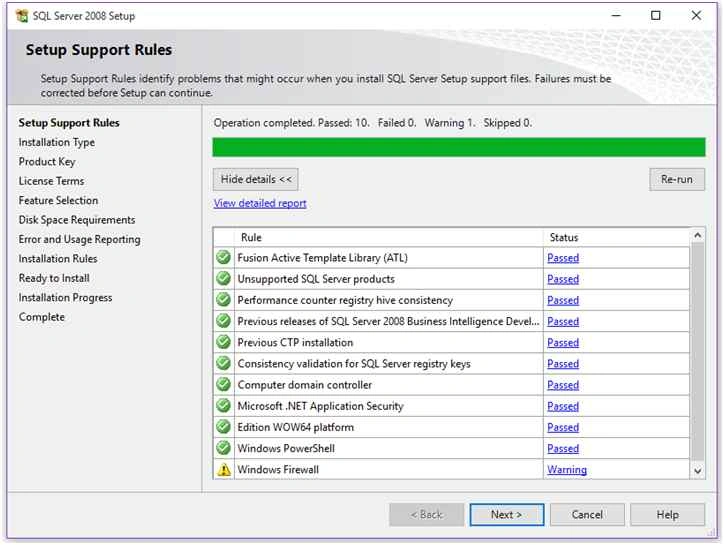
Again SQL Server runs a checkup after install to ensure whether your machine is OK or not for the installation. If you get passed in all rules, you’re good to go. Click Next.
Step 6: Installation Type
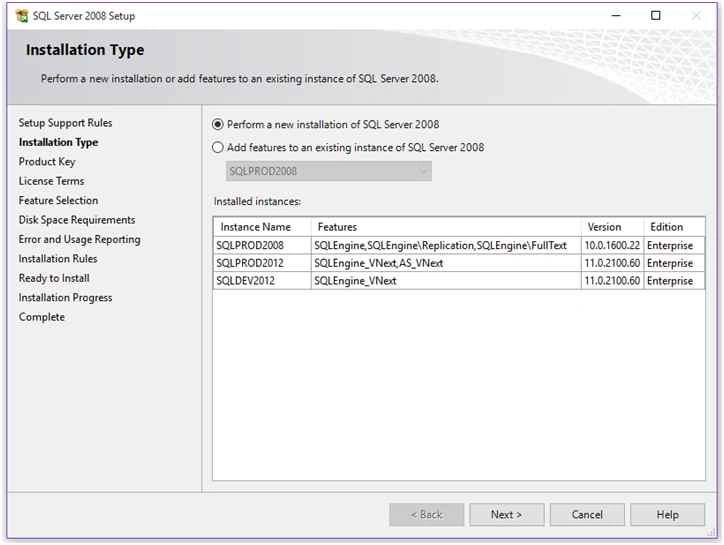
You find this step only if you previously installed any instances of SQL Server on your machine. At this step, you’ll find 2 options i.e.
- Perform a new Installation
- Add features to an existing instance.
As we want a new installation of default instance, we’ll select first option. If you want to add any additional features to your installed instance, you can go with option 2.
Select option 1 and click Next.
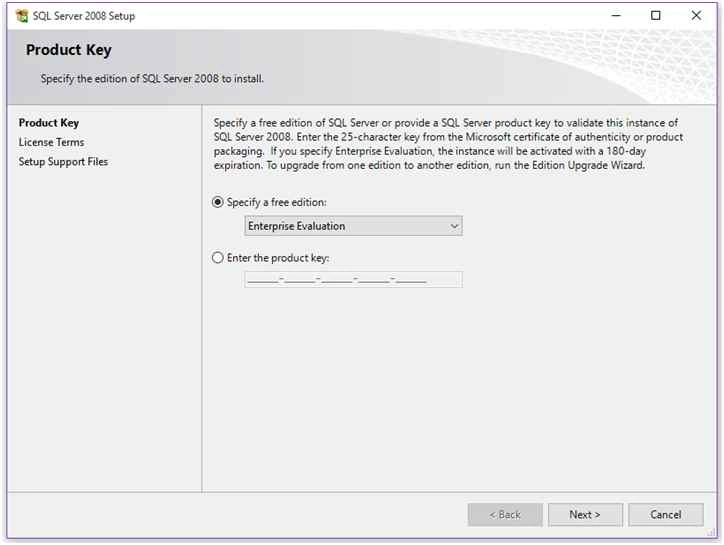
Step 7: Editions and Product Key

Here it’ll ask you the type of SQL Server edition you want to install on your machine or on server. If you want express edition, no need to specify Product Key. Other editions like Enterprise, Standard, etc. requires Product Key. Click Next
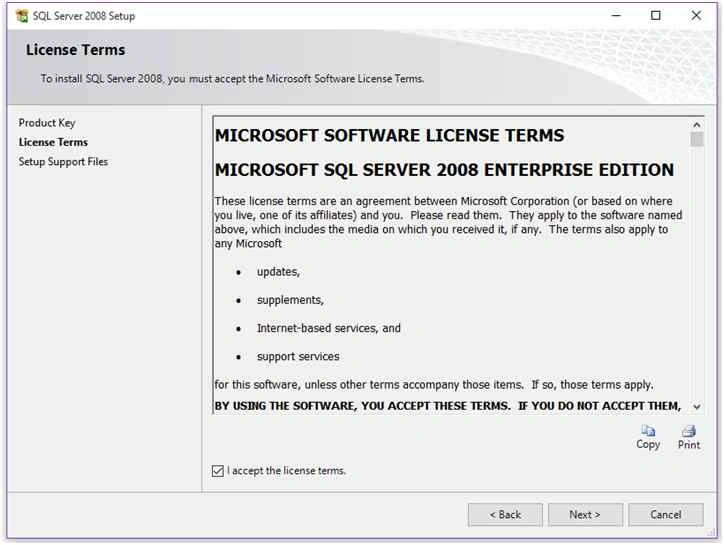
Step 8: License Term.

Click on “I accept the license terms” and click Next.
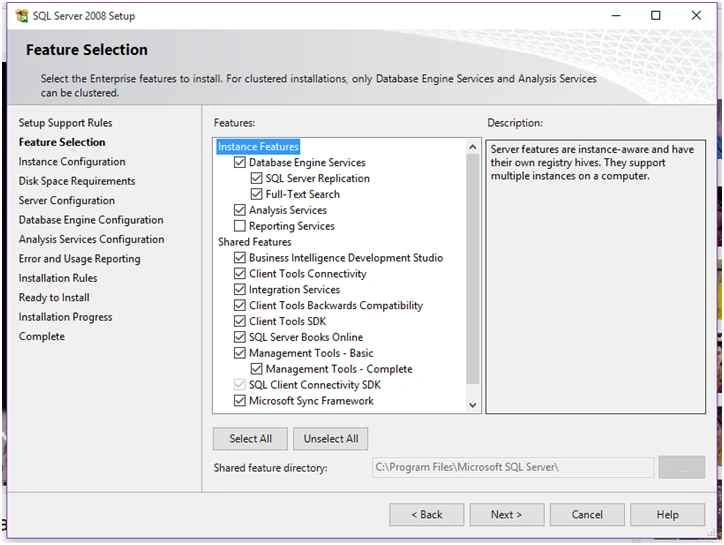
Step 9: Feature Selection.
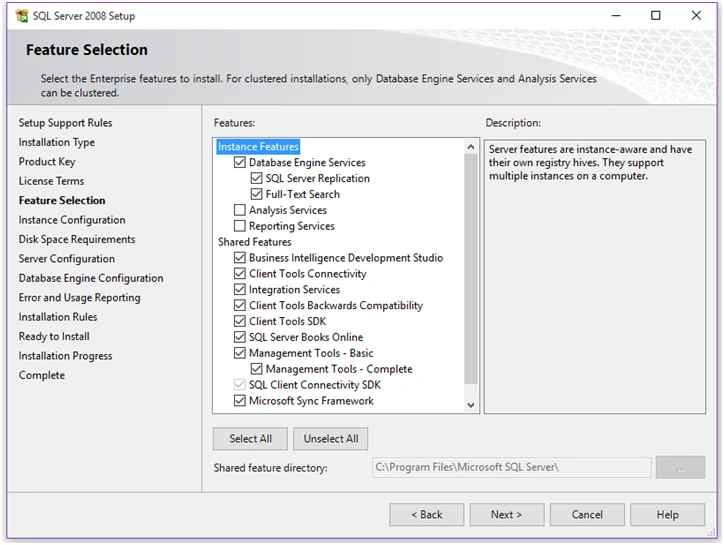
This is the important step during installation because at this step only you’ll select the features you want to install. As we don’t want Analysis and Reporting services now, we’ll not add these 2 components during installation process.
Select “Database Engine Services” and shared features.
Below you’ll find the path where these shared features will get installed.
If you’re installing this on 64-bit machine, you’ll find 2 path boxes for shared features as shown below.
Shared feature directory: To store 64-bit components.
Shared Feature directory (x86): To store 32-bit components.
I’m using 32-bit machine hence I’m only getting 1 path box as shown in above image.
Click Next.
Step 10: Instance Configuration
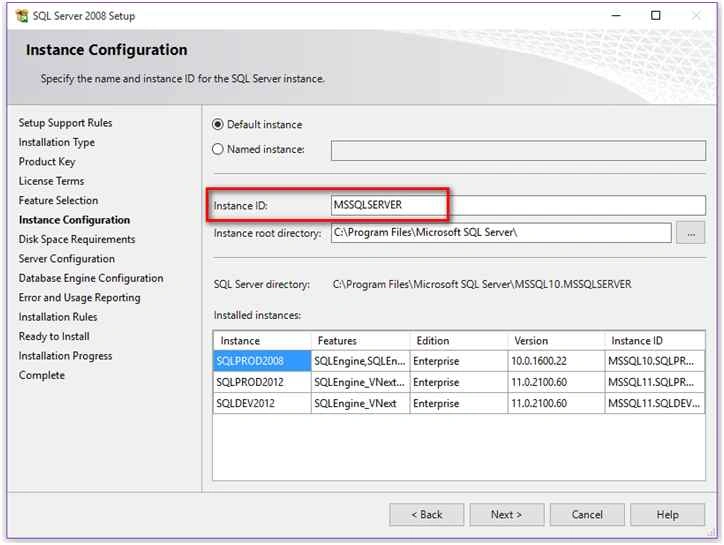
This is the step where you can specify what types of instance you want to install.
To install default instance of SQL Server, select “Default Instance” otherwise select “Named Instance” type the instance name and specify the instance root directory.
As we’re installing Default instance, we’ll go with first option and select Default instance.
You can only install 1 default instance on a single machine. If default instance is already installed, you cannot select the “Default Instance” option.
Click Next.
Step 11: Disk Space Requirement.
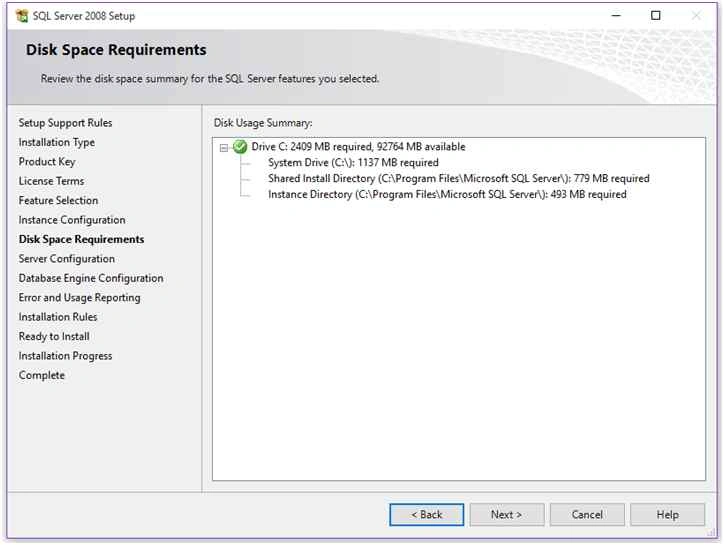
At this step, it’ll show you the required and available space on the drive you’re installing the instance.
Click Next.
Step 12: Server Configuration.
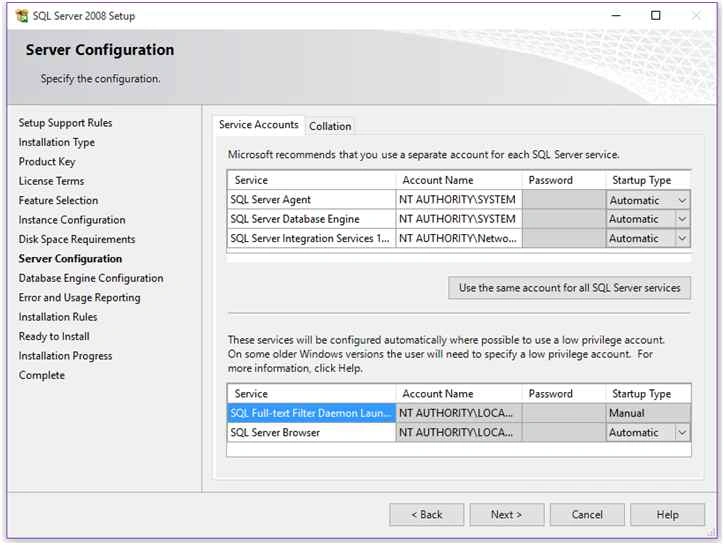
This step will determine how your SQL Services will run on your machine. Select the account name from which you want to run your services and select the startup type of the service.
Click Next.
Step 13: Database Engine Configuration
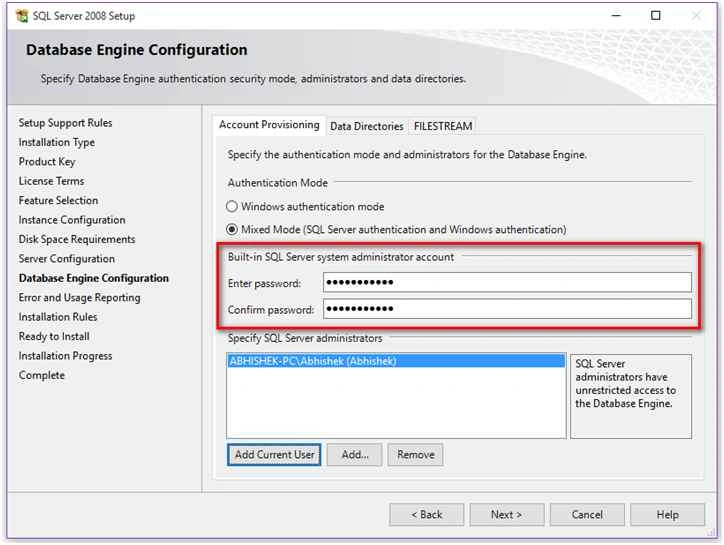
This is the 2nd most important step in installation process because here you’ll configure your database engine.
Here you’ll find 3 tabs named
Account Provisioning (Shown in above image):
Here you’ll select your Authentication Mode and also you’ll setup your System Administration (SA) account.
Select Authentication Mode as Mixed Mode and enter SA password. Add users as Sysadmin of the instance by using “Add” button. Add current user as SA admin by clicking “Add Current User”.
Data Directories:
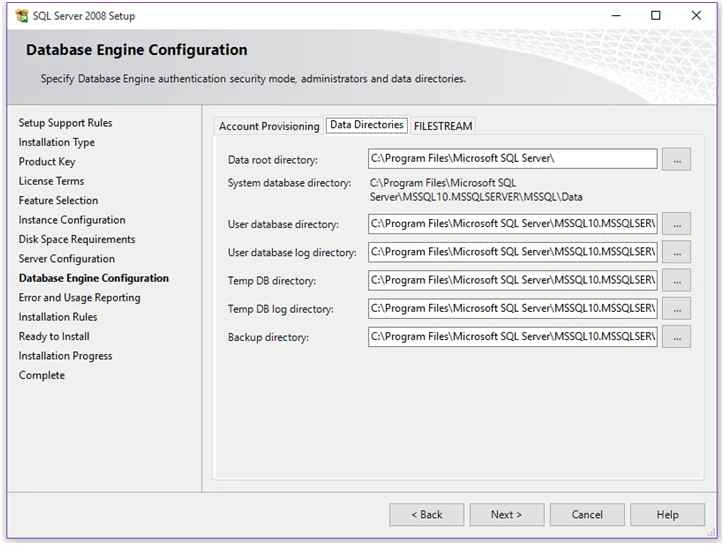
On this tab, you’ll get location of system databases, user databases, log file location, TEMP DB database location and also backup location. You can change these settings as per your choice.
FileStream
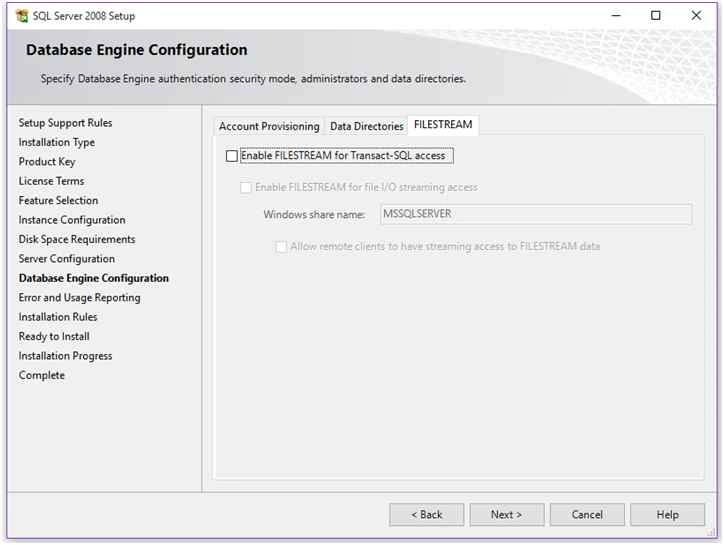
This tab will allow you to enable FileStream feature.
If you want to learn FileStream, you can read my article for the same on the following link.
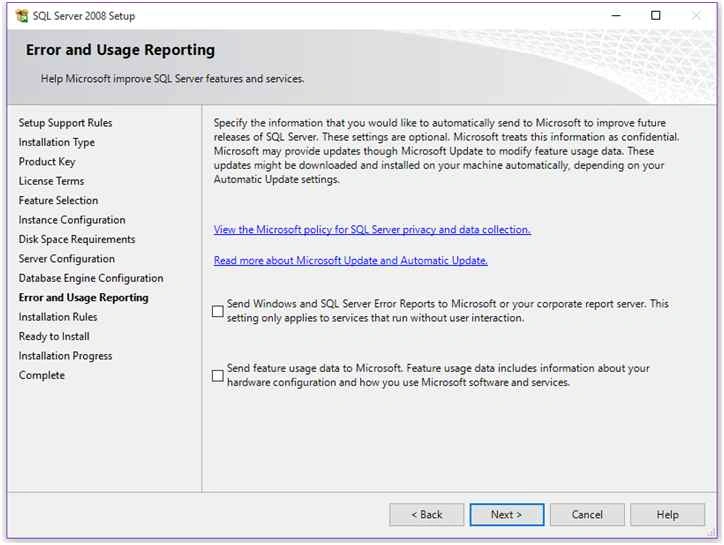
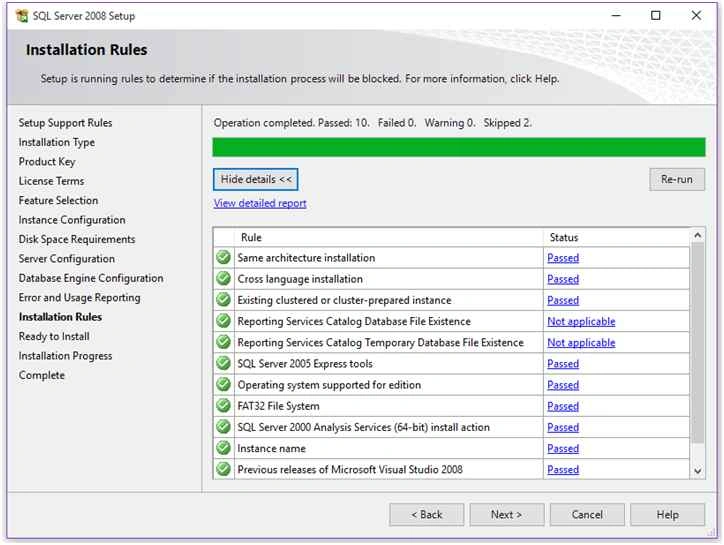
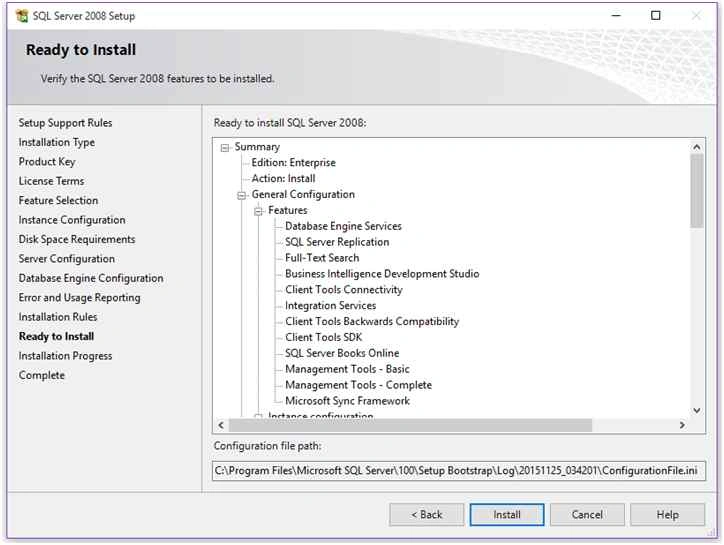

mangesh santharamPosted May 10, 2024, 5:23 AM
After installing in sql configuration Manger inside service i am getting error the remote producer call failed [0x800706be]
Muhammad Aqib ShehzadPosted Jan 5, 2016, 7:39 AM
Nice dear
Gowtham KPosted Jan 3, 2016, 10:23 AM
Good Share
Pankaj Kumar ChoudharyPosted Jan 2, 2016, 8:24 PM
Nice Explain Sir.........