

Requirements
- Visual Studio 2015 update 3
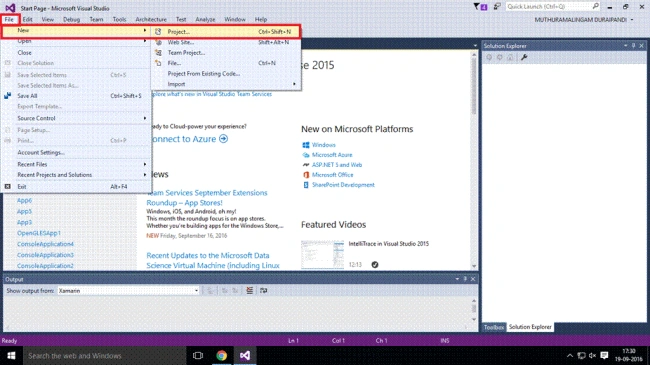
Step 1 - Open the Visual Studio 2015 Update 3. Then go to File→New→Project . Now, open a new project.
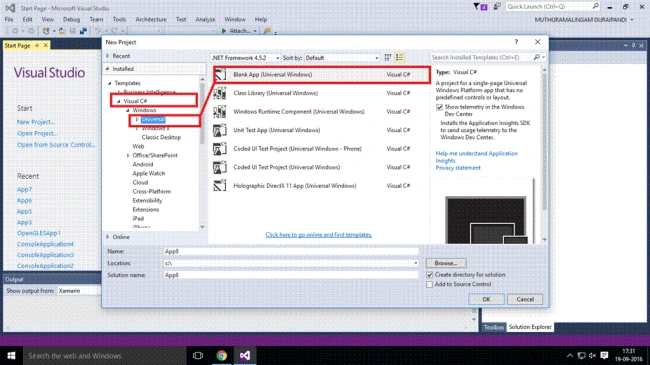
Step 2 - In the New Project window, choose Visual C# and select Universal. Then, select Blank App (Universal Windows).
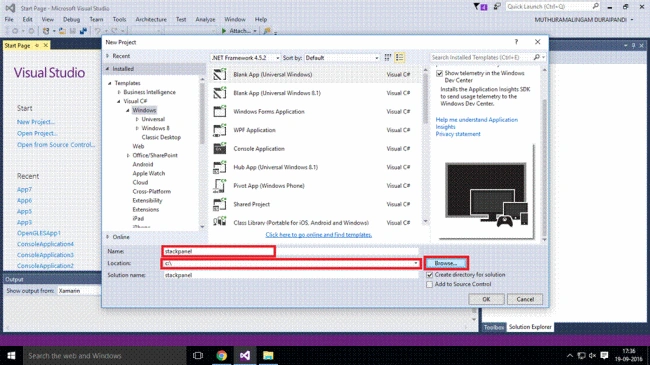
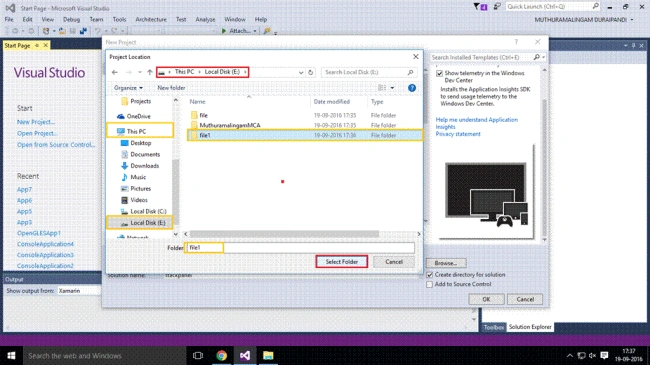
Step 3 - Now, name your application and assign the location for the app.
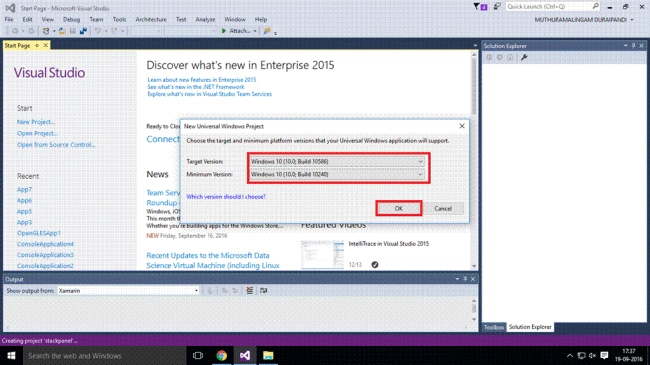
Step 4 - Select the Target Version and Minimum Version for your Universal Windows application and after that, click ” OK”.
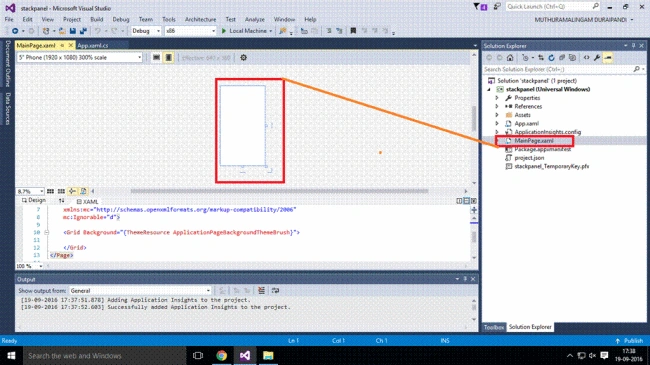
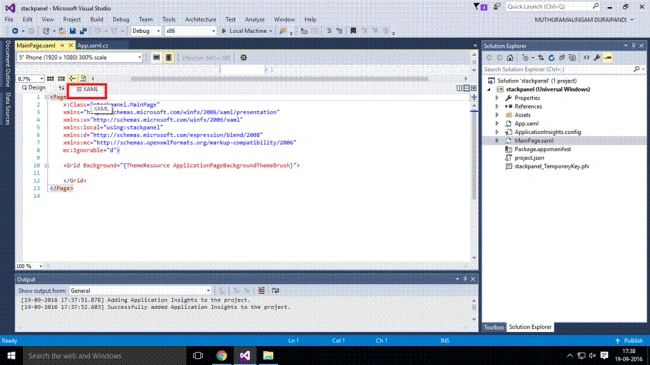
Step 5 - We should go to the Solution Explorer now. Choose MainPage.xaml and open XAML or Design window. Then, go to the XAML window and write some .xaml code.
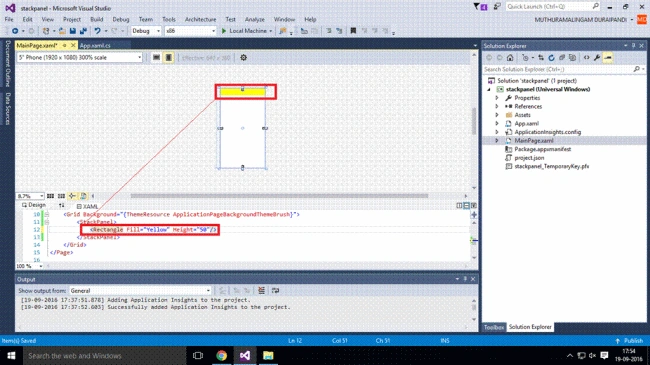
Step 6 - According to your requirement of shapes, boxes, and blocks, write the code.
Step 7 - We want some option in our project, like TextBlock, button, images, and so on.
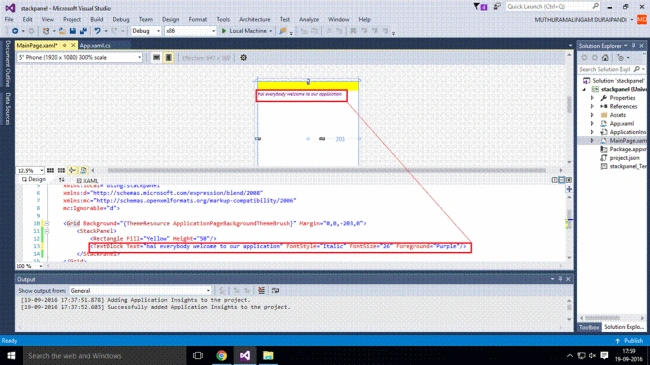
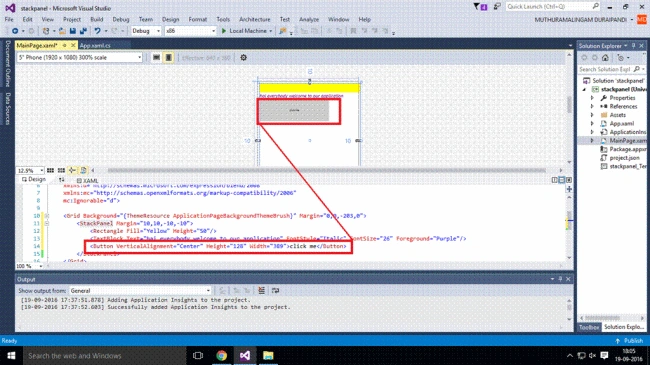
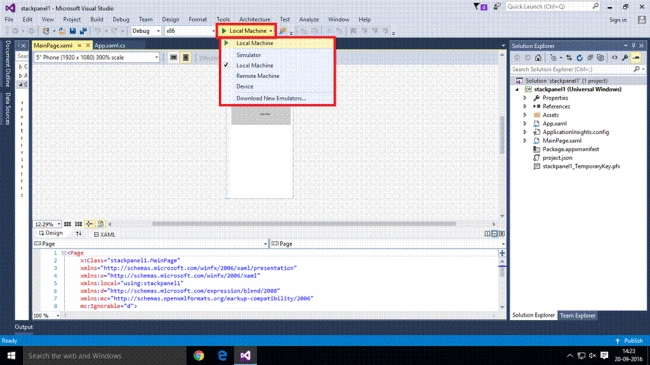
Step 8 - Write the XAML code and save all the files. After that, you can run it either on local machine or remote machine or any device. Let's choose Local Machine.
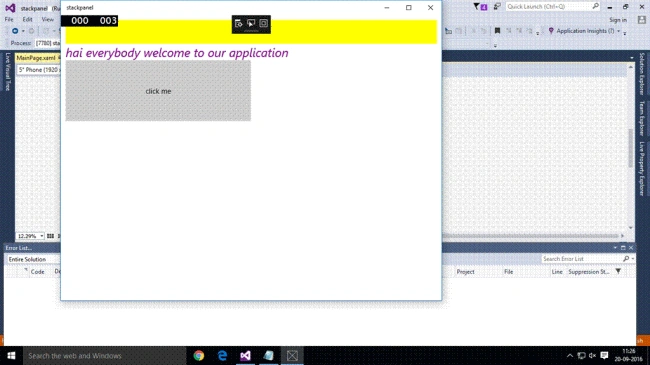
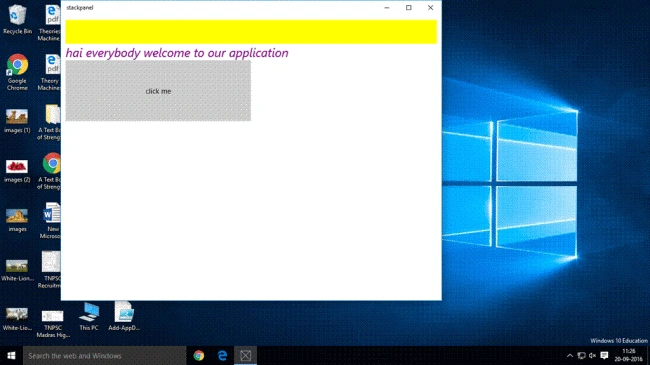
Step 9 - We can see our output below. Now, stackPanel UWP Application is created.
Step 3 - Now, name your application and assign the location for the app.
Step 4 - Select the Target Version and Minimum Version for your Universal Windows application and after that, click ” OK”.
Step 5 - We should go to the Solution Explorer now. Choose MainPage.xaml and open XAML or Design window. Then, go to the XAML window and write some .xaml code.
Step 6 - According to your requirement of shapes, boxes, and blocks, write the code.
Step 7 - We want some option in our project, like TextBlock, button, images, and so on.
- <Page
- x:Class="stackpanel1.MainPage"
- xmlns="http://schemas.microsoft.com/winfx/2006/xaml/presentation"
- xmlns:x="http://schemas.microsoft.com/winfx/2006/xaml"
- xmlns:local="using:stackpanel1"
- xmlns:d="http://schemas.microsoft.com/expression/blend/2008"
- xmlns:mc="http://schemas.openxmlformats.org/markup-compatibility/2006"
- mc:Ignorable="d">
- <Grid Background="{ThemeResource ApplicationPageBackgroundThemeBrush}">
- <StackPanel Margin="10,10,10,10">
- <Rectangle Fill="Yellow" Height="50"/>
- <TextBlock Text="hai everybody welcome to our application" FontStyle="Italic" FontSize="26" Foreground="Purple"/>
- <Button VerticalAlignment="Center" Height="128" Width="389">click me</Button>
- </StackPanel>
- </Grid>
- </Page>
Step 8 - Write the XAML code and save all the files. After that, you can run it either on local machine or remote machine or any device. Let's choose Local Machine.
Step 9 - We can see our output below. Now, stackPanel UWP Application is created.
Join the conversation! Your thoughts help the community grow.