

In my previous article, we discussed version control and Git. In this article, we will learn what GitHub is and how to set up a .NET project with Git Version Control system and push to GitHub.
GitHub is an open-source code hosting platform having a version control system. Using GitHub, we can work with the team together on projects from anywhere, anytime. We can host our source code projects in different programming languages and keep track of the changes made by the team using Git.
Below are the steps to add your VS project to Git and upload it to GitHub.
Step 1
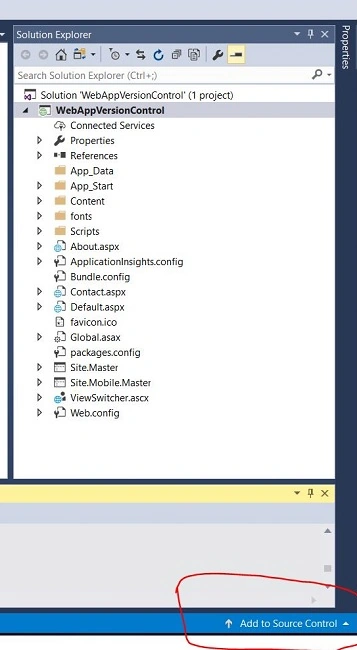
Open your project in Visual Studio and check the bottom for 'Add to Source Control'.
What is GitHub?
Step 2
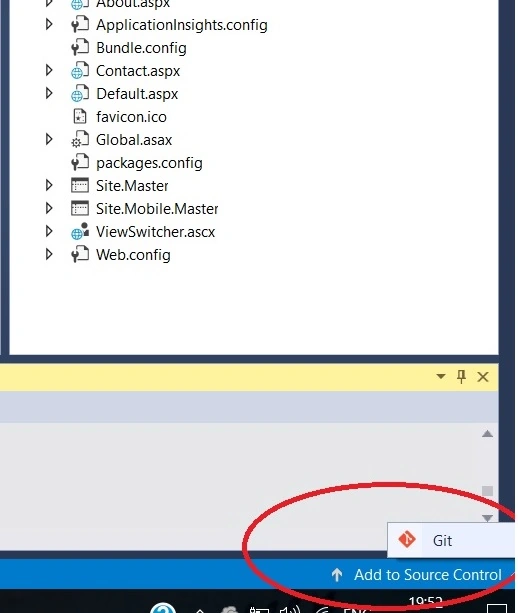
Select Git as your version control, as displayed on the below screen.
 Step 3
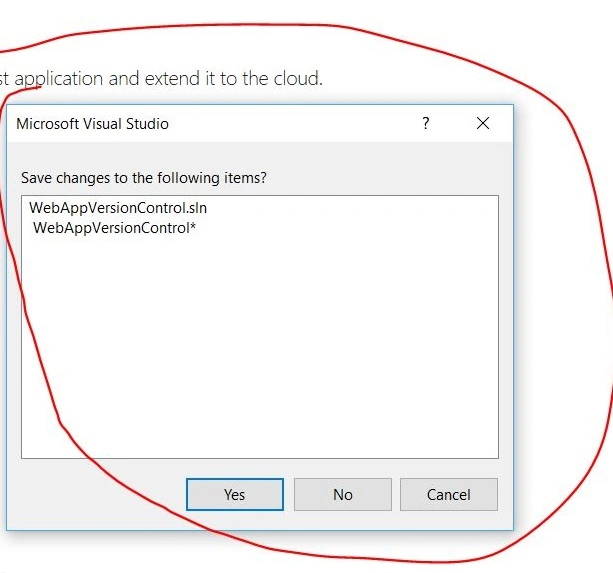
It will ask you to save your project solution. Just click on Yes.
Step 3
It will ask you to save your project solution. Just click on Yes.
Step 4
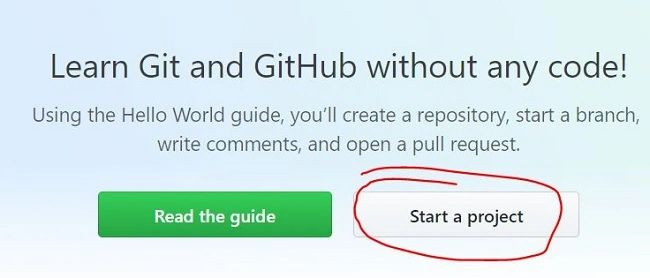
Now, go to Github.com and click on "Start a project", as shown on the below screen. (Before this, you need to create your GitHub account).
Step 5
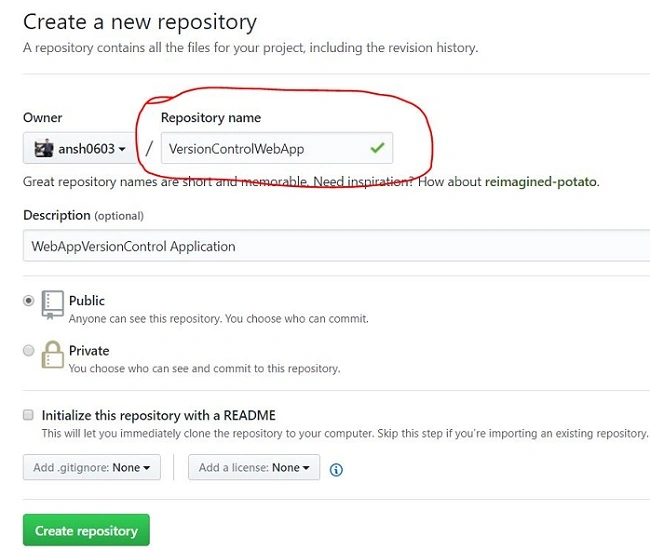
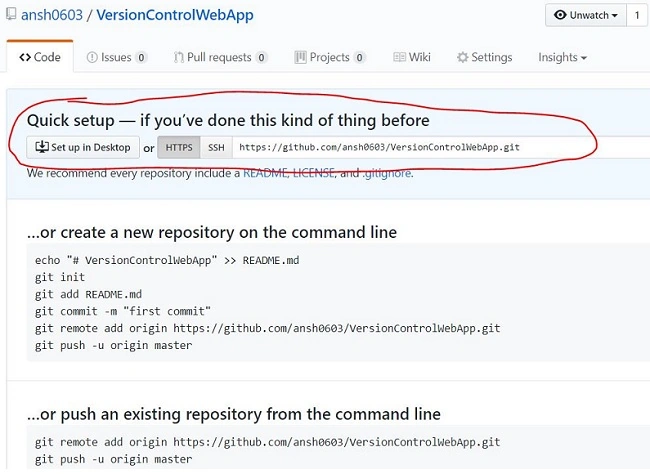
Once you start, it will ask you to create a new repository. So here, I am going to give the name 'VersionControlWebApp'. Add some sort of description.
Chose Public or Private on the basis of how you want to manage your repository and click the 'Create Repository' button.
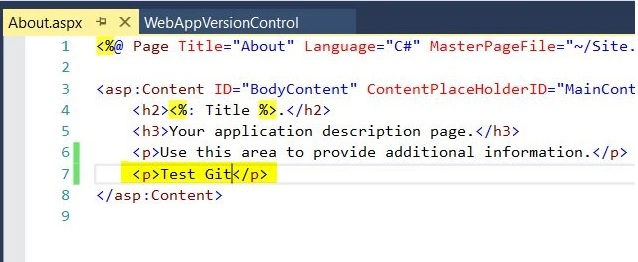
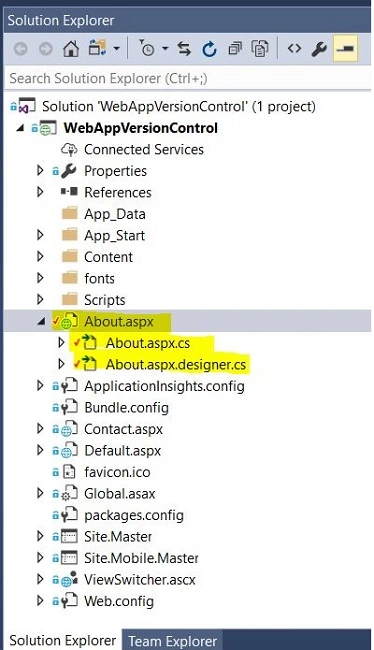
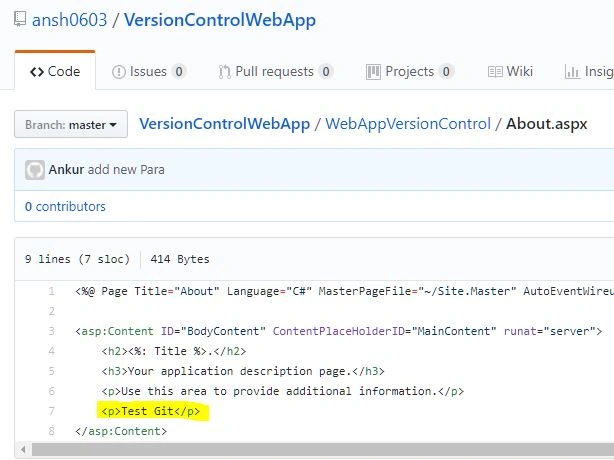
- <p>Test Git </p>
Step 13
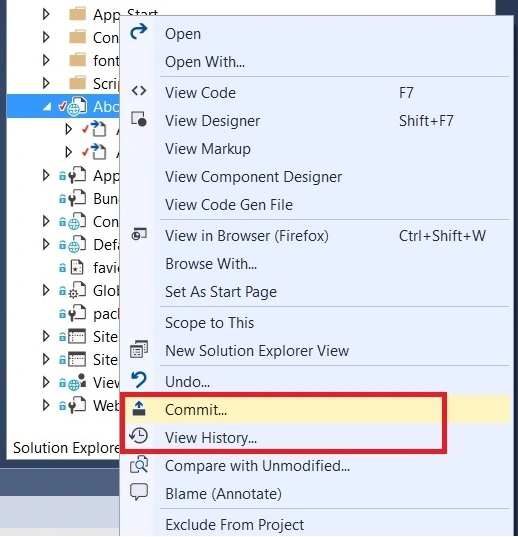
For committing my changes, just right click on the file and click on 'Commit'.
 Step 14
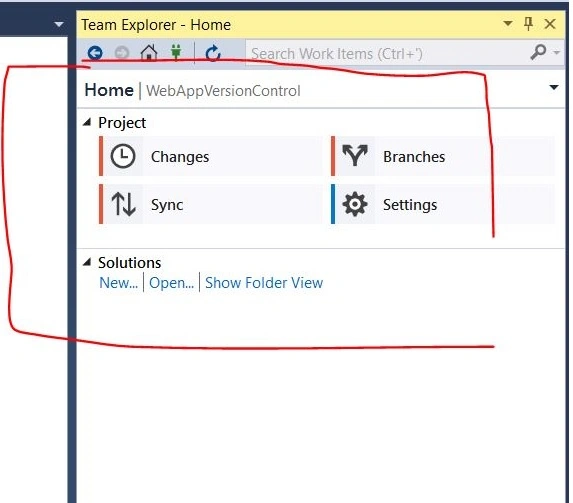
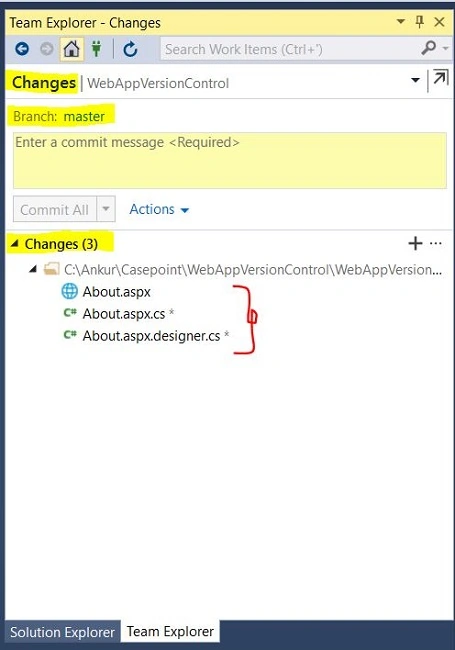
It will open the Team Explorer and ask for entering 'Commit message'. That way, all the team members know the changes made by you and collaborate works.
You can also select or change the branch where you want to push changes from the 'Branch Section'. Here, I am selecting the default branch 'master'. In the "Changes" section, it will show the list of files you want to commit.
Step 14
It will open the Team Explorer and ask for entering 'Commit message'. That way, all the team members know the changes made by you and collaborate works.
You can also select or change the branch where you want to push changes from the 'Branch Section'. Here, I am selecting the default branch 'master'. In the "Changes" section, it will show the list of files you want to commit.
 Step 15
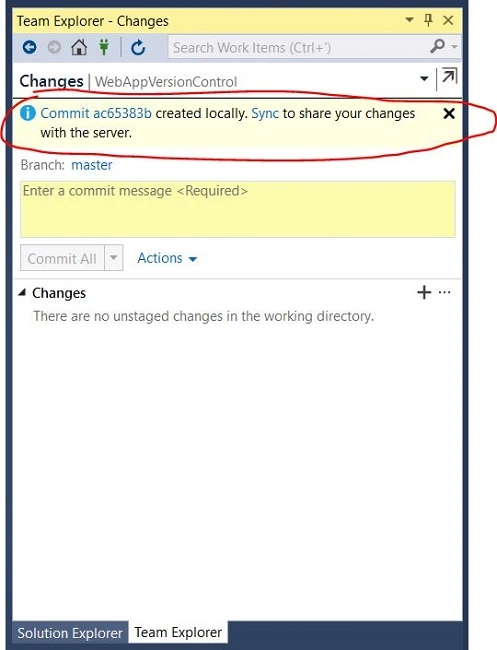
Once you enter the description, click on 'Commit All'. This will commit your changes locally and if you want to synchronize with GitHub, you can then click on 'Sync'.
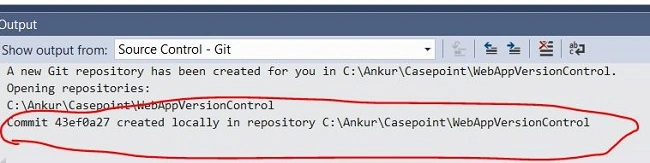
You can see here that your changes are created locally - 'Commit ac65383b created locally. 'Sync' to share your changes on the server'.
Step 15
Once you enter the description, click on 'Commit All'. This will commit your changes locally and if you want to synchronize with GitHub, you can then click on 'Sync'.
You can see here that your changes are created locally - 'Commit ac65383b created locally. 'Sync' to share your changes on the server'.
 Step 16
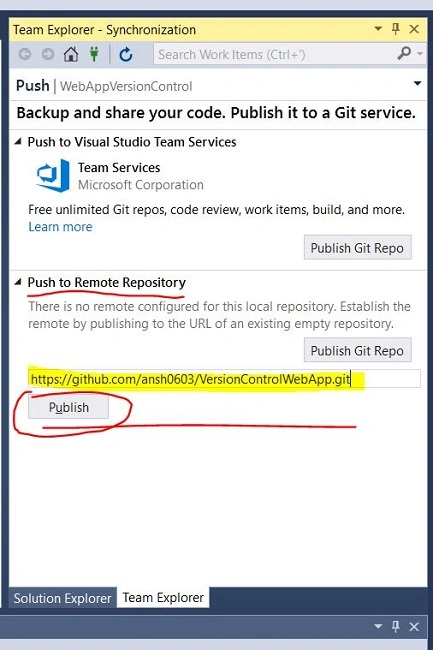
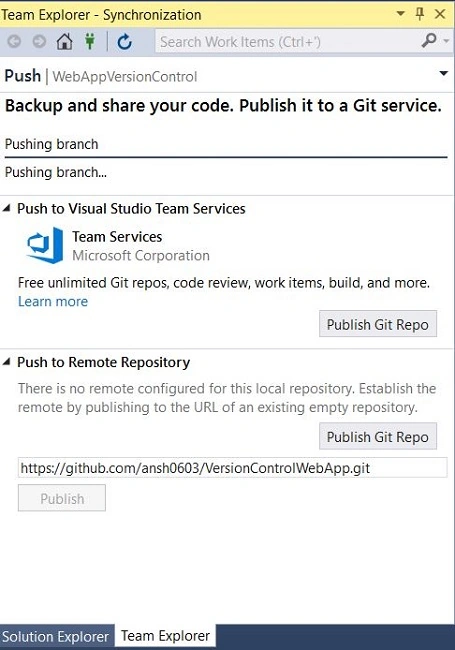
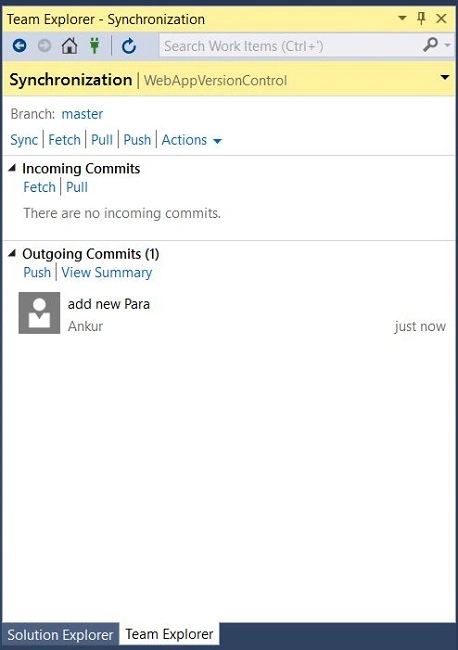
From the Synchronization tab, you can push the changes by clicking on "Push". It will push the current branch of your changes on GitHub.
Step 16
From the Synchronization tab, you can push the changes by clicking on "Push". It will push the current branch of your changes on GitHub.
Step 17
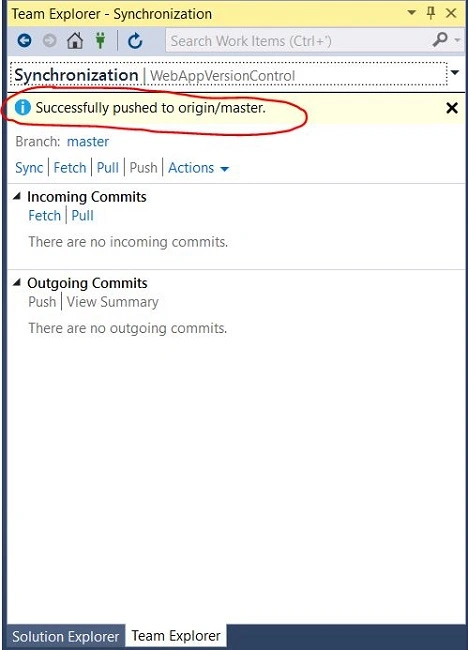
Once done, it will show the message - 'Successfully pushed to origin/master branch'.
 Step 18
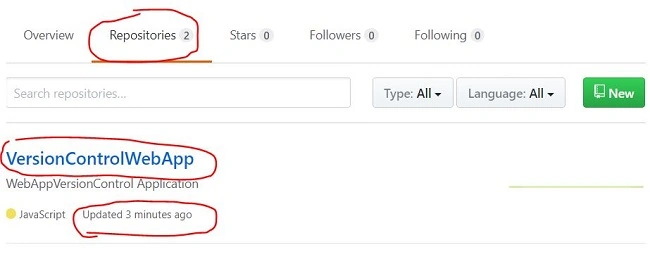
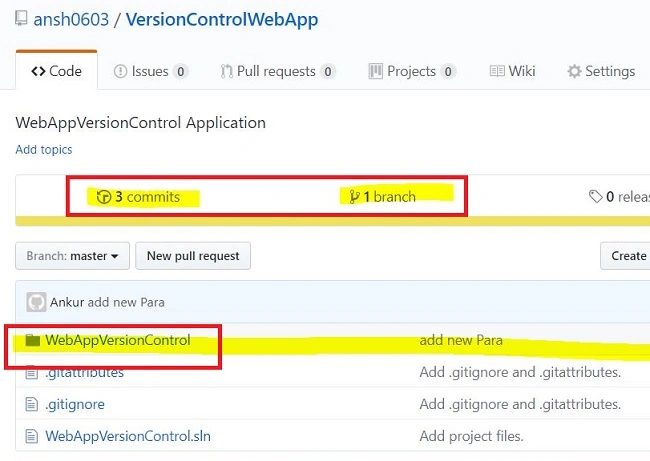
Open GitHub and check your "Repositories" section. You can see that the change that you committed has been updated here on GitHub.
Step 18
Open GitHub and check your "Repositories" section. You can see that the change that you committed has been updated here on GitHub.
Ashish PotdarPosted May 10, 2023, 11:00 AM
Very nice article Ankur. I appreciate your efforts.
Uzair AnwarPosted Sep 14, 2021, 6:28 PM
How to handle multiple developer a single project on github with code first approch?
Arindam MallikPosted Jan 12, 2021, 1:09 PM
Hi Ankur, how to verify difference between the old and new versions of change? Thanks
KaToryoPosted Jul 3, 2020, 10:00 AM
Hi, what version of visual studio did you use here? Thanks. Great tutorial!
Yogesh VedpathakPosted Jan 7, 2020, 1:12 AM
Great Article ...!!
Ricardo AraújoPosted Aug 10, 2019, 10:22 PM
Thank you Ankur
Former memberPosted Jul 12, 2019, 5:10 AM
Good work.
Z HussainPosted Feb 25, 2019, 9:46 AM
Very Helpful!
David BermudezPosted Jan 11, 2018, 10:03 AM
Hi, Is there any way to show the branch name into the html page (or console)? Is just to be sure what branch is on produccion
Humayun Kabir MamunPosted Nov 4, 2017, 9:52 AM
Thanks Ankur for this nice informative article...
Suresh KumarPosted Oct 31, 2017, 11:57 PM
Nice information bro