

In this article you will see how to translate documents to another language using NINTEX workflow in SharePoint 2013 Online.
Translate Document is a new action introduced in NINTEX workflow for SharePoint 2013. Using this action documents can be translated to other languages. To explain this action I have created the following document libraries.
- Documents: NINTEX workflow is created in this library and the documents will be translated to other languages.
- Translated Documents: Translated documents will be saved in this document library.
Create Translate Document Workflow:
- Navigate to the Office 365 site (https://c986.sharepoint.com/ ).
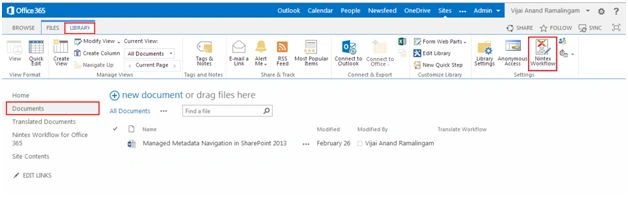
- Click on the Documents link in the quick launch bar. Click on the Library tab and then click on the NINTEX Workflow button in the ribbon interface.
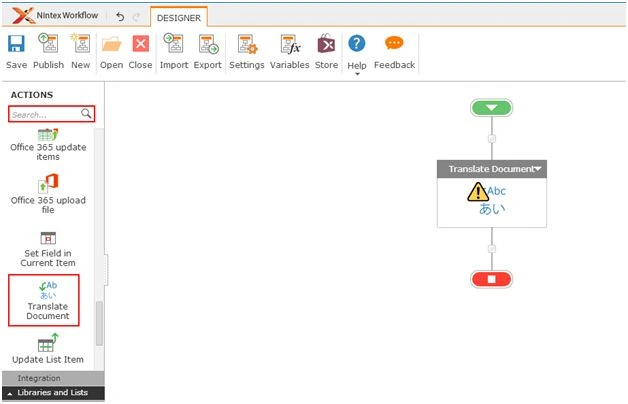
- Drag and drop the Translate Document action from the Libraries and Lists section.
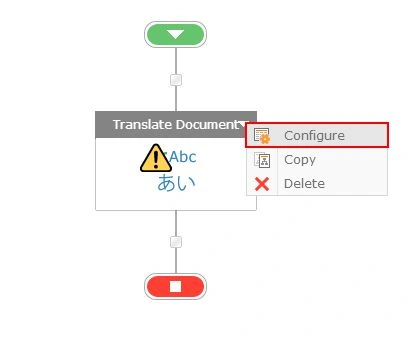
- Click on the down arrow and then click on Configure.
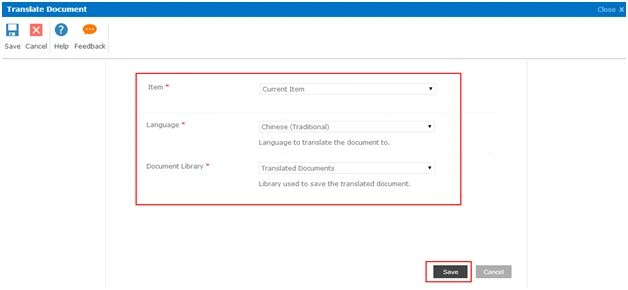
- Select the Item to be translated and the Language and Document Library where the translated document is to be saved. Click on Save.
Publish the workflow:
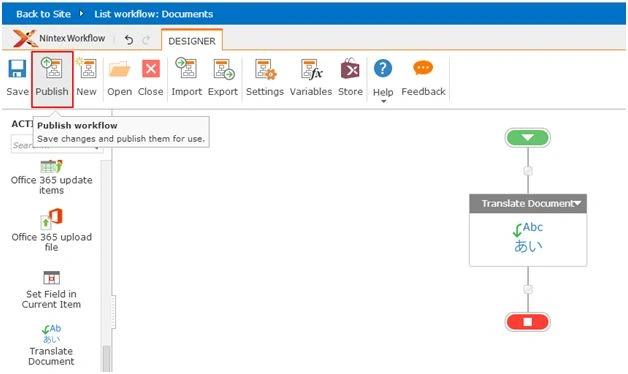
- Click the Publish button in the ribbon interface.
- Ensure the Title is set; optionally you can set the values for Description. Select the Task List, History List and Start options.
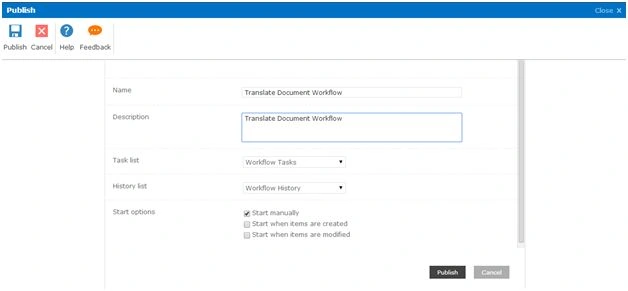
- Click on the Publish button. The Workflow will be validated.
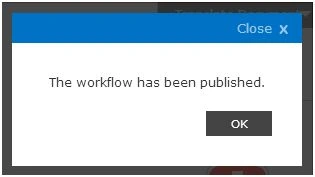
- The workflow is published successfully.
Test the workflow:
- Navigate to the Documents library.
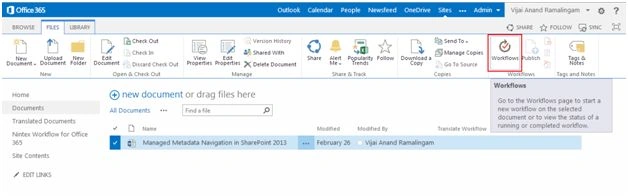
- Select the document and then click on Workflows in the ribbon interface.
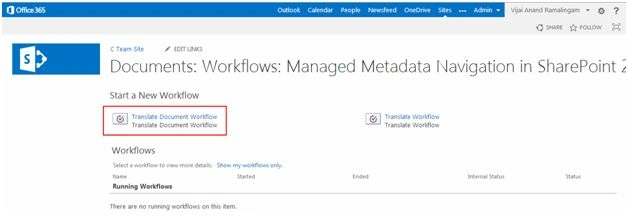
- Click on Translate Document Workflow and then click on the Start button.
- After a few minutes the document will be translated.
- Navigate to the Translated Documents library where the translated documents are saved.
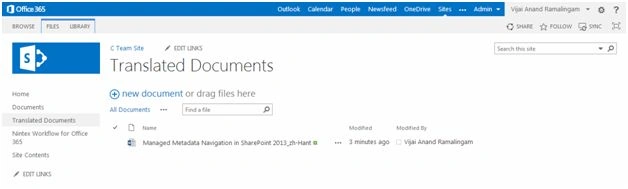
- The document is successfully translated.
Summary:
Thus in this article you saw how to translate documents to another language using NINTEX workflow in SharePoint 2013 Online.
SriramPosted Jul 1, 2015, 8:27 AM
Good