

In this article, we will learn about the fundamentals of Pipe in Angular. Some of the important topics mentioned below will be discussed in this article:
- What is Pipe in Angular?
- Build-in Pipes in Angular and with examples.
- How to parameterize a Pipe?
- What is a custom Pipe?
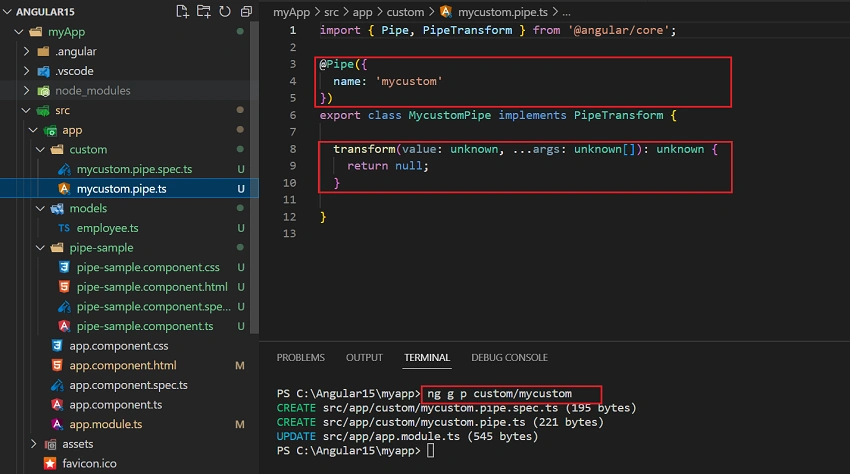
- How to create a custom pipe in Angular?
What is Pipe in Angular?
Pipe is used to transform bound properties before displaying in UI. It takes in data as input and transforms it to a desired output.
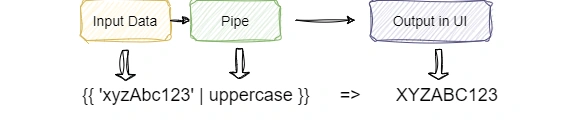
Some of key features include:
- Pipe “|” symbol is used to define a pipe.
- Chaining of pipes can be possible with other pipes like {{inputData | Pipe1 | Pipe2}}
- Pipes arguments can be provided by using the colon (:) sign.
Build-in Pipes in Angular and with examples
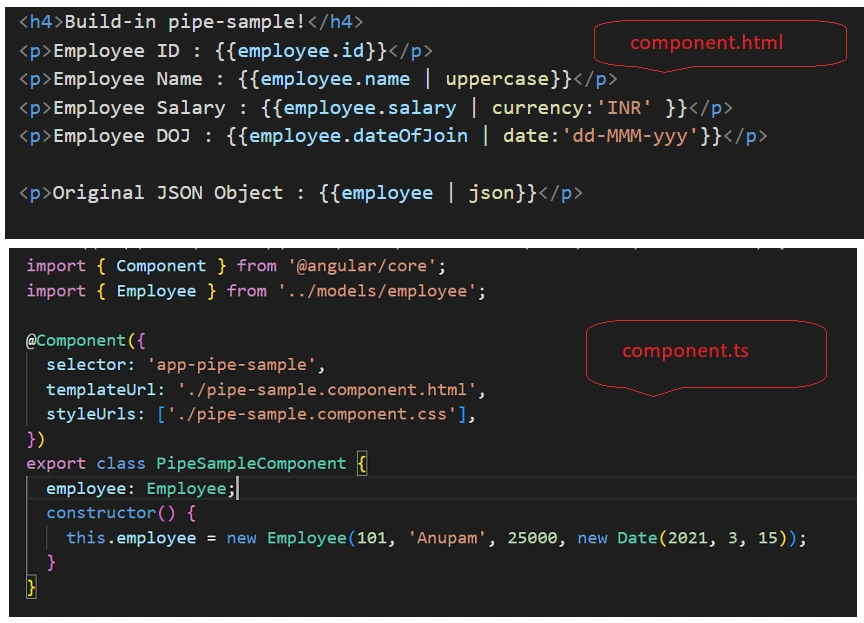
Angular comes with build-in pipes such as
- Date: Formats a date according to locale rules.
- UpperCase: Transforms string to uppercase
- LowerCase: Transforms string to lowercase
- Decimal: Formats a number according to locale rules.
- Currency: Formats a number as currency using locale rules.
- Percent: Formats a number as a percentage.
- JSON: Converts value into a string using JSON.stringify. Useful for debugging.
- Slice: Creates a new List or String containing a subset (slice) of the elements.
- Async: subscribes to an observable or a promise and returns the last emitted value.
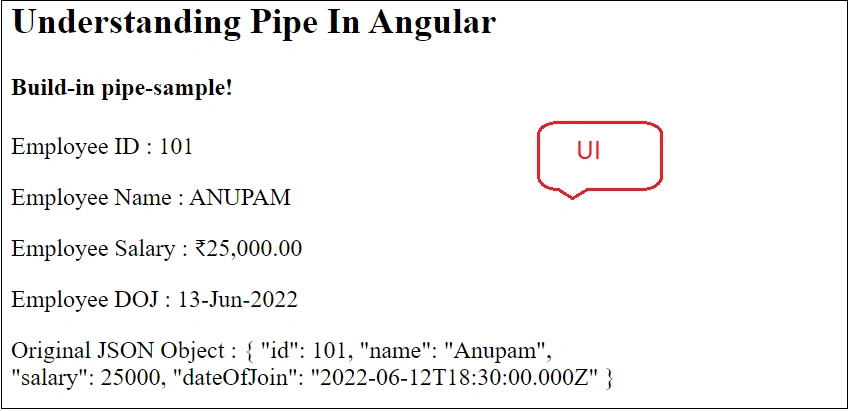
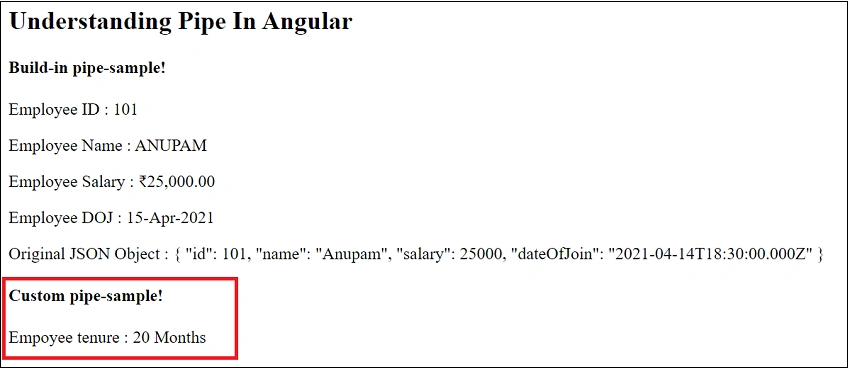
Let’s understand these with an example:
How to parameterize a Pipe?
A pipe may accept any number of optional parameters to fine-tune its output. We add parameters to a pipe by following the pipe name with a colon (: ) and then the parameter value (e.g., currency:'INR'). If our pipe accepts multiple parameters, we separate the values with colons (e.g. slice:1:5)
What is a custom Pipe?
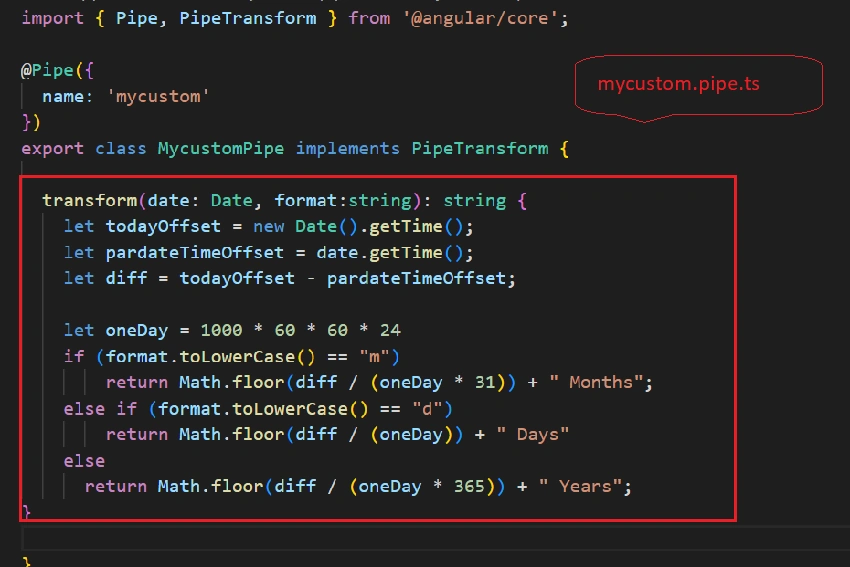
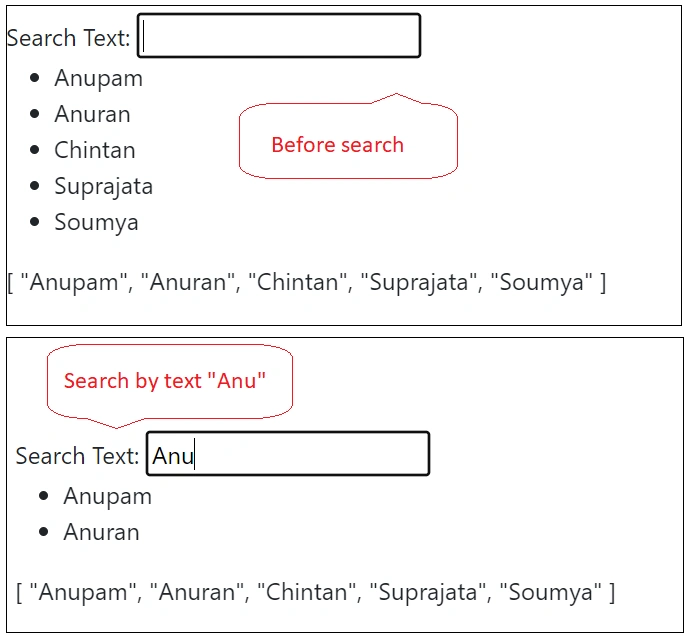
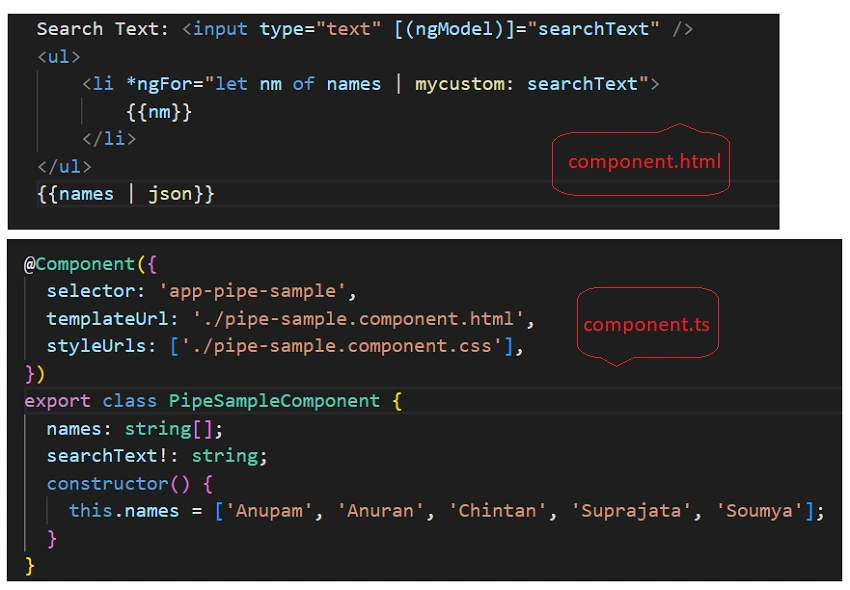
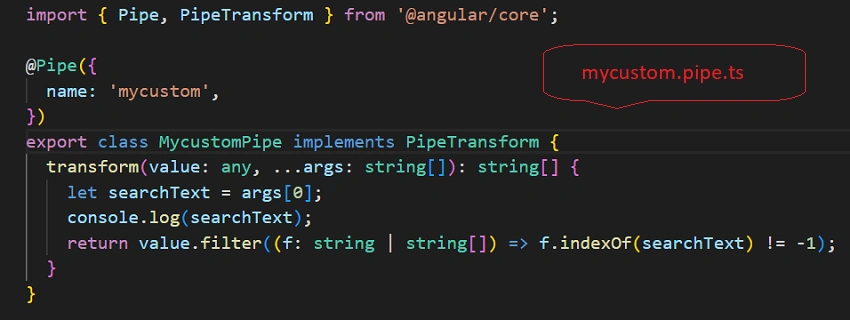
A custom pipe can be used for applying our own logic to transform text based on the requirement. @Pipe decorator is used to create a custom pipe.

Join the conversation! Your thoughts help the community grow.