

Introduction
Windows 10 is available for development and it's SDK has been released. Split View is a new addition to XAML in Windows 10. Let's learn about the Split View control. The Split View control can be used to make a nav pane pattern. To build this pattern, the developer needs to add an expand/collapse button that is formally called a Hamburger control.
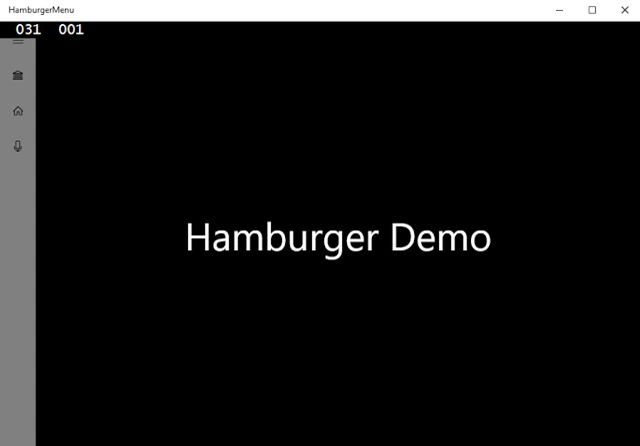
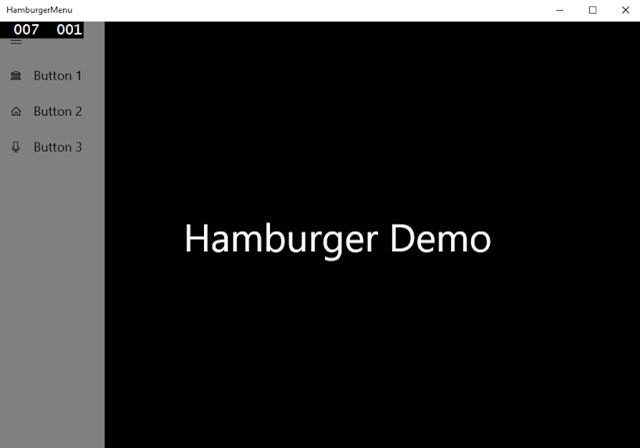
 The Split View control has an expandable pane and a content area. The content area is always visible. The pane can expand and collapse and remain in an open state and can present itself from either the left or the right side of an app's windows.
A Split View has one of the following 3 modes.
The pane is hidden until opened. When open, the pane overlays the content area.
The pane is always visible and doesn't overlay the content area. The pane and content areas divide the available screen.
The pane is always visible in this mode that is just wide enough to show icons.
Note
The Split View control has an expandable pane and a content area. The content area is always visible. The pane can expand and collapse and remain in an open state and can present itself from either the left or the right side of an app's windows.
A Split View has one of the following 3 modes.
The pane is hidden until opened. When open, the pane overlays the content area.
The pane is always visible and doesn't overlay the content area. The pane and content areas divide the available screen.
The pane is always visible in this mode that is just wide enough to show icons.
Note
Overlay
Inline
Compact
Usually 48 px wide.
The pane and the content area divide the available screen real estate. Although the standard compact mode doesn't overlay the content area, it can transform into a wider pane to show more content that will overlay the content area.
Let's try to use a Split View to create a Hamburger menu.
Step 1
Ensure you have the development environment all set. The first thing you need to do is be sure you are running some version of Windows 10 that you can find on Windows Insider. You need to have Visual Studio 2015 Community Edition installed as well. Those are the only two things to ensure you have installed.
Step 2
Open Visual Studio Community Edition 2015. Now that you have opened Visual Studio, you need to select the Windows 10 section. In that, you need to click on Blank Application and create that.
Step 3
Visual Studio will create the project and now you can see the project listings in the Solution Explorer. You will see that this project does not have a Windows Phone and Windows Store. There is only one project for both the Windows Phone Store and the other.
Step 4
Go to MainPage.xaml and let's edit some XAML, you will see the Grid tag here, you just need to remove that and let's start our work by adding a SplitView control. Split View has two main elements, the pane, and the content. The pane represents the menu that you want to be able to interact with and the content represents the main content of your page.
Here is the code.
- <SplitView>
- <SplitView.Pane></SplitView.Pane>
- <SplitView.Content></SplitView.Content>
- </SplitView>
- <SplitView x:Name="MySplitView" DisplayMode="CompactOverlay" IsPaneOpen="False"
- CompactPaneLength="50" OpenPaneLength="150">
- <SplitView.Content>
- <Grid>
- <TextBlock Text="Content of SplitView " FontSize="45" Foreground="White"
- HorizontalAlignment="Center" VerticalAlignment="Center"/>
- </Grid>
- </SplitView.Content>
Ammar ShaukatPosted Feb 11, 2016, 5:06 AM
very quick.
Imran Javed ZiaPosted Dec 5, 2015, 6:55 AM
Nice Work
Nuwan KarunarathnaPosted Nov 29, 2015, 10:27 AM
Good one ,,, It will be more easier to handle if you use a listbox/listView control to add items into the pane instead of buttons with a label :)
Gowtham RajamanickamPosted Jul 7, 2015, 7:00 AM
good one..
Sibeesh VenuPosted Jul 7, 2015, 12:50 AM
Nice Article! Thanks for sharing
SharadPosted Jul 7, 2015, 12:21 AM
nice article...
Afzaal Ahmad ZeeshanPosted Jul 6, 2015, 6:57 PM
This is a SplitterView, which is introduced in Windows 10; Hamburger Menu has been in the game for a very long time. (If you are using Google Chrome) look to the top right corner, those 3 lines are known as Hamburger Menu.
Santhakumar MunuswamyPosted Jul 6, 2015, 3:44 PM
Thanks for sharing