

We are now are ready with our SQL Azure
database server and database. So we can proceed with connecting with the
database. We can use our ADO.NET Connection class to connect to the database.
The steps involved here are:
- Get the Database Server Name
- Connect using SqlConnection class
The steps are following.
Get the Database Server Name
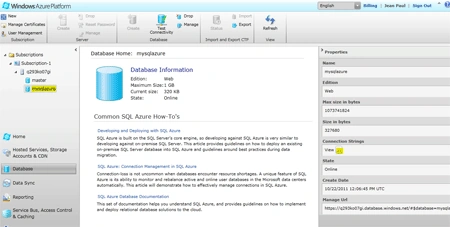
Sign in to the windows azure portal and click on the Database item from the left
pane. 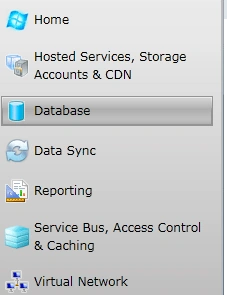
Then expand the subscriptions item and select the database server name. From the
right hand side properties window, you can get the Fully qualified DNS Name of
the server as shown in the figure below.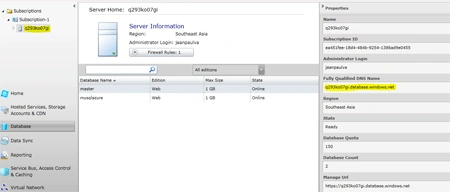
Copy your server name. Now open Visual Studio and create a new Azure project and
add a web role into it.
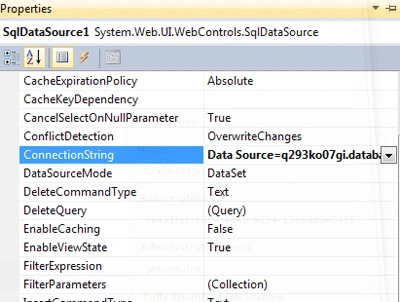
Add a SqlDataSource component into it from the toolbox. In the properties window
of the control, click on the ConnectionString property. From the drop down list
select New Connection. You will be prompted with the following dialog.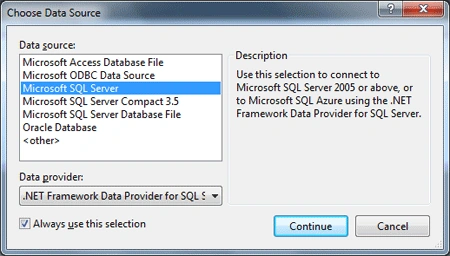
Select Microsoft SQL Server from the list above and click continue. Now the Add
Connection dialog will appear as shown below.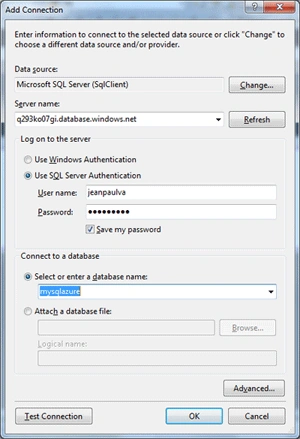
Enter the following
- SQL Azure Server Name
- User Name
- Password

Gowtham RajamanickamPosted Apr 20, 2015, 3:28 PM
good one...