
Introduction
Welcome again! We're always here to present new topics in Windows Phone App development, because it’s all about Windows Phone. It’s probably our last part of Windows Phone Controls. Today we’ll talk about the Image control in Windows Phone. It’s really awesome and you’ll definitely like it. So let’s get crackiing in it, the Windows Phone Image Control.
Working with Image Control
You can use an Image control from the Toolbox or just write a simple code like that and you need to use four RadioButtons. We talked about RadioButtons in our first part of this section Windows Phone Controls – Part 1. If you aren’t familiar with RadioButtons then feel free to have a look at that. So, our design looks like this picture below.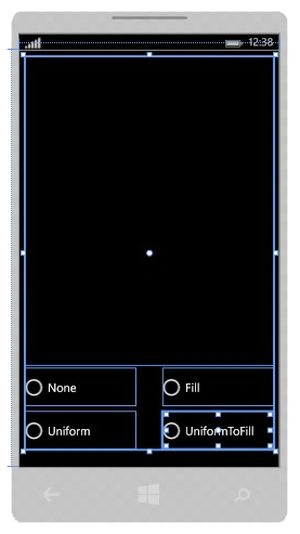
Figure 1
Adding an Image to Our Project
Now we have a little bit of work to go. We need to add an image to our project. Just right-click in the Solution Explorer and go to Add >> New Folder.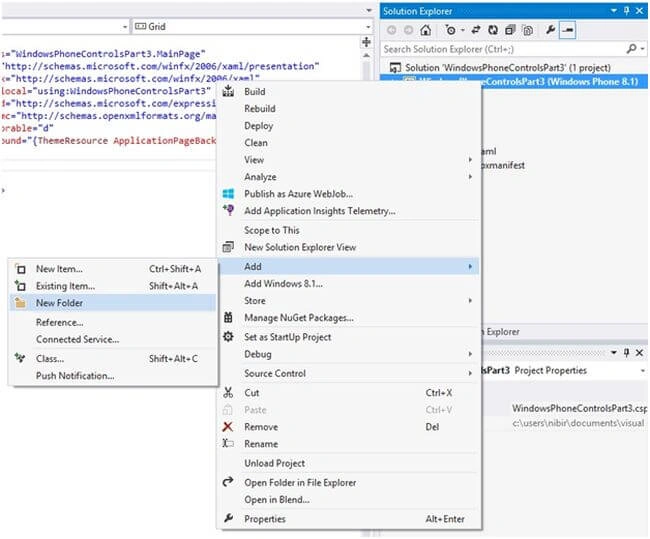
Figure 2
Give it a name such as “Images”.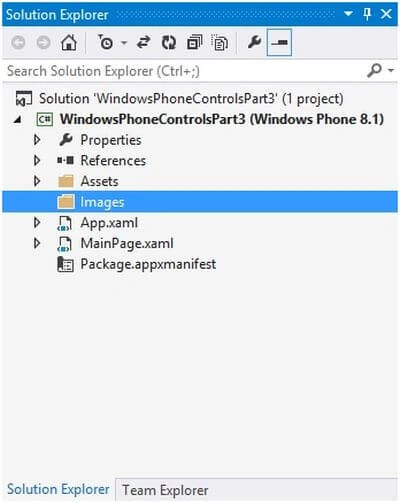
Figure 3
Now, right-click on the “Images” folder and go to Add >> Existing Item.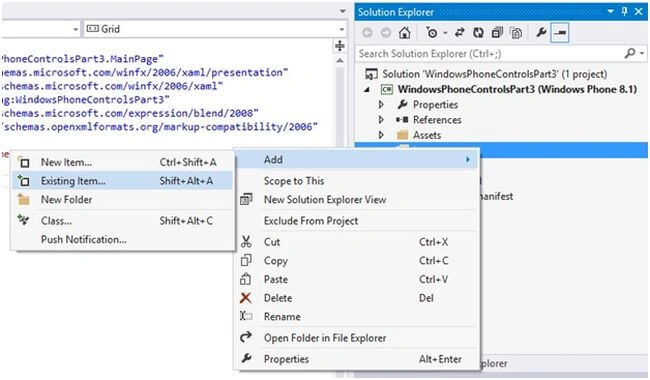
Figure 4
Now, go to your destination directory to select your desired image. Select and add it.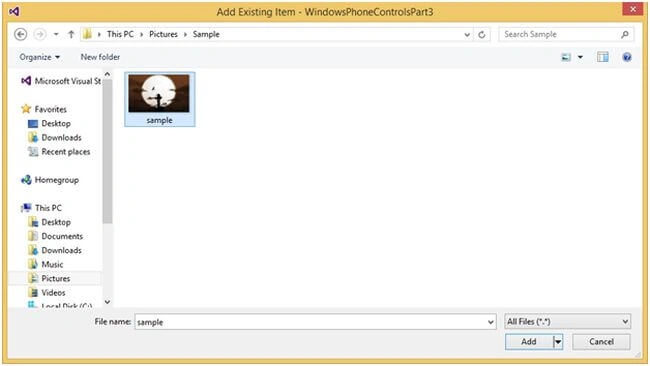
Figure 5
Designing UI and Code Behind
Now, in the XAML code show the path of the image you’ve added in the Source property of the Image control. The XAML code is given below.

Windows Phone Controls: Part 3
2 Comments
Join the conversation! Your thoughts help the community grow.
Sign in to leave a comment
It is the same account you read, post and publish with — and you will come straight back to this page.

Vaibhav DeshmukhPosted Oct 23, 2015, 5:48 AM
Nice ,Very helpful
Mrunalini AyyagariPosted Oct 31, 2014, 5:27 AM
very useful to beginers