

Introduction
- In this article, I have explained about working with Force Sensor using Arduino Mega 2560.
- It explains about sensor with the pressure of the mode.
Parts Of List
- Arduino Mega 2560
- Force Sensor
- LED
- Hook Up wires
- Bread Board
Force Sensor
- This is a force sensitive resistor with a round, 0.5" diameter, sensing area.
- This FSR will vary its resistance depending on how much pressure is being applied to the sensing area.
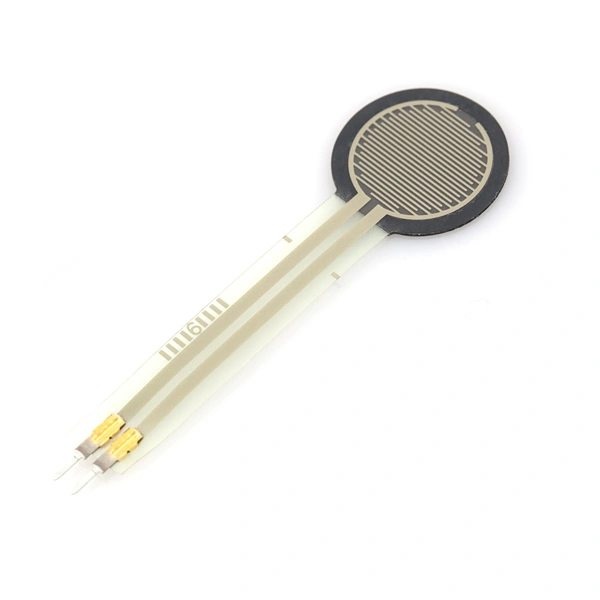
Figure 1: Force Sensor
Connection
Step 1: >Connection from Sensor to Arduino Mega 2560.
- Connect the sensor first pin to the Analog pin of Ao to the board
- Connect the sensor second pin to the 5v of the board.
Step 2: Connection from LED to Arduino Mega 2560.
- Connect the positive pin to the digital pin of 03 to the board.
- Connect the negative pin to the Gnd of the board.
Programming
- int ledpin = 3;
- int sensorPin = A1;
- int value;
- void setup()
- {
- pinMode(ledpin, OUTPUT);
- Serial.begin(9600); // Baud Rate
- }
- void loop()
- {
- value = analogRead(sensorPin);
- Serial.println(Force: );
- value = map(value, 0, 1023, 0, 255);
- Map value 0 - 1023 to 0 - 255(PWM)
- analogWrite(ledpin, value);
- delay(100);
- }
Explanation
- This explains about the pressure of the sensor mode.
- It can have a high range in the force that we have given to the sensor.
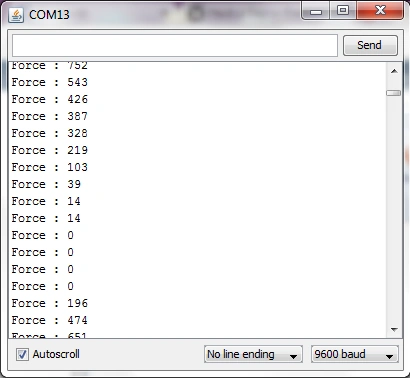
Figure 2: Output
Sr KarthigaPosted May 25, 2016, 8:08 AM
thank you raja sir
Sr KarthigaPosted May 25, 2016, 8:08 AM
thank you vignesh sir
Sr KarthigaPosted May 25, 2016, 8:08 AM
thank you santhakumar sir
RajaPosted May 24, 2016, 2:43 AM
Nice Article...
Vignesh ManiPosted May 21, 2016, 9:28 AM
Nice one
Santhakumar MunuswamyPosted May 21, 2016, 2:04 AM
Thank you for nice work
Sr KarthigaPosted May 20, 2016, 10:38 AM
Thank you bhuvanesh sir
Sr KarthigaPosted May 20, 2016, 10:37 AM
Thank you neeraj sir
Sr KarthigaPosted May 20, 2016, 10:37 AM
thank you debasis sir
Sr KarthigaPosted May 20, 2016, 10:36 AM
thank you prasanna
Bhuvanesh MohankumarPosted May 19, 2016, 9:26 AM
Nice, I am knowing about many sensor when I read your article :)
Neeraj KumarPosted May 19, 2016, 7:16 AM
Nice article
Debasis SahaPosted May 19, 2016, 6:26 AM
Good One..
Prasanna MuraliPosted May 19, 2016, 4:48 AM
Nice one...