


In this article we will learn about the HTML Data Source of Windows Phone App Studio. We will create a static app of two pages as a demo for learning how to use this tool.
HTML Data Source
In Windows Phone App Studio we have various types of Data Sources. Some of the Data Sources are for dynamic purposes and some are for static use. A HTML Data Source is in that category. It is a Data Source that holds the HTML content. It supports only basic HTML tags like div, image, table, anchor and so on. The Style is tag is not supported. This HTML Data Source comes with one detail page that is used for displaying the HTML data. This Data Source suffers from one shortcoming, the finite length of HTML. You can enter the HTML content up to the length of 2048 characters. Since this tool is in beta stage, we can expect to have a remedy to this problem in the future releases from Microsoft. This issue is also raised in the user voice forum of Microsoft.
When to use
There is no specific rule for it that says when one should use it or not. It's totally a user choice. But it is good for:
- simple static text display.
- About page of the App.
- Help or App instructions.
Overcoming 2048 size
As I said, it supports a maximum of 2048 characters. To overcome this limit we can use more then one HTML Data Source. All those HTML Data Sources can be linked using menu items. To understand it better consider this example, In a book the index page is like your first app page that contains a link to other pages. Here other pages are nothing but HTML Data Sources. In this way you can create various page based apps. From this technique you can create various tutorials, tips, tricks, shortcuts and so on like apps. The HTML Data Source will be very useful in that case.

To add the HTML Data Source:
- First open the "Configure App content" page of App Studio.
- Click on "+" and select "Add Section" from the pop-up.
- On add section page, add your section name
- Choose the HTML as the Data Source type
- Enter the Data Source name.
- Click "Save changes".
You are done with adding the Data Source. Now the next step is to configure it.
Setting HTML Data Source
To add the data or content or more precisely HTML to your Data Source:
- Click on the newly added Data Source.
- Enter your HTML.
- The editor can take HTML tags as well as simple text.
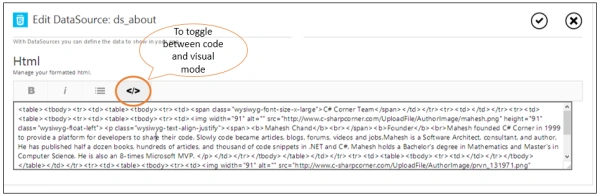
- If you want to use the HTML tags then click on "Show code".
- Now you can insert your HTML code.
- To hide to code and to see the visuals click on "Show code" again.
- The editor also supports the direct HTML copy and paste operation.
- You can copy the web page section and paste it into an editor. The editor will automatically drop the unsupported tags. This technique is used in my demo.
Demo App




Join the conversation! Your thoughts help the community grow.