

Prerequisites
- Visual Studio 2015
Now, let's get started with the following steps:
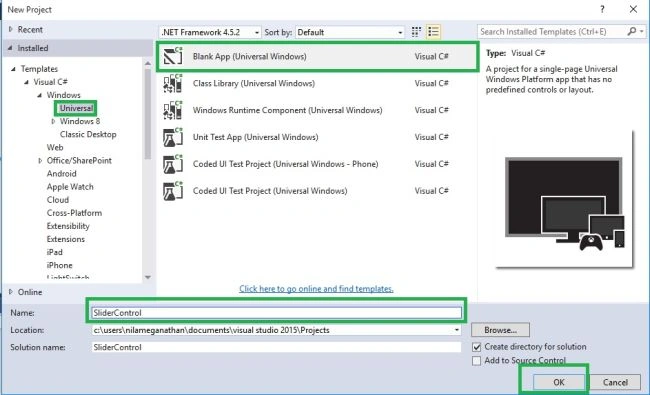
Step 1 : Create Windows Universal Project.Open Visual Studio 2015 and click File -> New -> Project option for New Universal app.

Step 2: Give the Project Name,
Afterwards, New Project Window will open. You can select an Installed -> Template -> Visual C# -> Windows -> Universal and select a Blank App (Universal Windows).
Type Project Name Slider control and click OK.
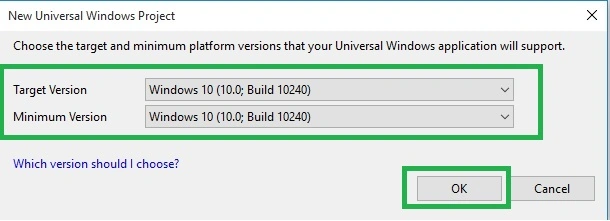
Step 3: Set the platform versions.
Here, we choose the Target Version, Minimum Version for our Universal Windows Application and click OK.
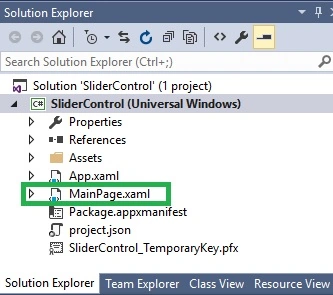
Step 4: Choose Designer Window.
Now, we go to the Solution Explorer and select MainPage.xaml.
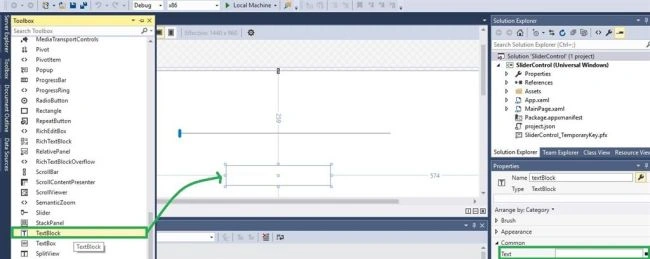
Step 5: Design the app.
Drag the Slider Control from the tool box and change the Name to Slider control in the Property Window.

Next, add the Text block from the tool box and change the text property value, which is empty in the Property Window.
Step 6: Add the coding.
Now, we want to bind the Slider control value to the Text Block. Thus, add XAML code, given below, to the Text Block in MainPage.xaml.

- Text="{Binding Value, ElementName=SliderControl, Mode=OneWay}"/>
Now, we are ready to run our project. Thus, click the Local Machine to run the Application.

Output

Now, we can change the TextBox value by moving the slider from left to right.
Conclusion: I hope you understood Slider control in Universal Windows and how to run it.
Ramesh PalaniappanPosted Aug 24, 2016, 12:53 AM
Good one
Vignesh ManiPosted Aug 23, 2016, 9:09 AM
Good one