

Hello everybody! Today, I shall show you how to make a simple Simsimi chat application.
Prerequisites
- Simsimi API key
- Bubble View
- Newtonsoft.json
- Xamarin Android Support Design
- Icon of Simsimi and Arrow
About Request Parameters:
Parameter | Value | Required | Default | Description |
Key | String | Yes | Your key value | |
Text | String | Yes | Query message | |
Language code | String | Yes | Language code(List) | |
Ft | Double(0.0 ~ 1.0) | 0.0 | 1.0 : 'Bad Word Discriminator' |
Step 1
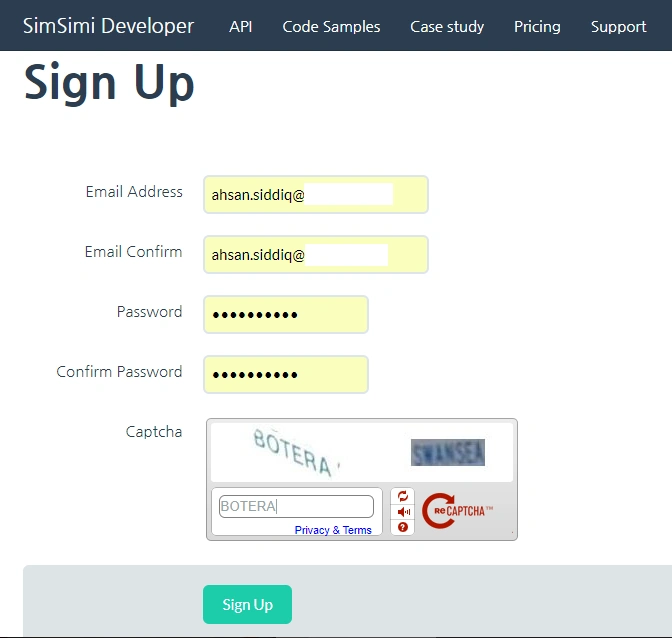
First, we need to subscribe Simsimi API key. Go to developer.simsimi.com
Create an account on Simsimi Developer.
Step 2
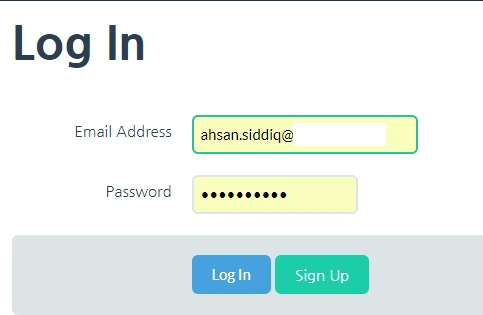
Next, login to your account by providing the login email and password.
Step 3
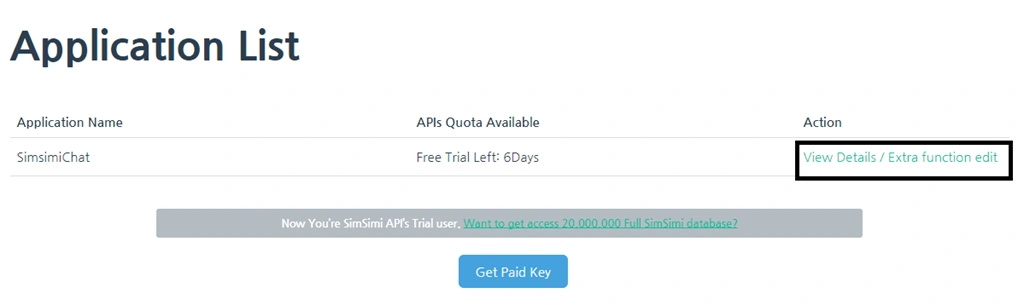
Now, go to application list and click on View Details/Extra function edit and get 7 days’ free trial key.
Step 4
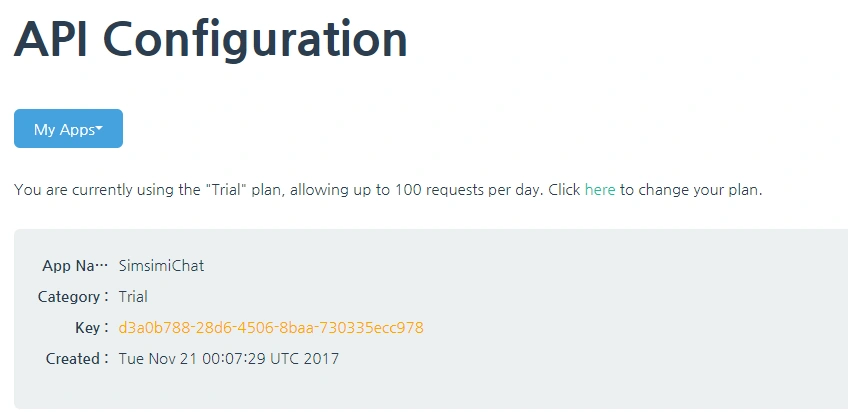
Give this an application name and purpose of trial. Now, you can use this API to request Simsimi to talk.
Create Xamarin Android Application
Step 1
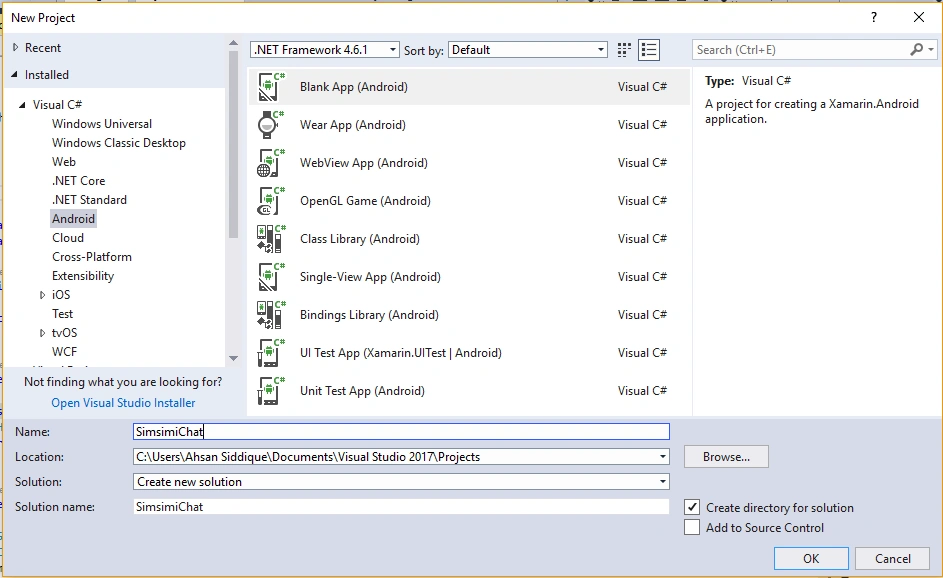
Open Visual Studio and go to New Project-> Templates-> Visual C#-> Android-> Blank app. Give it a name, like SimsimiChat.
Step 2
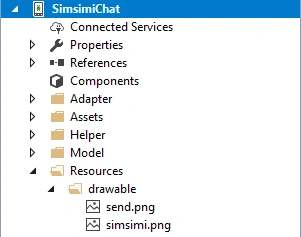
Go to Solution Explorer -> Project Name -> Resources-> Drawable right click Arrow and Simsimi icon. Paste into the drawable folder.
Step 3
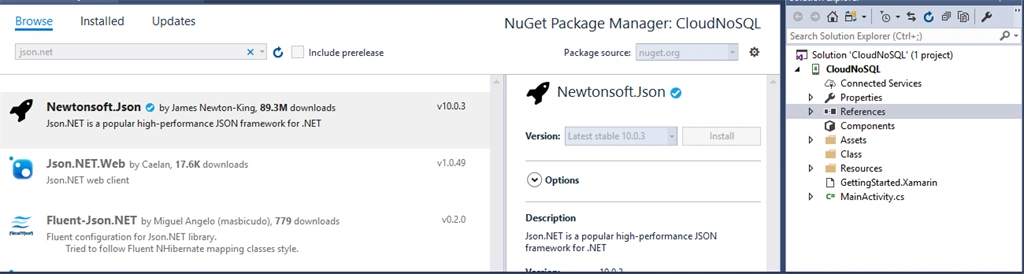
Next, go to Solution Explorer-> Project Name-> References. Then, right-click to "Manage NuGet Packages" and search for JSON. Install the Newtonsoft.json package.
Step 4
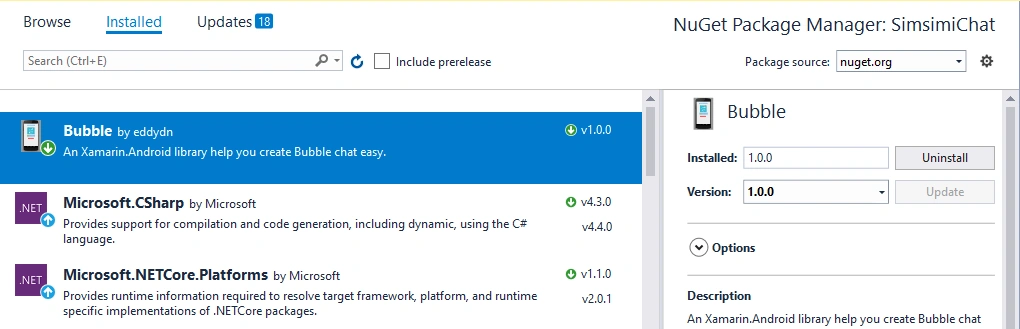
Similarly, go to Solution Explorer-> Project Name-> References. Then, right-click to "Manage NuGet Packages" and search for Bubble. Install the Bubble package.
Step 5
Now again, go to Solution Explorer-> Project Name-> References. Then, right-click to "Manage NuGet Packages" and search for Xamarin.Android.Support.Design. Install the Support Design Packages.
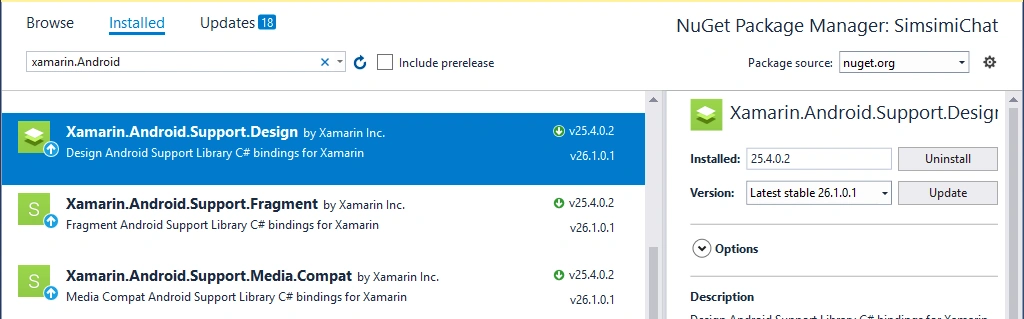
Step 6
Next, open Solution Explorer-> Project Name-> Resources-> Layout-> Main.axml. Open this main layout file and add the following code.
(File Name: Main.axml)
(Folder Name: Layout)
- <?xml version="1.0" encoding="utf-8"?>
- <RelativeLayout xmlns:android="http://schemas.android.com/apk/res/android" android:layout_width="match_parent" android:layout_height="match_parent">
- <android.support.design.widget.FloatingActionButton android:clickable="true" android:src="@drawable/send" android:id="@+id/fab" android:tint="@android:color/white" android:layout_alignParentBottom="true" android:layout_alignParentEnd="true" android:layout_width="wrap_content" android:layout_height="wrap_content" />
- <ListView android:layout_width="match_parent" android:layout_height="match_parent" android:layout_above="@+id/fab" android:layout_marginBottom="20dp" android:id="@+id/list_of_message" android:stackFromBottom="true" android:transcriptMode="alwaysScroll" android:dividerHeight="0dp" android:divider="@android:color/transparent" />
- <EditText android:layout_toLeftOf="@+id/fab" android:layout_alignParentBottom="true" android:layout_alignParentStart="true" android:id="@+id/user_message" android:layout_width="match_parent" android:layout_height="wrap_content" />
- </RelativeLayout>
Step 7
Next, add a new Layout, go to Solution Explorer-> Project Name-> Resources-> Layout-> Right click to add a new item, select Layout, give it a name as List_item_message_send.axml. Open this layout file and add the following code.
(File Name: List_item_message_send.axml)
(Folder Name: Layout)
AXML Code
- <?xml version="1.0" encoding="utf-8"?>
- <RelativeLayout xmlns:android="http://schemas.android.com/apk/res/android" xmlns:app="http://schemas.android.com/apk/res-auto" android:layout_width="match_parent" android:layout_height="match_parent">
- <com.github.library.bubbleview.BubbleTextView android:id="@+id/text_message" android:padding="10dp" android:textColor="#FFF" android:layout_alignParentRight="true" android:layout_width="wrap_content" android:layout_height="wrap_content" app:arrowWidth="8dp" app:angle="8dp" app:arrowHeight="10dp" app:arrowPosition="14dp" app:arrowLocation="right" app:arrowCenter="true" app:bubbleColor="#7EC0EE" />
- </RelativeLayout>
Step 8
Next, add another new Layout. Go to Solution Explorer-> Project Name-> Resources-> Layout-> Right click to add a new item, select Layout, give it a name as List_item_message_recv.axml. Open this layout file and add the following code.
(File Name: List_item_message_recv.axml)
(Folder Name: Layout)
AXML Code
- <?xml version="1.0" encoding="utf-8"?>
- <RelativeLayout xmlns:android="http://schemas.android.com/apk/res/android" xmlns:app="http://schemas.android.com/apk/res-auto" android:layout_width="match_parent" android:layout_height="match_parent">
- <ImageView android:id="@+id/simsimi_image" android:src="@drawable/simsimi" android:layout_width="40dp" android:layout_height="40dp" />
- <com.github.library.bubbleview.BubbleTextView android:id="@+id/text_message" android:padding="10dp" android:layout_width="wrap_content" android:layout_height="wrap_content" android:textColor="#FFF" android:layout_toRightOf="@id/simsimi_image" app:arrowWidth="8dp" app:angle="8dp" app:arrowHeight="10dp" app:arrowPosition="14dp" app:arrowLocation="left" app:arrowCenter="true" app:bubbleColor="#FF4081" />
- </RelativeLayout>
Next, go to Solution Explorer-> Project Name and right-click. Select Add -> New Item-> Class. Give it a name as SimsimiModel.cs and write the following code.
(File Name: SimsimiModel.cs)
C# Code
- namespace SimsimiChat.Model {
- public class SimsimiModel {
- public string response {
- get;
- set;
- }
- public int id {
- get;
- set;
- }
- public int result {
- get;
- set;
- }
- public string msg {
- get;
- set;
- }
- }
- }
Hafiz IrfanPosted Oct 16, 2019, 9:21 AM
Do you have any experience in xamarin from app with chat.?
Hafiz IrfanPosted Oct 16, 2019, 9:20 AM
Hello, i want chat in xamarin froms.?