

Introduction
This article demonstrates how to add custom background image animation for UWP in Xamarin.Forms application. This function is available in Universal Windows Platform applications.
This article demonstrates how to add custom background image animation for UWP in Xamarin.Forms application. This function is available in Universal Windows Platform applications.
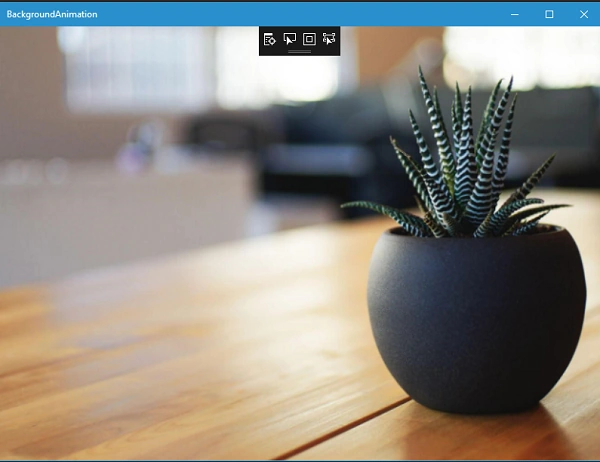
Let's start.
Step 1
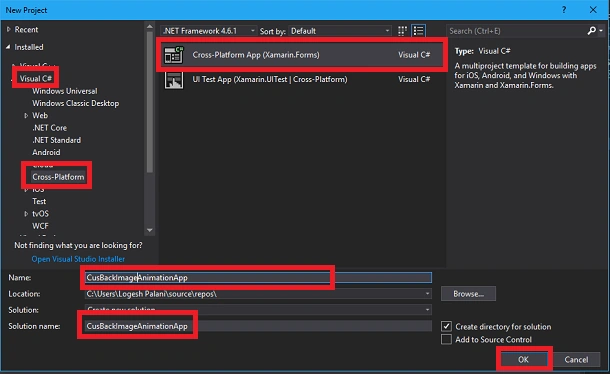
Create a Xamarin.Forms app by going to File >> New >> Visual C# >> Cross Platform >> Cross platform app (Xamarin.Native or Xamarin.Forms) and click OK.
Create a Xamarin.Forms app by going to File >> New >> Visual C# >> Cross Platform >> Cross platform app (Xamarin.Native or Xamarin.Forms) and click OK.
( Project Name :CusBackImageAnimationApp)
Step 2
Now, select Blank App >>Platform (Android, IOS, Windows(UWP)) >> Xamarin.Forms >> .NET Standard and click OK.
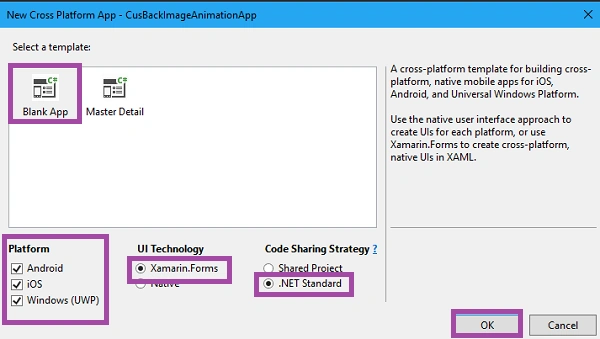
Now, select Blank App >>Platform (Android, IOS, Windows(UWP)) >> Xamarin.Forms >> .NET Standard and click OK.
Step 3
After the project creation, add User Control to your UWP application. For that, go to Solution Explorer >>select and right-click to CusBackImageAnimarionUserControl.UWP app followed by selecting Add >> New Item >> Visual C# >> User Control and give the page a name as BackgroundAnimationUserControl. Click OK.
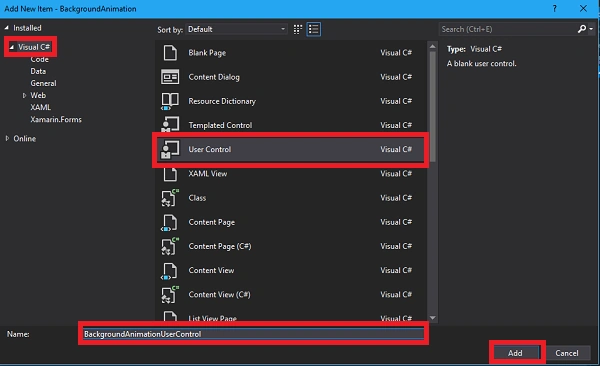
After the project creation, add User Control to your UWP application. For that, go to Solution Explorer >>select and right-click to CusBackImageAnimarionUserControl.UWP app followed by selecting Add >> New Item >> Visual C# >> User Control and give the page a name as BackgroundAnimationUserControl. Click OK.
Step 4
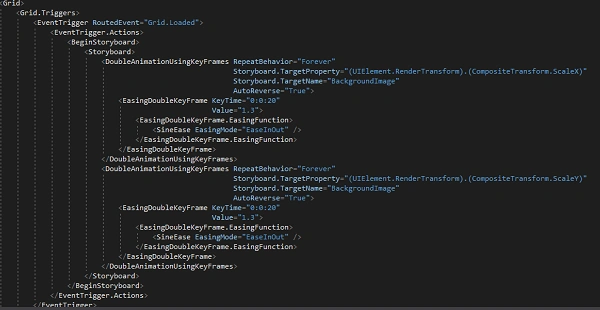
In this step, open BackgroungAnimationUserControl.Xaml page. For that, double-click to get its design view. Here is the code to be pasted into it.
In this step, open BackgroungAnimationUserControl.Xaml page. For that, double-click to get its design view. Here is the code to be pasted into it.
Used toolbox items
- Image - To use background animation
XAML Code
- <UserControl
- x:Class="BackgroundAnimation.BackgroundAnimationUserControl"
- xmlns="http://schemas.microsoft.com/winfx/2006/xaml/presentation"
- xmlns:x="http://schemas.microsoft.com/winfx/2006/xaml"
- xmlns:local="using:BackgroundAnimation"
- xmlns:d="http://schemas.microsoft.com/expression/blend/2008"
- xmlns:mc="http://schemas.openxmlformats.org/markup-compatibility/2006"
- mc:Ignorable="d">
- <Grid>
- <Grid.Triggers>
- <EventTrigger RoutedEvent="Grid.Loaded">
- <EventTrigger.Actions>
- <BeginStoryboard>
- <Storyboard>
- <DoubleAnimationUsingKeyFrames RepeatBehavior="Forever"
- Storyboard.TargetProperty="(UIElement.RenderTransform).(CompositeTransform.ScaleX)"
- Storyboard.TargetName="BackgroundImage"
- AutoReverse="True">
- <EasingDoubleKeyFrame KeyTime="0:0:20"
- Value="1.3">
- <EasingDoubleKeyFrame.EasingFunction>
- <SineEase EasingMode="EaseInOut" />
- </EasingDoubleKeyFrame.EasingFunction>
- </EasingDoubleKeyFrame>
- </DoubleAnimationUsingKeyFrames>
- <DoubleAnimationUsingKeyFrames RepeatBehavior="Forever"
- Storyboard.TargetProperty="(UIElement.RenderTransform).(CompositeTransform.ScaleY)"
- Storyboard.TargetName="BackgroundImage"
- AutoReverse="True">
- <EasingDoubleKeyFrame KeyTime="0:0:20"
- Value="1.3">
- <EasingDoubleKeyFrame.EasingFunction>
- <SineEase EasingMode="EaseInOut" />
- </EasingDoubleKeyFrame.EasingFunction>
- </EasingDoubleKeyFrame>
- </DoubleAnimationUsingKeyFrames>
- </Storyboard>
- </BeginStoryboard>
- </EventTrigger.Actions>
- </EventTrigger>
- </Grid.Triggers>
- <Image x:Name="BackgroundImage"
- Source="Images/logesh.JPG"
- Stretch="UniformToFill"
- RenderTransformOrigin="0.5,0.5">
- <Image.RenderTransform>
- <CompositeTransform/>
- </Image.RenderTransform>
- </Image>
- </Grid>
- </UserControl>
Step 5
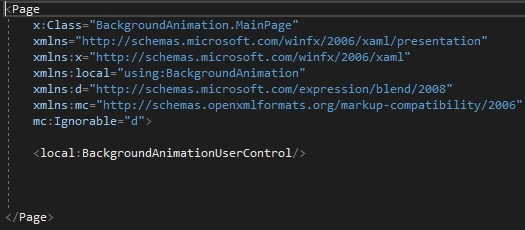
Afterward, open Solution Explorer >> CusBackImageAnimationApp.UWP >> click open MainPage.xaml page. Given below is the code for this page.
Afterward, open Solution Explorer >> CusBackImageAnimationApp.UWP >> click open MainPage.xaml page. Given below is the code for this page.
XAML Code
- <Page
- x:Class="BackgroundAnimation.MainPage"
- xmlns="http://schemas.microsoft.com/winfx/2006/xaml/presentation"
- xmlns:x="http://schemas.microsoft.com/winfx/2006/xaml"
- xmlns:local="using:BackgroundAnimation"
- xmlns:d="http://schemas.microsoft.com/expression/blend/2008"
- xmlns:mc="http://schemas.openxmlformats.org/markup-compatibility/2006"
- mc:Ignorable="d">
- <local:BackgroundAnimationUserControl/>
-
- </Page>
Step 6
After the design view, go to Build menu and click "Configure Manager ". Here, you can configure your Universal Windows Platform startup settings.
After the design view, go to Build menu and click "Configure Manager ". Here, you can configure your Universal Windows Platform startup settings.
Click F5 or "Build and Run " to run your UWP application. After running this project, you will get the result like below.
Finally, we have successfully changed a Xamarin.Forms custom UWP application in which we can change the background image.
Ahsan SiddiquePosted Dec 25, 2017, 12:53 AM
I guess this is only a picture not a Animation?