

Scope
This Xamarin Workshop Guide was created for the The Portuguese National Meeting of IT Students (ENEI) by Sara Silva and the original content is available here. To extend it to the global community, it was published in a new project called Xam Community Workshop and the main goal is for any developer or user group to customize it for their events.
Before reading this article you must read:
- Xamarin Guide 1: Create a Xamarin Forms Project
- Xamarin Guide 2: Create the Model and the Data Source
- Xamarin Guide 3: Create the SessionsView
- Xamarin Guide 4: Create the SessionDetailsView
- Xamarin Guide 5: Add ShareService
- Xamarin Guide 6: Add Splash Screen, Name and Version
- Xamarin Guide 7: Add Support For WinRT Apps
- Xamarin Guide 8: Change the App.cs to App.xaml
- Xamarin Guide 9: Use MVVM Pattern
- Xamarin Guide 10: Move ItemTemplate to Resources
In this step you will learn how to create the user interface to the LoginView using the Font Awesome, how to create the LoginViewModel and how to handle the navigation among pages.
Creating the UI using Font Awesome
The Font Awesome supports icons that can be displayed using a Label. That way it is possible to use this font to show an icon in the application. In this step you will use the Microsoft, Google and Facebook icons to display in the UI, this way you do not need to use images.
To start, open the ENEI.SessionsApp project and add a new XAML page in the Views folder, as in the following:
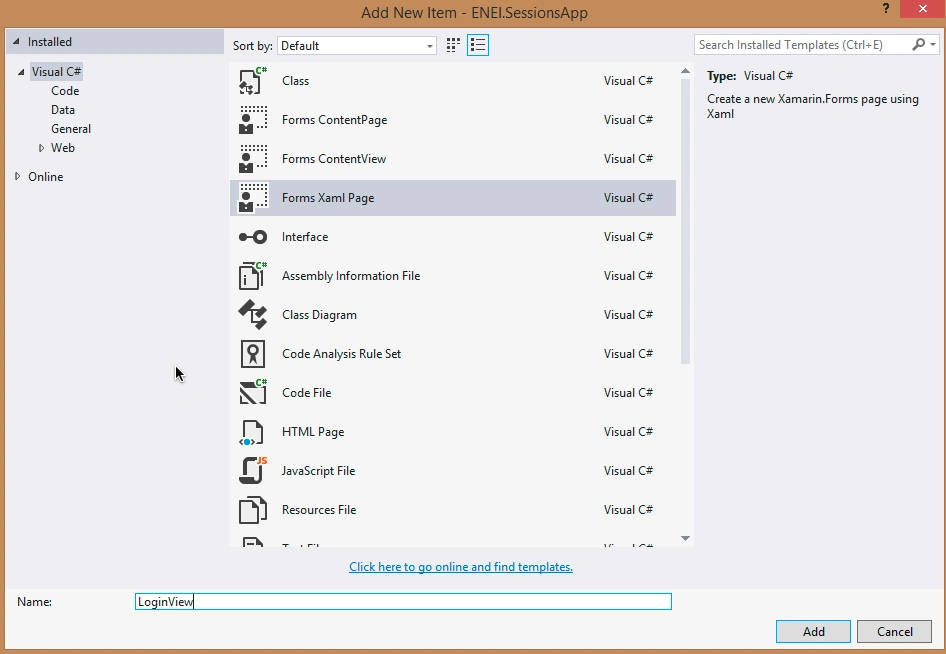
The result will be the following XAML page:
- <?xml version="1.0" encoding="utf-8" ?>
- <ContentPage
- xmlns="http://xamarin.com/schemas/2014/forms"
- xmlns:x="http://schemas.microsoft.com/winfx/2009/xaml"
- x:Class="ENEI.SessionsApp.Views.LoginView">
- <Label Text="{Binding MainText}" VerticalOptions="Center" HorizontalOptions="Center" />
- </ContentPage>
In general you need:
- In ENEI.SessionsApp.iOS
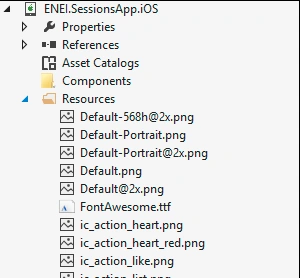
Figure: The Resources folder
Change the Info.plist, to include the font.
In Visual Studio or Xamarin Studio it is possible to edit the XML as in the following:
- <?xml version="1.0" encoding="UTF-8"?>
- <!DOCTYPE plist PUBLIC "-//Apple//DTD PLIST 1.0//EN" "http://www.apple.com/DTDs/PropertyList-1.0.dtd">
- <plist version="1.0">
- <dict>
- …
- <key>UIAppFonts</key>
- <array>
- <string>FontAwesome.ttf</string>
- </array>
- </dict>
- </plist>
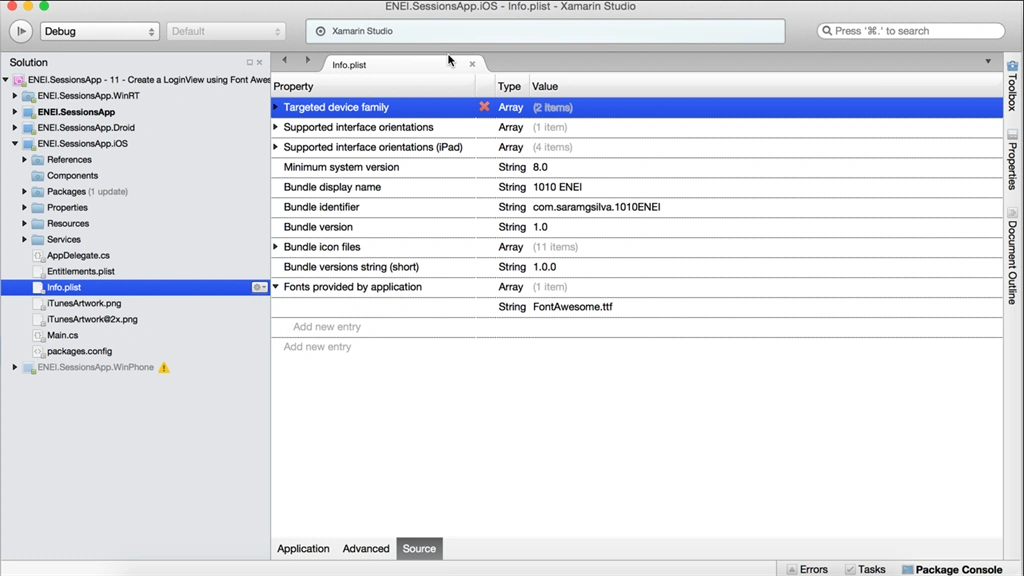
Figure: The Source panel from Info.plist in Xamarin Studio
Android
Add the FontAwesome.ttf to the Assets folder as in the following:
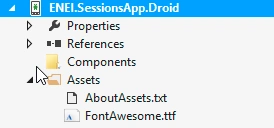
Figure: The Assets folder
Create a Render for a CustomLabel
- [assembly: ExportRenderer(typeof(CustomLabel), typeof(CustomLabelRenderer))]
- namespace ENEI.SessionsApp.Droid.Renders {
- public class CustomLabelRenderer: LabelRenderer {
- protected override void OnElementChanged(ElementChangedEventArgs < Label > e) {
- base.OnElementChanged(e);
- var label = (TextView) Control;
- Typeface font = Typeface.CreateFromAsset(Forms.Context.Assets, "FontAwesome.ttf");
- label.Typeface = font;
- }
- }
- }
- Add the FontAwesome.ttf to the Assets/Fonts folder
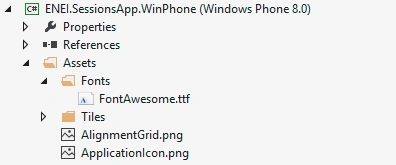
Figure: The Assets/Folder folder
- Set the FontAwesome.ttf as Content and Copy Always
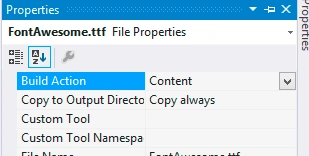
Figure: Configurations
In ENEI.SessionsApp
- Add a CustomLabel class.
- Define the FontFamily for each platform.
- public class CustomLabel: Label {
- public CustomLabel() {
- FontFamily = Device.OnPlatform(
- iOS: "FontAwesome",
- Android: null,
- WinPhone: @
- "\Assets\Fonts\FontAwesome.ttf#FontAwesome");
- if (Device.OS == TargetPlatform.Windows) {
- FontFamily = @
- "\Assets\Fonts\FontAwesome.ttf#FontAwesome";
- }
- }
- }
- <?xml version="1.0" encoding="utf-8" ?>
- <ContentPage
- xmlns="http://xamarin.com/schemas/2014/forms"
- xmlns:x="http://schemas.microsoft.com/winfx/2009/xaml"
- xmlns:controls="clr-namespace:ENEI.SessionsApp.Controls;assembly=ENEI.SessionsApp"
- x:Class="ENEI.SessionsApp.Views.LoginView"
- Title="Authentication" BackgroundColor="White" x:Name="ContentPage"
- Icon="ic_action_users.png">
- <Grid BackgroundColor="White">
- <Grid.RowDefinitions>
- <RowDefinition Height="Auto" />
- <RowDefinition Height="*" />
- </Grid.RowDefinitions>
- <!-- Title - Only for WP-->
- <StackLayout Grid.Row="0" Orientation="Horizontal" Padding="20,10,0,0">
- <StackLayout.IsVisible>
- <OnPlatform Android="false" WinPhone="true" iOS="false"
- x:TypeArguments="x:Boolean" />
- </StackLayout.IsVisible>
- <Image WidthRequest="48"
- HeightRequest="38"
- Source="Images/ic_action_users.png"/>
- <Label FontSize="Medium" FontAttributes="Bold"
- TextColor="Black">
- <OnPlatform Android="" WinPhone="Authentication"
- iOS="" x:TypeArguments="x:String" />
- </Label>
- </StackLayout>
- <StackLayout Spacing="20" HorizontalOptions="Center" VerticalOptions="CenterAndExpand" Grid.Row="1">
- <!—login by social network will be here -->
- </StackLayout>
- </Grid>
- </ContentPage>
- <StackLayout WidthRequest="300" HeightRequest="60" Orientation="Horizontal" BackgroundColor="#3b5998" HorizontalOptions="Center" Spacing="20">
- <controls:CustomLabel FontSize="Small"
- HorizontalOptions="CenterAndExpand"
- Text=""
- TextColor="White"
- VerticalOptions="CenterAndExpand" />
- <Label FontAttributes="Bold"
- FontSize="Small"
- HorizontalOptions="StartAndExpand"
- Text="Facebook"
- TextColor="White"
- VerticalOptions="CenterAndExpand" />
- </StackLayout>
- <StackLayout WidthRequest="300" HeightRequest="60" Orientation="Horizontal" BackgroundColor="#dd4b39" HorizontalOptions="Center" Spacing="20">
- <controls:CustomLabel FontSize="Small"
- HorizontalOptions="CenterAndExpand"
- Text=""
- TextColor="White"
- VerticalOptions="CenterAndExpand" />
- <Label FontAttributes="Bold"
- FontSize="Small"
- HorizontalOptions="StartAndExpand"
- Text="Google"
- TextColor="White"
- VerticalOptions="CenterAndExpand" />
- </StackLayout>
- <StackLayout WidthRequest="300" HeightRequest="60" Orientation="Horizontal" BackgroundColor="#219dfd" HorizontalOptions="Center" Spacing="20">
- <controls:CustomLabel FontSize="Small"
- HorizontalOptions="CenterAndExpand"
- Text=""
- TextColor="White"
- VerticalOptions="CenterAndExpand" />
- <Label FontAttributes="Bold"
- FontSize="Small"
- HorizontalOptions="StartAndExpand"
- Text="Microsoft"
- TextColor="White"
- VerticalOptions="CenterAndExpand" />
- </StackLayout>
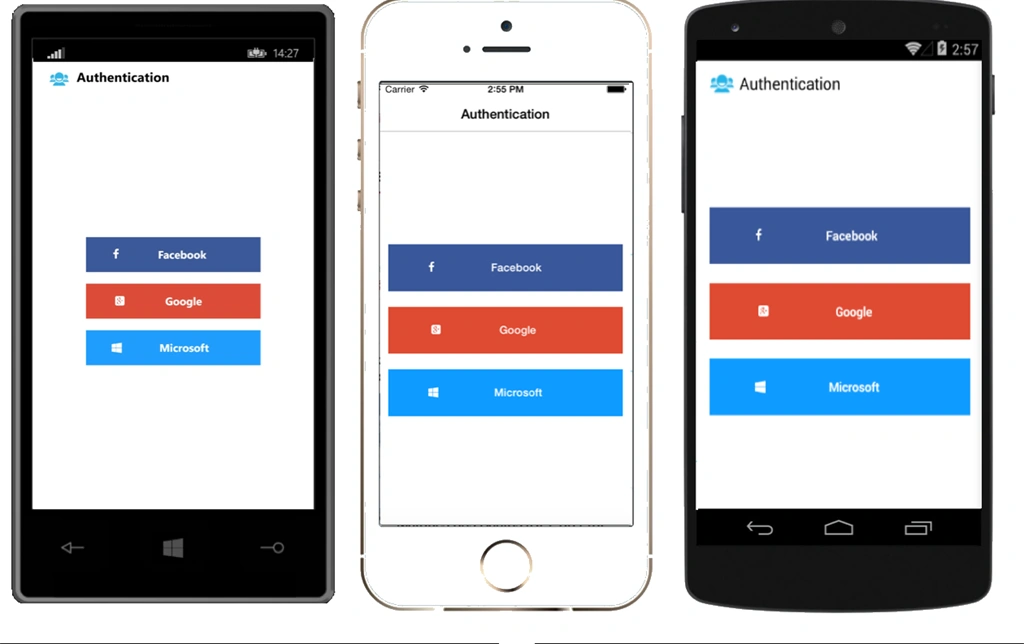
Figure: The LoginView
Create the LoginViewModel
At this moment, you have the user interface to the LoginView, this way it is possible to define the LoginViewModel, that will have the action for each option in LoginView.
Open the ENEI.SessionsApp project and add the LoginViewModel to the ViewModels folder, as in the following:
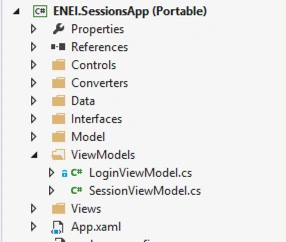
Figure: The LoginViewModel
Then create the LoginCommnad, as in the following:
- public class LoginViewModel {
- public LoginViewModel() {
- LoginCommand = new Command(DoLogin);
- }
- private void DoLogin(object param) {
- var option = param.ToString();
- switch (option) {
- case "facebook":
- //connect with facebook api
- break;
- case "goolge":
- //connect with google api
- break;
- case "microsoft":
- //connect with microsoft api
- break;
- }
- }
- public ICommand LoginCommand {
- get;
- set;
- }
- }
Now, connect the UI with the LoginViewModel and to start, define the LoginViewModel and binding it to the BindingContext as in the following:
- public partial class LoginView: ContentPage {
- public LoginView() {
- InitializeComponent();
- BindingContext = new LoginViewModel();
- }
- }
- <StackLayout WidthRequest="300" HeightRequest="60" Orientation="Horizontal" BackgroundColor="#3b5998" HorizontalOptions="Center" Spacing="20">
- <StackLayout.GestureRecognizers>
- <TapGestureRecognizer CommandParameter="facebook"
- Command="{Binding LoginCommand}"/>
- </StackLayout.GestureRecognizers>
- <controls:CustomLabel FontSize="Small"
- HorizontalOptions="CenterAndExpand"
- Text=""
- TextColor="White"
- VerticalOptions="CenterAndExpand" />
- <Label FontAttributes="Bold"
- FontSize="Small"
- HorizontalOptions="StartAndExpand"
- Text="Facebook"
- TextColor="White"
- VerticalOptions="CenterAndExpand" />
- </StackLayout>
When you run the application you should call the DoLogin method, as in the following:
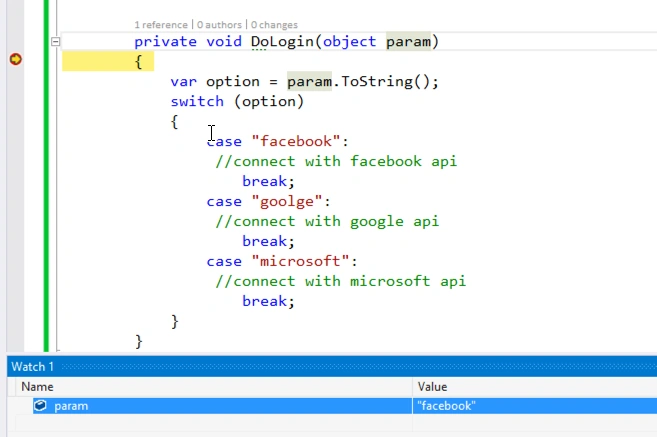
Figure: The DoLogin method in debug mode
Handle the navigation
At this moment you do not have the authentication, but you can create the complete flow to the application. This way, you need to define the navigation among pages, that is the main goal of this step.
To start, you can create a NavMessage, as in the following:
- public class NavMessage {
- public string Page {
- get;
- set;
- }
- public object Param {
- get;
- set;
- }
- }
- public App()
- {
- InitializeComponent();
- MainPage = new NavigationPage(new LoginView()) {
- BarBackgroundColor = Color.White,
- BarTextColor = Color.Black,
- BackgroundColor = Color.White,
- };
- MessagingCenter.Subscribe < NavMessage > (this, "Navigation", navMessage = > {
- switch (navMessage.Page) {
- case "login":
- MainPage = new LoginView();
- break;
- case "sessions":
- MainPage = new NavigationPage(new SessionsView()) {
- BarBackgroundColor = Color.White,
- BarTextColor = Color.Black,
- BackgroundColor = Color.White,
- };
- break;
- case "details":
- MainPage.Navigation.PushAsync(new SessionDetailsView(navMessage.Param as Session), true);
- break;
- }
- });
- }
In the LoginViewModel you should change the DoLogin method to:
- private void DoLogin(object param) {
- var option = param.ToString();
- switch (option) {
- case "facebook":
- //connect with facebook api
- break;
- case "goolge":
- //connect with google api
- break;
- case "microsoft":
- //connect with microsoft api
- break;
- }
- MessagingCenter.Send(new NavMessage {
- Page = "sessions"
- }, "Navigation");
- }
In the SessionsViewModel change the SeeSessionDetails method to:
- private void SeeSessionDetails(object param)
- {
- var session = param as Session;
- if (session != null)
- {
- MessagingCenter.Send(new NavMessage
- {
- Page = "details",
- Param = session
- }, "Navigation");
- }
- }
- public SessionsView()
- {
- InitializeComponent();
- }
Asfend YarPosted Mar 13, 2016, 2:21 PM
nice
Vipul MalhotraPosted Jun 21, 2015, 4:32 AM
Great Article..Thanks for sharing
NitinPosted Apr 28, 2015, 12:14 PM
good one
Karthik Muthu KaruppanPosted Apr 28, 2015, 11:24 AM
Nice one
Santhakumar MunuswamyPosted Apr 28, 2015, 9:55 AM
Good work