
In this blog, let's build a Login Flow with .NET MAUI with Shell.
Authentication in any mobile app is very common. Let's get started with this. It's obvious that it should ask for login only if it isn't authenticated. We will check for authentication if not there we will move to Login page. If login is successful we will move to the Home page. For this example, we will override the back button pressed event to quit the application but you can customize it accordingly as per your need.
For this post, I am using a simple authentication but you can use JWT or any method you want.
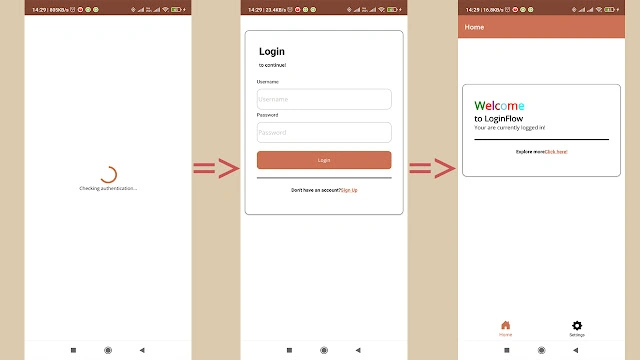
Here is an example of the login flow:
All the pages that have to be used need to be registered with Shell.
If you are a bit familiar with the Shell navigation the first content page is the one that is displayed after startup. So we need to structure the shell accordingly in order.
The pages we are using here for the example:
- Loading Page
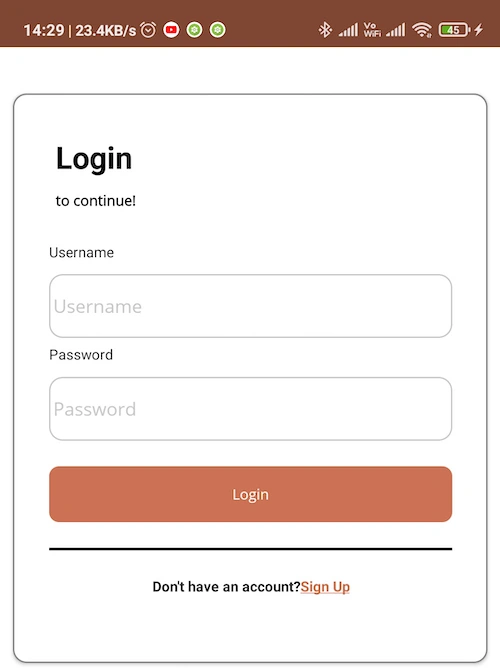
- Login Page
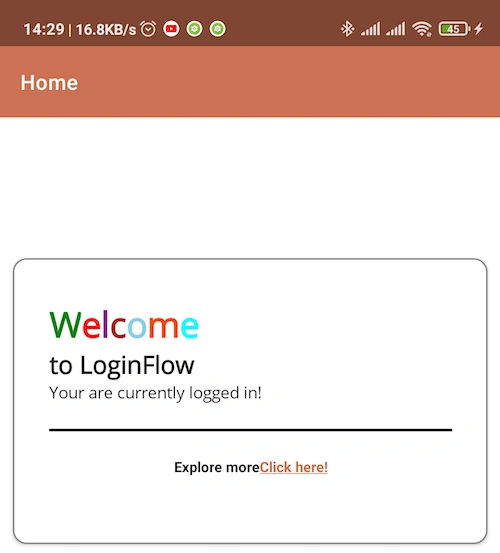
- Home Page
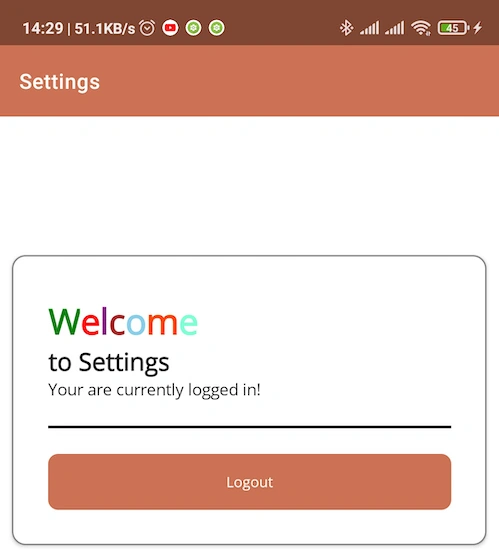
- Settings Page
Here is the AppShell.xaml
<?xml version="1.0" encoding="UTF-8" ?>
<Shell
    x:Class="LoginFlow.AppShell"
    xmlns="http://schemas.microsoft.com/dotnet/2021/maui"
    xmlns:x="http://schemas.microsoft.com/winfx/2009/xaml"
    xmlns:local="clr-namespace:LoginFlow"
    xmlns:views="clr-namespace:LoginFlow.Views"
    Shell.FlyoutBehavior="Disabled">

    <!--Loading Page-->
    <ShellContent
        Title="Home"
        ContentTemplate="{DataTemplate views:LoadingPage}"
        Route="loading" />

    <!--Login Page-->
    <ShellContent
        Title="Login"
        ContentTemplate="{DataTemplate views:LoginPage}"
        Route="login"/>
    <!--Main Page-->
    <TabBar>
        <Tab Title="Home" Icon="house_door_fill.svg">
            <ShellContent
                Icon="house_door_fill.svg"
        Title="Home"
        ContentTemplate="{DataTemplate views:HomePage}"
        Route="home" />

        </Tab>
        <Tab Title="Settings" Icon="gear_fill.svg">
            <ShellContent
                Icon="house_door_fill.svg"
        Title="Settings"
        ContentTemplate="{DataTemplate views:SettingsPage}"
        Route="settings" />
        </Tab>
    </TabBar>

</Shell>
Register all the routes
public partial class AppShell : Shell
{
    public AppShell()
    {
        InitializeComponent();
        //Register all routes
        Routing.RegisterRoute("login", typeof(LoginPage));
        Routing.RegisterRoute("main", typeof(MainPage));
        Routing.RegisterRoute("home", typeof(HomePage));
        Routing.RegisterRoute("settings", typeof(SettingsPage));
    }
}
Jaime StuardoPosted Jul 9, 2023, 2:56 AM
Hello.... after a successful login, how can I show the user information in the flyout header or in a different content page?