

This article explains how to create custom promoted links/tiles in SharePoint with custom sorting.
Technologies Used
- HTML CSS for building tile-like structure.
- CSOM to get data from SharePoint list.
- Knockout JS for binding list data with UI.
Prerequisite
- Add the promoted links app to your site.(I have given it a name as “CustomTiles”). You can use a custom list as well, with the same columns as in promoted links.
- Add a picture library for background images of the promoted links. (Given name as “picsForTiles”).
- Add some data in promoted links app, i.e., “CustomTiles” list.
Below is the screenshot of the application with some random data.
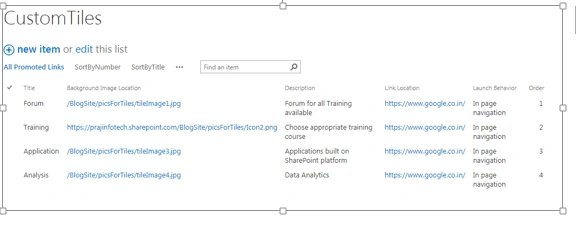
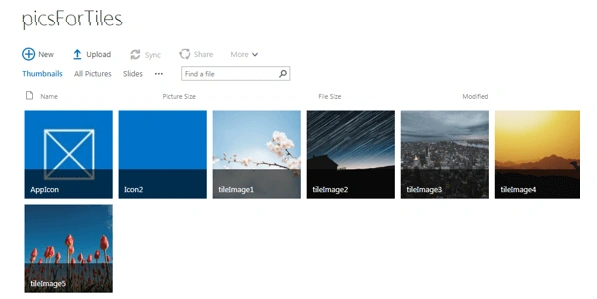
HTML
Add the following HTML with required files in HTML file.
- <!DOCTYPE HTML PUBLIC "-//W3C//DTD XHTML 1.0 Transitional//EN">
- <html>
- <head>
- <title>Custom Promoted Links</title>
- <script src="https://code.jquery.com/jquery-3.3.1.min.js"></script>
- <script src="https://cdnjs.cloudflare.com/ajax/libs/knockout/3.4.2/knockout-min.js"></script>
- <script src="/SiteAssets/JS/getTilesData.js"></script>
- <link rel="stylesheet" href=" /SiteAssets/CSS/customTiles.css" /> </head>
- <body>
- <!--HTML Content--><input type="button" value="Sort By Title" data-bind="click: sortedtilesByTitle()"> <input type="button" value="Sort By Order" data-bind="click: sortedtilesByOrder()"><br/><br/>
- <div class="mainContainer" data-bind="foreach:tiles">
- <div class='card slide-up'>
- <div><img class='image' data-bind="attr:{src: backImage}"> </div>
- <div class='caption'>
- <h2 class='caption-title' data-bind="text:title"></h2>
- <p class='caption-content' data-bind="text:desc"> </p>
- </div>
- </div>
- </div>
- </body>
- </html>
CSS
Content of customTiles.css file is as below.
- .card {
- position: relative;
- width: 200 px;
- height: 200 px;
- float: left;
- margin: 0 10 px 10 px 0;
- cursor: pointer;
- background - color: #ffffff;
- overflow: hidden;
- box - shadow: 0 3 px 6 px rgba(0, 0, 0, 0.16),
- 0 3 px 6 px rgba(0, 0, 0, 0.23);
- }.image {
- width: 200 px;
- height: 200 px;
- background - position: center;
- background - size: cover;
- background - repeat: no - repeat; - webkit - transition - property: -webkit - transform;
- transition - property: -webkit - transform;
- transition - property: transform;
- transition - property: transform,
- -webkit - transform; - webkit - transition - duration: 0.4 s;
- transition - duration: 0.4 s;
- }.caption {
- position: absolute;
- top: auto;
- bottom: 0;
- opacity: 0;
- left: 0;
- width: 100 % ;
- height: 100 px;
- background - color: #ffffff;
- padding: 15 px; - webkit - transform: translateY(100 % );
- transform: translateY(100 % ); - webkit - backface - visibility: hidden;
- backface - visibility: hidden; - webkit - transition: opacity 0.1 s 0.3 s,
- -webkit - transform 0.4 s;
- transition: opacity 0.1 s 0.3 s,
- -webkit - transform 0.4 s;
- transition: transform 0.4 s,
- opacity 0.1 s 0.3 s;
- transition: transform 0.4 s,
- opacity 0.1 s 0.3 s,
- -webkit - transform 0.4 s;
- }.caption - title {
- margin - top: 0;
- margin - bottom: 10 px;
- }.caption - content {
- margin: 0;
- }.caption - link {
- color: #724b31;
- text - decoration: none;
- opacity: 1; - webkit - transition - property: opacity;
- transition - property: opacity; - webkit - transition - duration: 0.15 s;
- transition - duration: 0.15 s; - webkit - transition - timing - function: cubic - bezier(0.39, 0.58, 0.57, 1);
- transition - timing - function: cubic - bezier(0.39, 0.58, 0.57, 1);
- }.caption - link: hover {
- opacity: 0.65;
- }.slide - up: hover.image {
- -webkit - transform: translateY(-50 px);
- transform: translateY(-50 px);
- }.slide - up: hover.caption {
- opacity: 1; - webkit - transform: translateY(0 px);
- transform: translateY(0 px); - webkit - transition: opacity 0.1 s,
- -webkit - transform 0.4 s;
- transition: opacity 0.1 s,
- -webkit - transform 0.4 s;
- transition: transform 0.4 s,
- opacity 0.1 s;
- transition: transform 0.4 s,
- opacity 0.1 s,
- -webkit - transform 0.4 s;
- }
JavaScript (gettilesData.js)
I have used knockout.js for binding the logic. This is a self-explanatory JavaScript file.
- //declare variables
- var completeListItems = null;
- var listName = 'CustomTiles';
- $(document).ready(function() {
- //fetch items from list on page load
- SP.SOD.executeFunc('sp.js', 'SP.ClientContext', function() {
- mainFunction();
- });
- });
- //main function to activate knockout
- function mainFunction() {
- completeListItems = new tilesListViewModel();
- retrivelistItems();
- ko.applyBindings(completeListItems);
- }
- function tilesList(title, desc, tileOrder, backImage, linkLocation) {
- var self = this;
- self.title = title;
- self.desc = desc;
- self.tileOrder = tileOrder;
- self.backImage = backImage;
- self.linkLocation = linkLocation;
- }
- //view model
- function tilesListViewModel() {
- var self = this;
- self.tiles = ko.observableArray([]); //observable array
- //to add tiles data
- self.AddTiles = function(title, desc, tileOrder, backImage, linkLocation) {
- self.tiles.push(new tilesList(title, desc, tileOrder, backImage, linkLocation));
- }
- //sort tiles by order
- self.sortedtilesByOrder = function() {
- self.tiles.sort(function(left, right) {
- return left.tileOrder == right.tileOrder ? 0 : (left.tileOrder < right.tileOrder ? -1 : 1)
- });
- }
- //sort tiles by title
- self.sortedtilesByTitle = function() {
- self.tiles.sort(function(left, right) {
- return left.title == right.title ? 0 : (left.title < right.title ? -1 : 1)
- });
- }
- } //End view model
- //function to get list items from sharepoint using CSOM
- function retrivelistItems() {
- var clientContext = new SP.ClientContext.get_current();
- var oList = clientContext.get_web().get_lists().getByTitle(listName);
- var camlQuery = new SP.CamlQuery();
- camlQuery.set_viewXml("<View><RowLimit>20</RowLimit></View>");
- this.collListItem = oList.getItems(camlQuery);
- clientContext.load(collListItem);
- clientContext.executeQueryAsync(Function.createDelegate(this, this.querySuccess), Function.createDelegate(this, this.queryFail));
- }
- //success callback
- function querySuccess(sender, args) {
- var listItemEnumerator = collListItem.getEnumerator();
- while (listItemEnumerator.moveNext()) {
- var oListItem = listItemEnumerator.get_current();
- var tileTitle = oListItem.get_item('Title');
- var tileDesc = oListItem.get_item('Description');
- var tileOrder = oListItem.get_item('TileOrder');
- var tileBackImage = oListItem.get_item('BackgroundImageLocation').get_url();
- var linkLoc = oListItem.get_item('LinkLocation').get_url();
- //fill the data from list
- completeListItems.AddTiles(tileTitle, tileDesc, tileOrder, tileBackImage, linkLoc);
- }
- }
- //failure function callback
- function queryFail(sender, args) {
- alert('Request failed. ' + args.get_message() + '\n' + args.get_stackTrace());
- }
Add a Content Editor to SharePoint page and refer to the HTML file. The end result will be something like below.
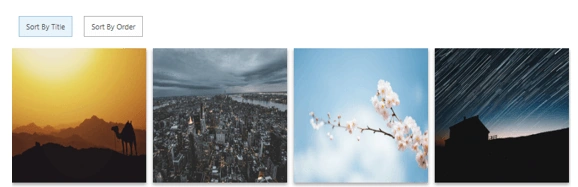
On mouse hover, the tile displays Title and Description. You can add more data from the list if required.
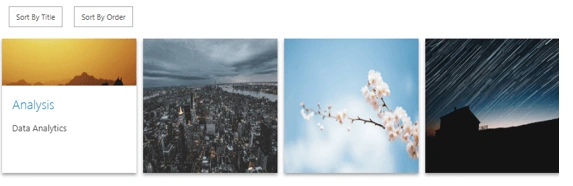
Clicking on the "sort by title" or "sort by order" option will sort the tiles accord the ng to title (A-Z) or order provided in the list (1-onwards sequentially).
You can customize the CSS for more transition effects.
Chakradhar NallamothulaPosted Oct 16, 2018, 2:14 PM
Hyperlink is not working for the file and how to display the 4 tiles per row?
Prajakta PatilPosted Jun 20, 2018, 8:06 AM
Yes it would as you can create normal custom list as well instead of promoted links.
T SekharPosted Jun 20, 2018, 6:53 AM
Is it work in sp 2010?
Piyush AgarwalPosted Mar 7, 2018, 11:02 AM
We can also use tile app part which is provided by Sharepoint OOTB. This also looks great with sorting feature....