
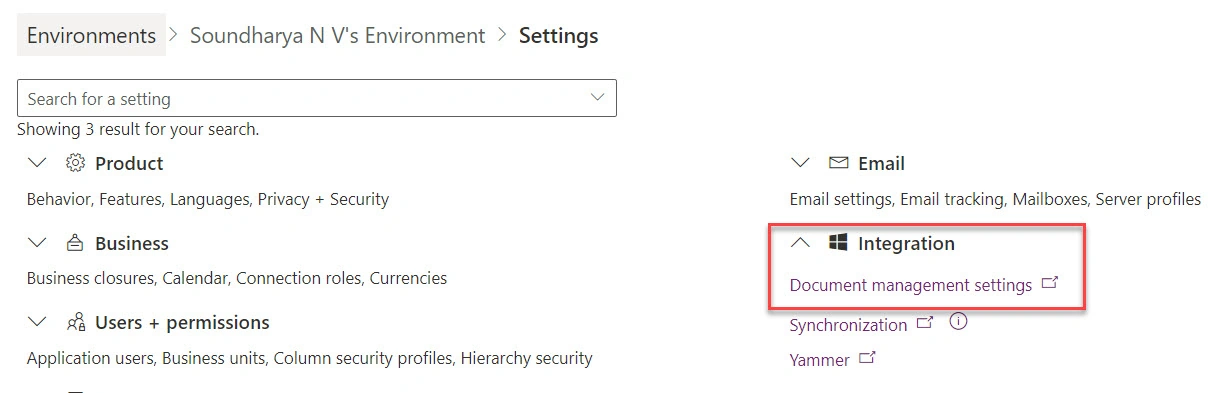
- Go to the admin portal, select your environment
- Click on settings
- Under Integration, click on Document management settings
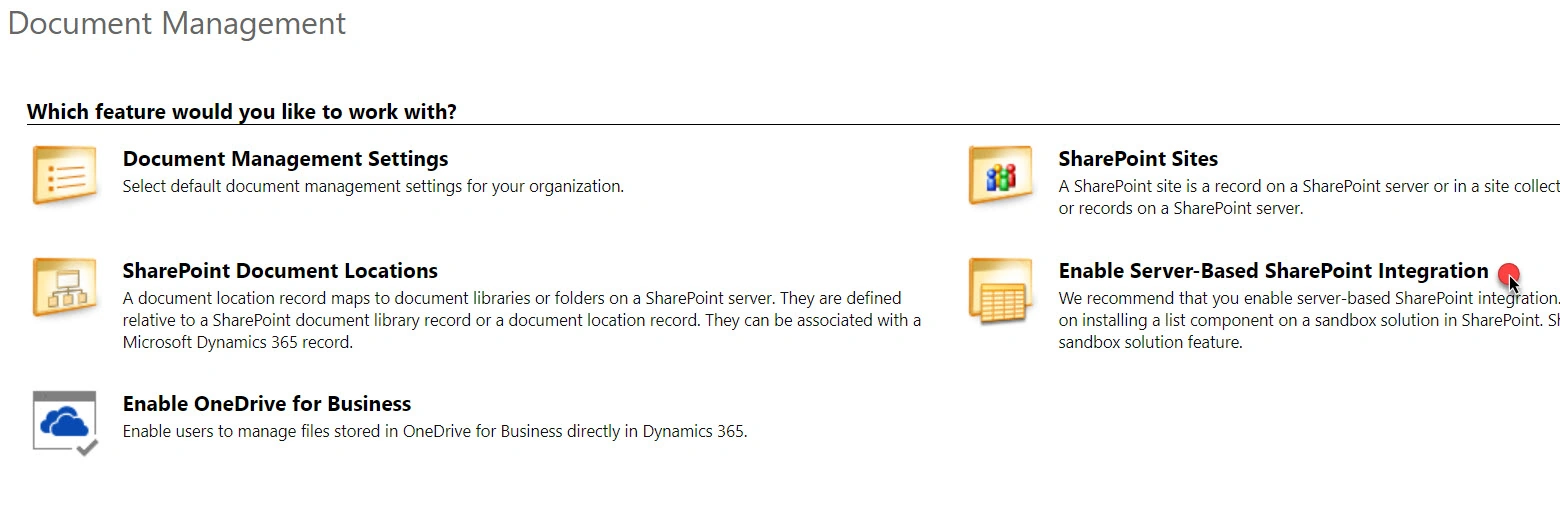
- Click on Enable Server-based SharePoint Integration
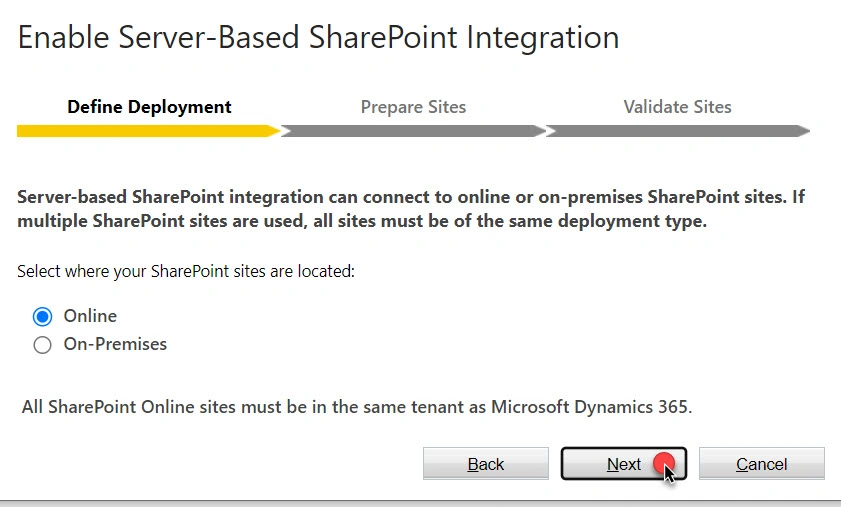
- Click on next
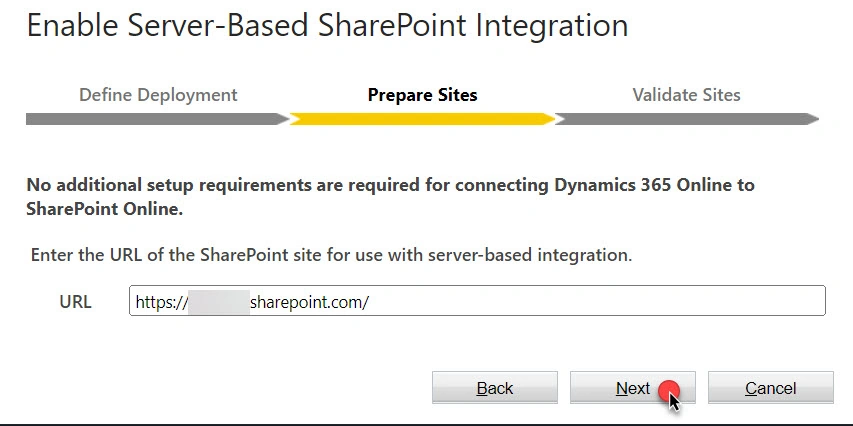
- Enter your SharePoint link and click on Next
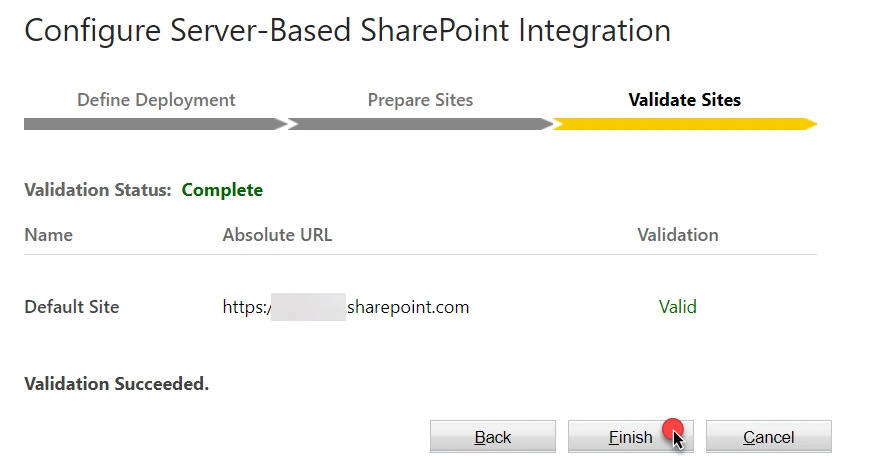
- Once validation is success, click on finish
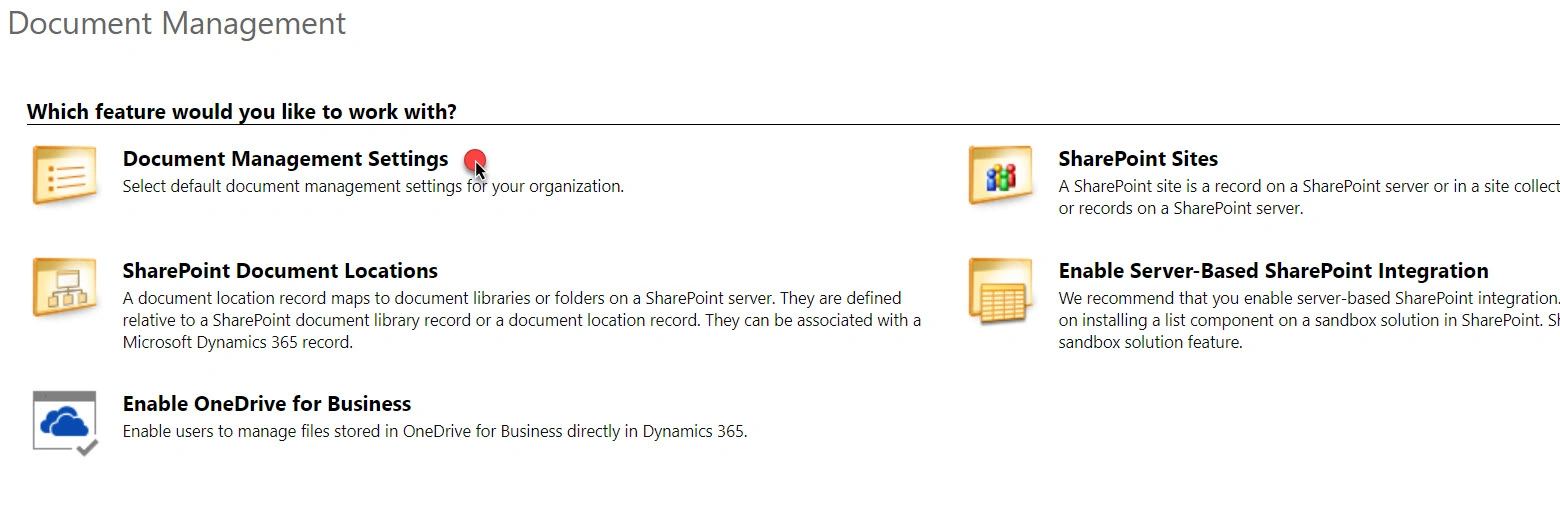
- Now, go to Document Management settings
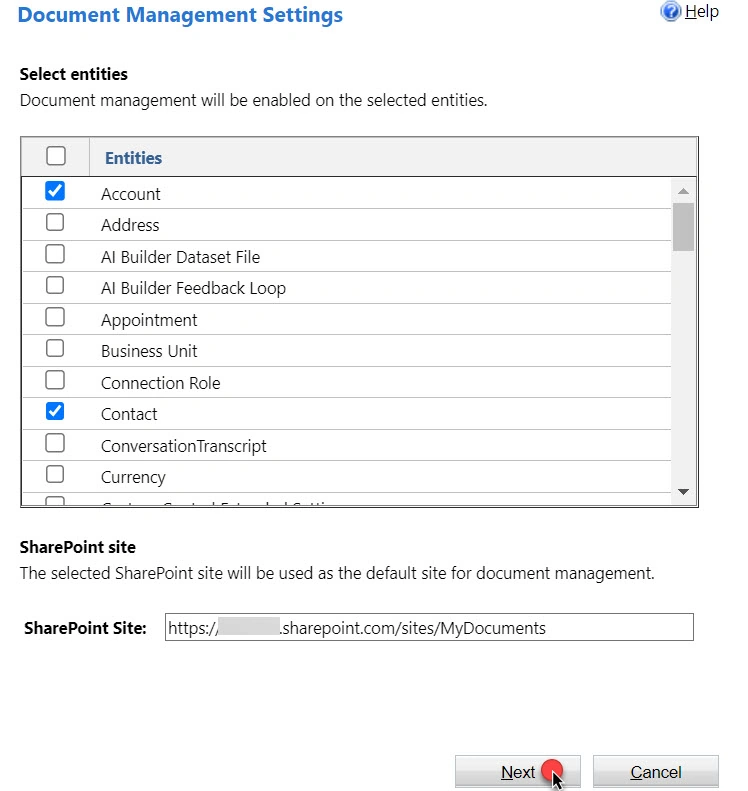
- Select which entities you are planning to store the documents and click on Next
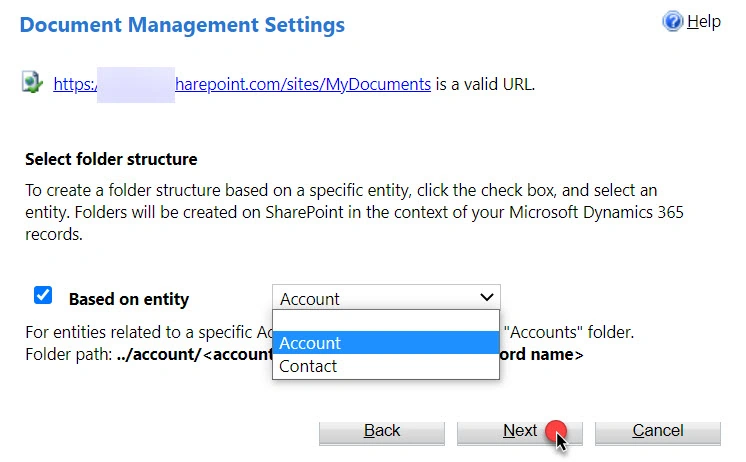
- select the based on entity, accordingly and click on Next
- Once it is succeeded, click on FInish
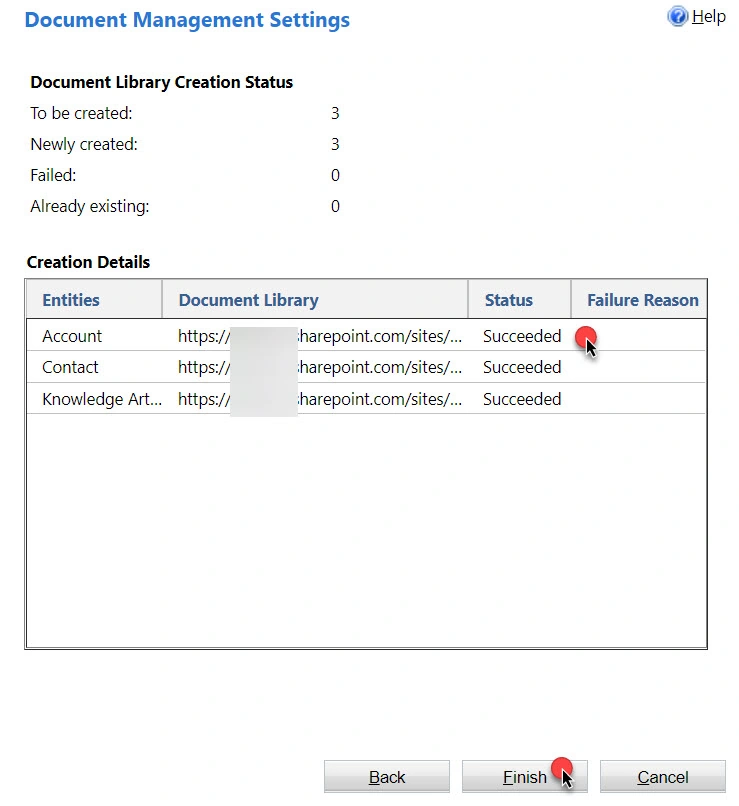
- Integration is successful and live now!
- Open any account record, now you should see an option to upload a file, try uploading a file
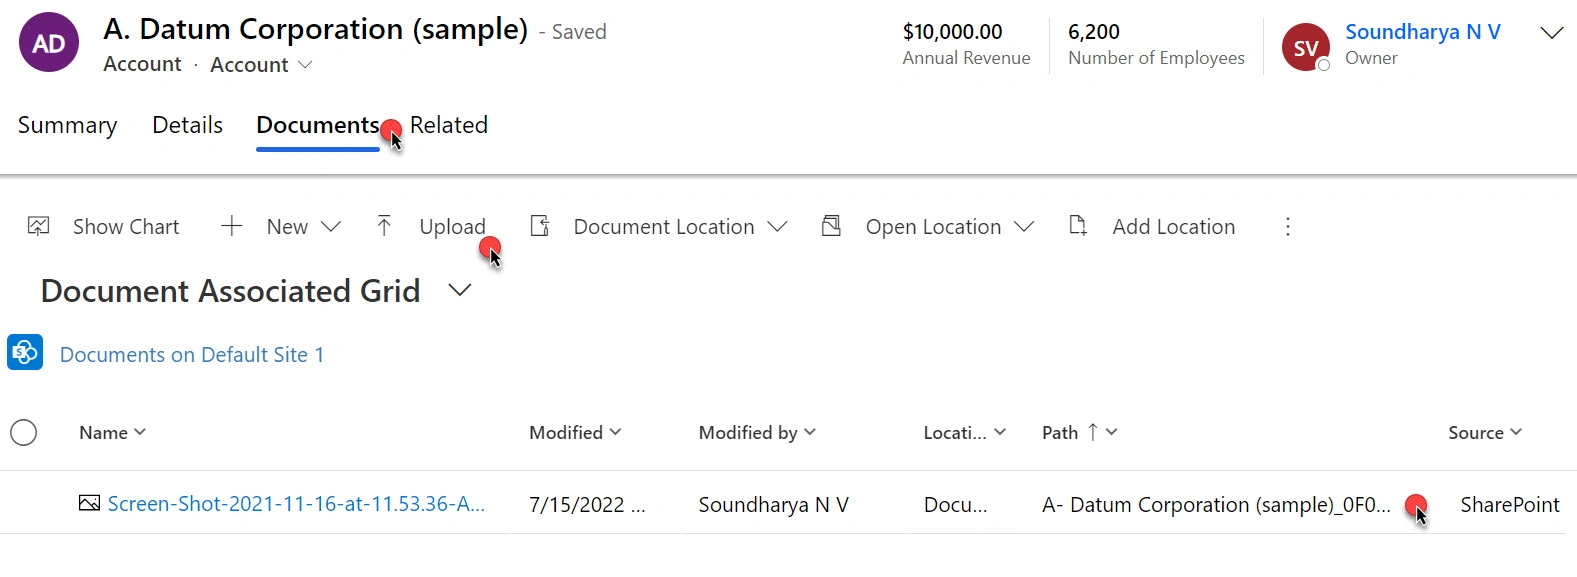
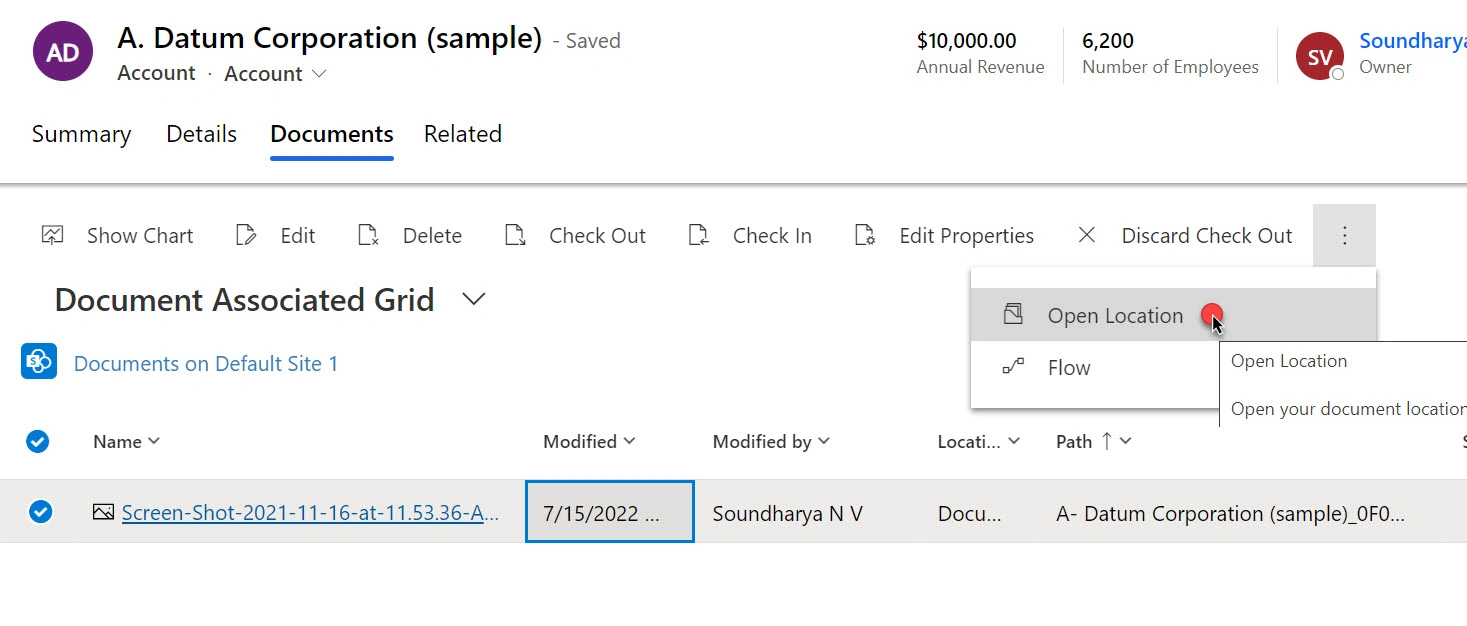
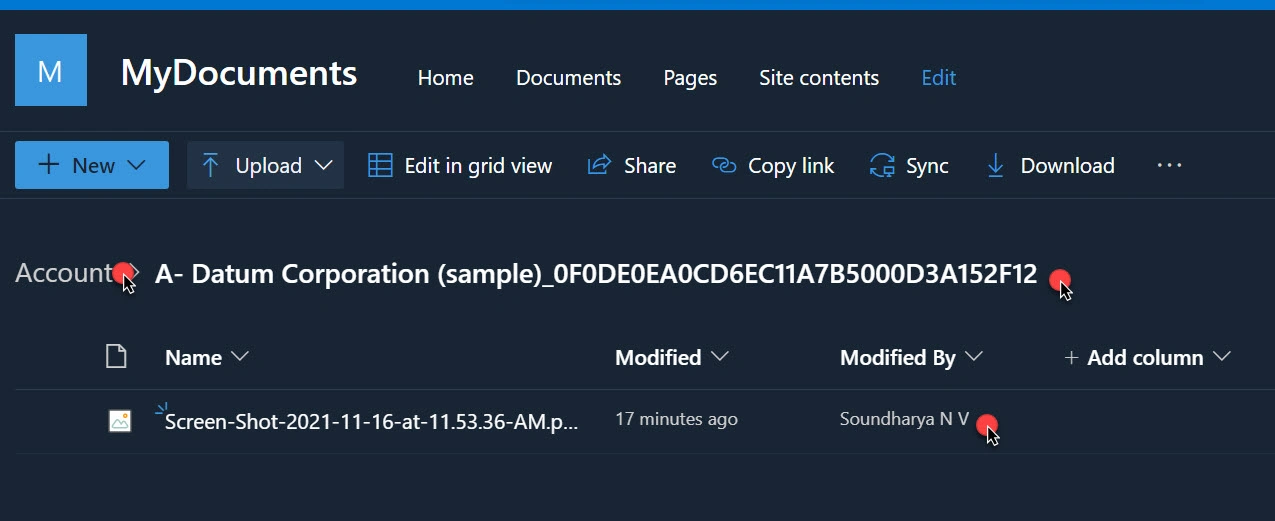
- Check the SharePoint now, if you cant find the path click on the file and click on open location
Hope it's helpful..! :-)
If you feel anything is missing or you faced any challenge setting this up, feel free to comment
Ana NetoPosted Oct 1, 2025, 8:41 AM
For updated instructions with screenshots from the new UI, check https://www.crmsoftwareblog.com/2024/03/how-to-setup-a-dynamics-365-integration-with-sharepoint/