

We have discussed Getting Started With Ionic 3 With Typescript in my previous post. Today, I am going to show how to integrate OneSignal push notifications into an Ionic 3 application. I have already created an application so that I can integrate OneSignal into my existing application.
Step 1 - Installing OneSignal plugin in your application
- Open your command prompt (Better to run as Administrator)
- Change your directory to your project location

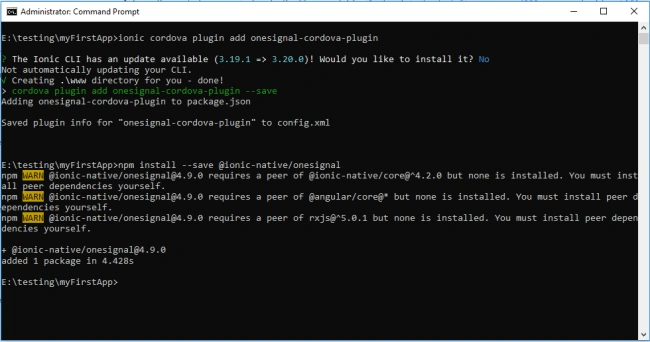
- Type this line in your command prompt and press enter. It will install OneSignal Plugin in your application.
- ionic cordova plugin add onesignal-cordova-plugin
- npm install --save @ionic-native/onesignal
Step 2 - ImportOneSignal plugin in your application
After Installing the plugin open app.module.ts and import OneSignal Plugin
After Installing the plugin open app.module.ts and import OneSignal Plugin
- import { OneSignal } from '@ionic-native/onesignal';
- OneSignal,

Step 3 - Generating Google Server API Key
Goto Google Firebase Console and login with your Gmail Account.
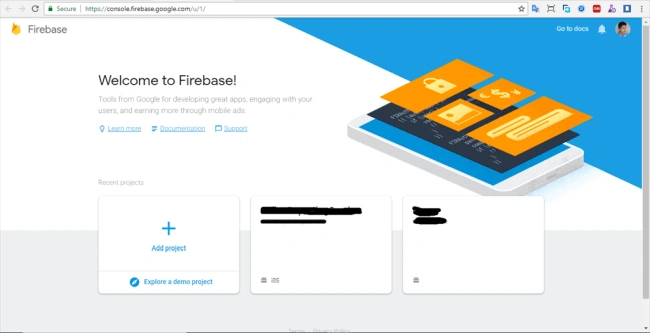
Goto Google Firebase Console and login with your Gmail Account.
Click on Add Project
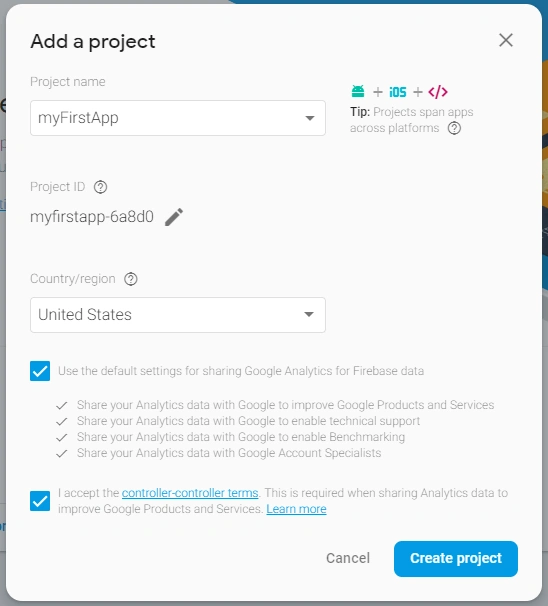
Name your project, choose a country, accept the terms, and click on Create Project.
Now, go to settings and click on Project Settings.

Now, go to settings and click on Project Settings.
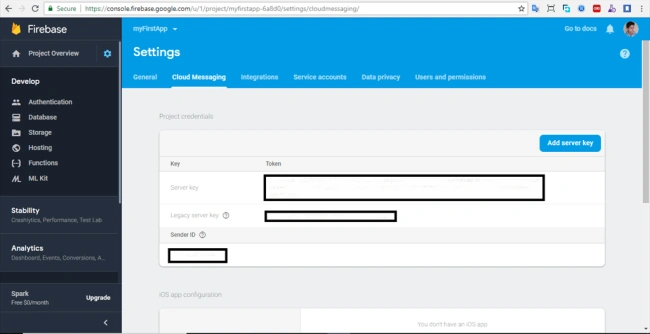
Go to Cloud Messaging tab and mail a note of both the values listed (Do not share these codes with anyone)
- Server key also known as Google Server API Key
- sender ID also known as Google Project Number
Step 4 - Configure OneSignal Application
- Go to OneSignal and login with your ID or create a new one if you don't have any existing or you can login with Gmail, Facebook and GitHub. Currently, I am logging with gmail.

- After logging in successfully add a new App. Type your app name and click on create.
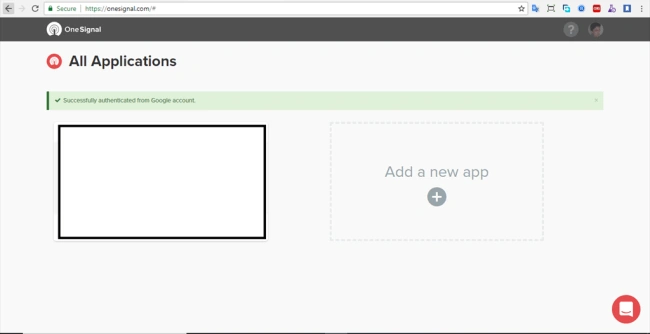
- Select platform and click Next. Currently, I am selecting Google Android.

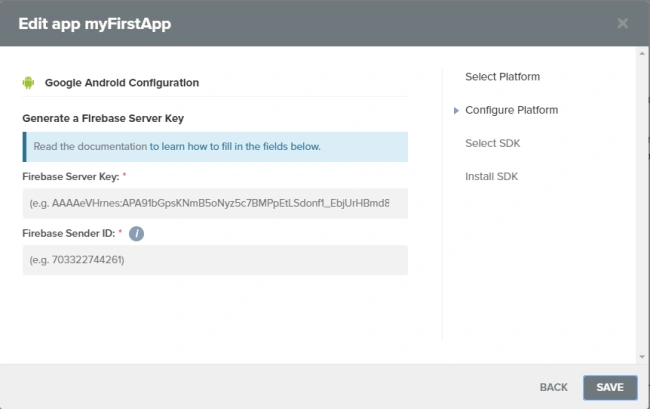
- There you need to insert Firebase Server Key And Firebase Sender Id. We have already created those ID's from Google Console Firebase. Copy those IDs and paste it here and click on save.
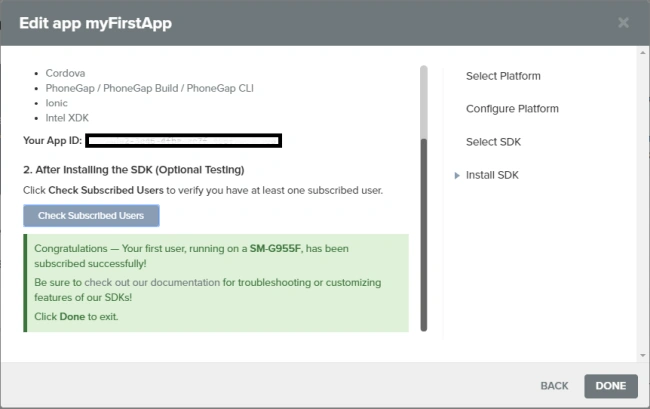
- Now, you have to choose SDK for your application. We are developing an application using Ionic so that we can choose Phonegap, Cordova, Ionic, Intel SDK and click on Next.

- There you can find your App ID. Do not share your AppID with anyone. You need to subscribe first to continue so let's pause this step here and let's get back to our code.

Step 5 - Implement OneSignal Push Notification
We are going to register our device for receiving a push notification. First, we will check if Cordova is avaliable or not; that means if the user is using a web browser or real device. Because push notifications will not work in the browser. For this create a common folder under src and create a folder name common and file called is-cordova-avaliable.ts. put this code inside the is-cordova-avaliable.ts file.
We are going to register our device for receiving a push notification. First, we will check if Cordova is avaliable or not; that means if the user is using a web browser or real device. Because push notifications will not work in the browser. For this create a common folder under src and create a folder name common and file called is-cordova-avaliable.ts. put this code inside the is-cordova-avaliable.ts file.
- export let isCordovaAvailable = () => {
- if (!(<any>window).cordova) {
- alert('This is a native feature. Please use a device');
- return false;
- }
- return true;
- };
Goto app.component.ts under src/app and add those code over there.
- import { OneSignal, OSNotificationPayload } from '@ionic-native/onesignal';
- import { isCordovaAvailable } from '../common/is-cordova-available';
Add OneSignal plugin in constructor.
- private oneSignal: OneSignal,
- if (isCordovaAvailable()){
- this.oneSignal.startInit('oneSignalAppId', 'sender_id');
- this.oneSignal.inFocusDisplaying(this.oneSignal.OSInFocusDisplayOption.Notification);
- this.oneSignal.handleNotificationReceived().subscribe(data => this.onPushReceived(data.payload));
- this.oneSignal.handleNotificationOpened().subscribe(data => this.onPushOpened(data.notification.payload));
- this.oneSignal.endInit();
- }
Replace 'oneSignalAppId' with your AppId from OneSignal and 'sender_id' with Google Firebase Sender ID.
- isCordovaAvaliable() Will check if user is using real devices or not.
- startInit('oneSignalAppId', 'sender_id') will start the initilization process.
- handleNotificationReceived() is a method that runs when notification is received.
- handleNotificationOpened() is a method that runs when notification is tapped or clicked.
- endInit() is required for complete the initilization process.
Finally, the following line of code will handle the received and opened notification.
- private onPushReceived(payload: OSNotificationPayload) {
- alert('Push recevied:' + payload.body);
- }
- private onPushOpened(payload: OSNotificationPayload) {
- alert('Push opened: ' + payload.body);
- }
onPushOpened() will alert user with the notification message once the notification is opened.
And finally your app.component.ts code will look like this.
- import { Component } from '@angular/core';
- import { Platform } from 'ionic-angular';
- import { StatusBar } from '@ionic-native/status-bar';
- import { SplashScreen } from '@ionic-native/splash-screen';
- import { HomePage } from '../pages/home/home';
- import { OneSignal, OSNotificationPayload } from '@ionic-native/onesignal';
- import { isCordovaAvailable } from '../common/is-cordova-available';
- @Component({
- templateUrl: 'app.html'
- })
- export class MyApp {
- rootPage:any = HomePage;
- constructor(platform: Platform,
- statusBar: StatusBar,
- private oneSignal: OneSignal,
- splashScreen: SplashScreen) {
- platform.ready().then(() => {
- // Okay, so the platform is ready and our plugins are available.
- // Here you can do any higher level native things you might need.
- if (isCordovaAvailable()){
- this.oneSignal.startInit('oneSignalAppId', 'sender_id');
- this.oneSignal.inFocusDisplaying(this.oneSignal.OSInFocusDisplayOption.Notification);
- this.oneSignal.handleNotificationReceived().subscribe(data => this.onPushReceived(data.payload));
- this.oneSignal.handleNotificationOpened().subscribe(data => this.onPushOpened(data.notification.payload));
- this.oneSignal.endInit();
- }
- statusBar.styleDefault();
- splashScreen.hide();
- });
- }
- private onPushReceived(payload: OSNotificationPayload) {
- alert('Push recevied:' + payload.body);
- }
- private onPushOpened(payload: OSNotificationPayload) {
- alert('Push opened: ' + payload.body);
- }
- }
If you have already installed Android SDK in your application then you can run an application in emmulator with this command.
- ionic cordova emulate android
- ionic cordova run android
Now, navigate to OneSignal dashboard and click on messages.

After this type your notification Title and Message and click on Confirm button down below and click on Send Message. You can change notification options like: Color, Icon, Lunch Url, Notification sound e.t.c from Options. Now check you device you will get a push notification like this.
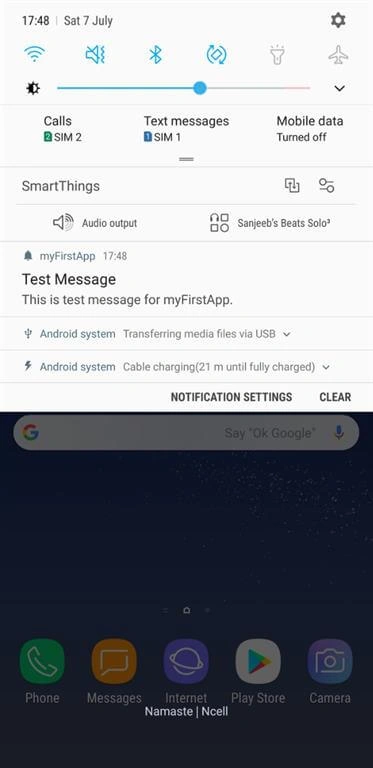
Now, we have successfully implemented OneSignal Notification in our project.
You can find full source code in GitHub repo from here.
#HappyCoding
You can find full source code in GitHub repo from here.
#HappyCoding
Yazılım DenemePosted May 15, 2019, 8:54 AM
Hi sir, how can i get notification data before showing my device? Because i want to show notification depends on some conditions.
Rajesh KumarPosted Mar 19, 2019, 11:20 PM
Please can you provide demo for ios cordova?
Rajesh KumarPosted Mar 18, 2019, 12:00 AM
Hello, I have implemented the push notification feature using firebase integration.But i am not able to know that How to handle the event to open specific page on tap of notification in ios for cordova?