

In this blog, we will discuss about how to use DataView and DataGrid in ASP.NET.
What are DataGrid and GridView?
- DataGrid is introduced in ASP.NET 1.1 and still supports Gridview, which was introduced in ASP.NET 2.0
- We can use DataGrid controls only for data selection.
- GridView control can use sorting, paging, deletes and updates .
- GridView introduces new column types.
In this tutorial, I will show how to retrieve the database value and how to show the database value in GridView and DataGrid.
First, we will create a Webpage in ASP.NET Web Application project, where we will open Visual Studio, followed by clicking File->New->Project.
First, we will create a Webpage in ASP.NET Web Application project, where we will open Visual Studio, followed by clicking File->New->Project.
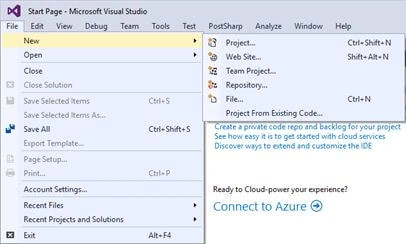
Afterwards, click Project followed by opening new popup Window, which opens, as shown below.
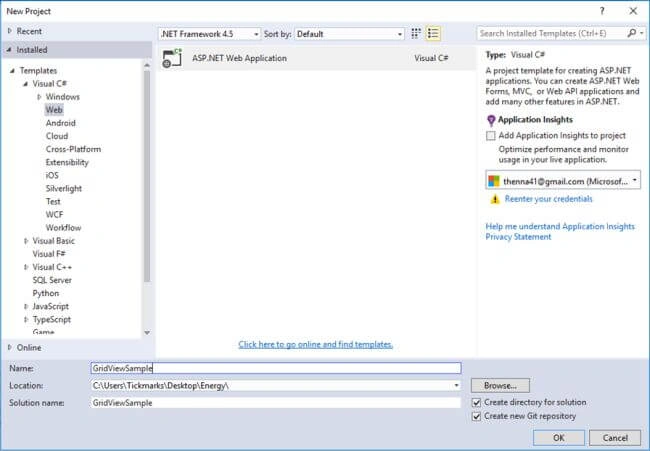
Now, click ASP.NET Web Application and enter the project name (I am creating a project name GridViewSample). Afterwards, enter the name and click OK. Afterwards, click OK button templates that will popup, as shown below.
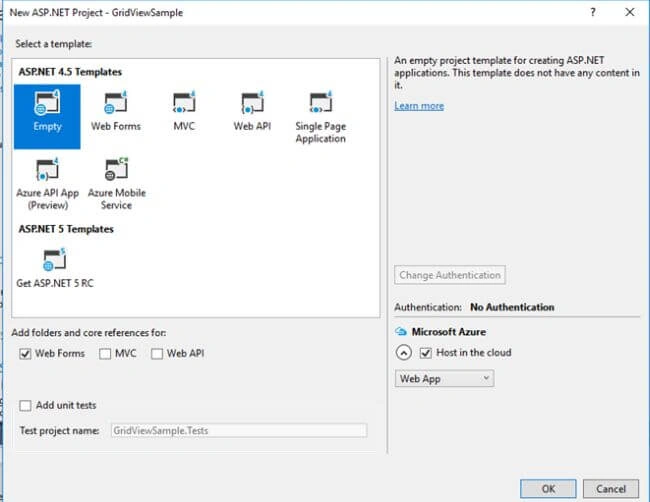
I choose WebForms empty template. Afterwards, click OK button. New project explorer is created. Afterwards, we should create new WebForm page . Right click on the Project folder, followed by clicking Add and subsequently choose WebForm.
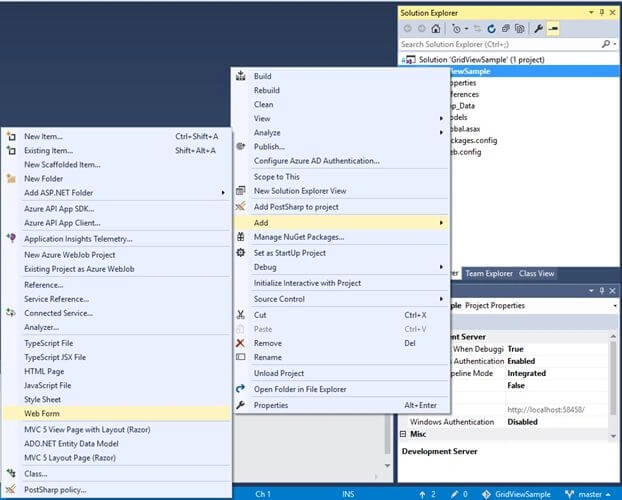
I had given Web Form Page name GridViewSample. Subsequently, click OK button and create a new Webpage. Now, I will explain how to retrieve the database, using GridView and DataGrid.
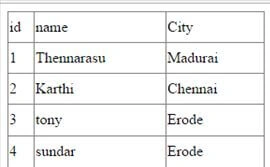
First, I have created a sample database, using SQL Server. My database sample screenshot is given below.
First, I have created a sample database, using SQL Server. My database sample screenshot is given below.
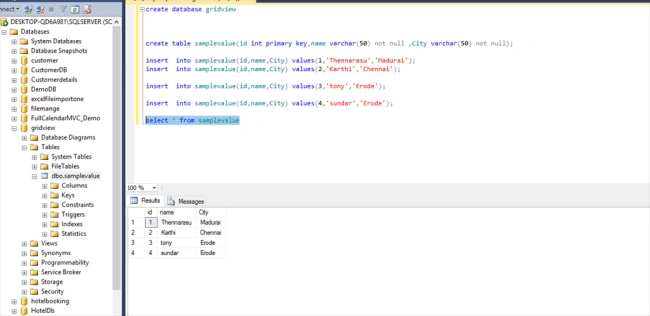
Now, I am going to explain the database value, which will be retrieved, using GridView and DataGrid. In Visual Studio, click Webform page and subsequently click Design Mode.
Let's click Toolbox now. We are going to choose First DataGrid. Before proceeding to DataGrid Toolbox, two types of DataGrid are available. We can see the screenshot given below. First, right click on toolbox, followed by choosing an item. We can see Two DataGrid.
Let's click Toolbox now. We are going to choose First DataGrid. Before proceeding to DataGrid Toolbox, two types of DataGrid are available. We can see the screenshot given below. First, right click on toolbox, followed by choosing an item. We can see Two DataGrid.
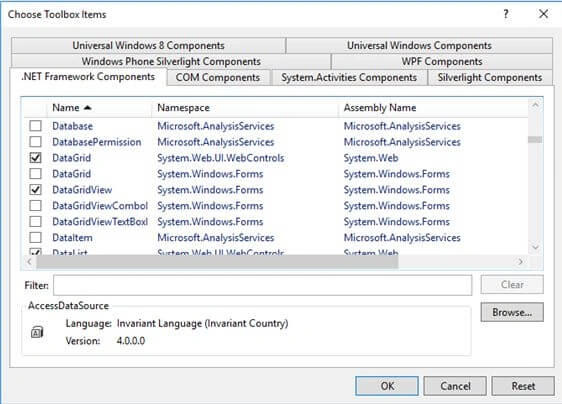
The screenshot shows Two DataGrid options, where one is Windows and another is Web. Now, we should choose Web. Subsequently, click Web and finally OK button. Now, DataGrid control will be added.
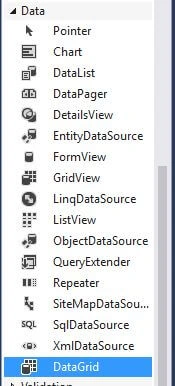
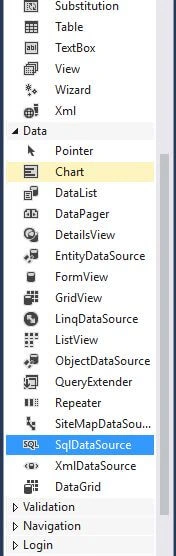
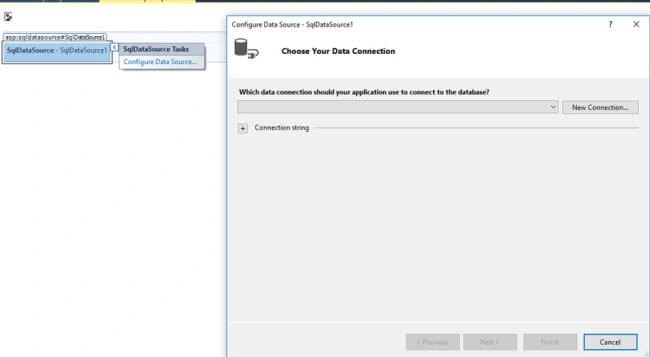
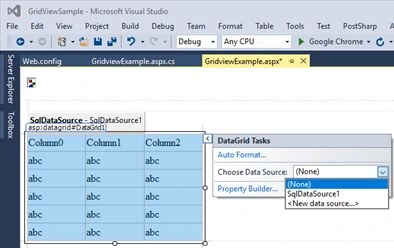
Now, we can see DataGrid in the toolbox. Now, drag and drop DataGrid in WebForm Design space. Before proceeding, DataGrid cannot access the database directly. We are required to connect the database declarative datasource controls SQL DATASOURCE. We can choose its toolbox itself.


Anu VPosted Jan 30, 2017, 11:23 PM
Thanks for sharing.. nice article..