

Introduction
Registering a SharePoint site for client secrets and client ID is essential for integrating custom applications with SharePoint and accessing its resources securely. In this guide, we'll explore the step-by-step process of registering a SharePoint add-in, generating a client ID and client secret, and granting the required permissions using the AppRegNew form. By following these instructions, developers can seamlessly integrate their applications with SharePoint and leverage its capabilities in their solutions.
Understanding SharePoint Add-ins
SharePoint add-ins, also known as apps, are self-contained pieces of functionality that extend the capabilities of a SharePoint site. They can be SharePoint-hosted or provider-hosted, offering flexibility in deployment and architecture.
Now, let's delve into the process of registering a SharePoint add-in and granting the necessary permissions:
Step 1. Begin by navigating to your SharePoint site
Modifying the URL by adding "_layouts/15/appregnew.aspx" at the end (e.g. https://(Site Name)/_layouts/15/AppRegNew.aspx ). This will take you to the AppRegNew form.
Navigate to
[Site Collection URL]/_layouts/15/AppRegNew.aspx.
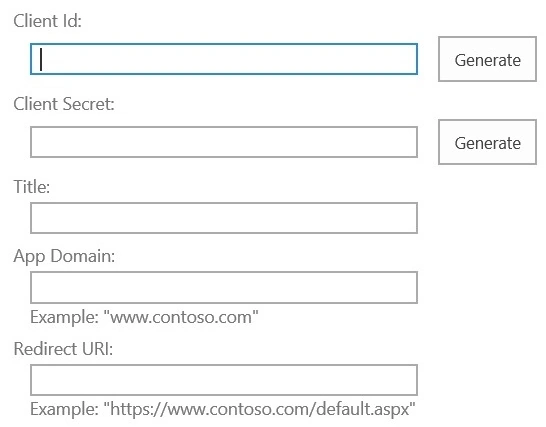
Step 2. Fill in the required details
- Client ID (a unique GUID),
- Client Secret (acts like a password),
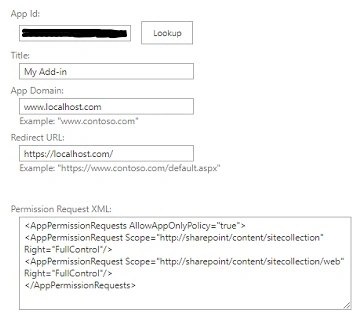
- Title (name of the add-in),
- App Domain (domain where the add-in is hosted),
- Redirect URI (provider-hosted add-in).
INPUT
- Fill in the Title as " My-Add-in"
- Fill in the App Domain as www.localhost.com
- Fill in the Redirect URI field as https://www.localhost.com
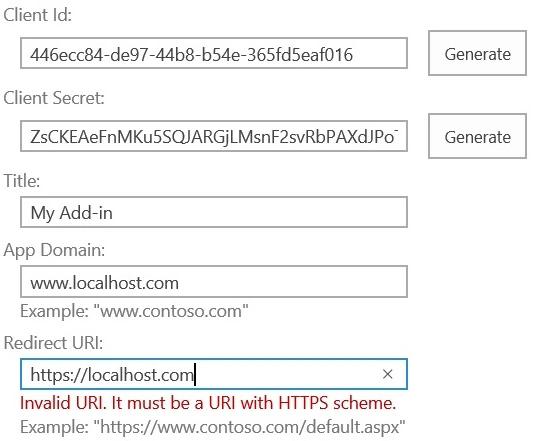
- Click the "Generate" button next to the "App Id" to create a new GUID.
- Click the "Generate" button next to the "App Secret" to generate a new secret.
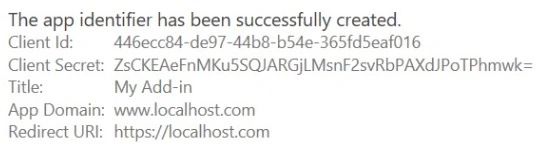
- Save the generated Client ID and Client Secret for future reference.
- Click "Create" to register the app.

Join the conversation! Your thoughts help the community grow.