Background:
In .NET we all are familiar with events, which are messages that are sent by an object, which can be any Silverlight element, like button, textbox etc., to notify code that something significant has happened. So in a typical .NET application, the control which fires an event also raises it / handles it.
With WPF, a new enhanced model had been introduced called Routed Events, which allows an event to originate in one element yet raised by another element. For example, event routing allows a click that begins in a shape to rise to that shape's container and then to the containing page before it's handled by your code.
Silverlight had borrowed this concept from WPF and support bubbled events that rise up the containment hierarchy from deeply nested element to their containers.
Now before we start taking a practical exercise to understand Bubbled routed events, let us understand the basics of hierarchy of Silverlight elements.
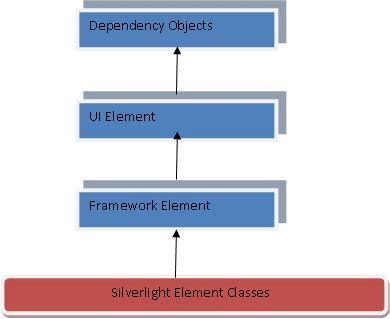
Silverlight Element Classes: Classes from which Silverlight elements are derived.
Framework Element:
Provides a framework of common APIs for objects that participate in Silverlight layout. FrameworkElement also defines APIs related to data binding, object tree, and object lifetime feature areas in Silverlight.
UIElement:
UIElement is a base class for most of the objects that have visual appearance and can process basic input in Silverlight.
Dependency Object: Represents an object that participates in the Silverlight dependency property system. DependencyObject is the immediate base class of several other important Silverlight classes, such as UI Element, Geometry, Framework Template Style.
The UIElement class defines the most important events for handling user input and the only events that use event bubbling .i.e. KeyDown, KeyUp, GotFocus, LostFocus.
The FrameworkElement class adds just a few more events to this model, i.e. Loaded, SizeChanged, Layout Updated.
Programming Bubbled Event: Bubbling events are events that travel up the containment hierarchy. For example, MouseLeftButtonDown is a bubbling event. It's raised first by the element that is clicked. Next, it's raised by that element's parent, and then by that element's parent, and so on, until Silverlight reaches the top of the element tree.
Let us create a Silverlight application to understand this.
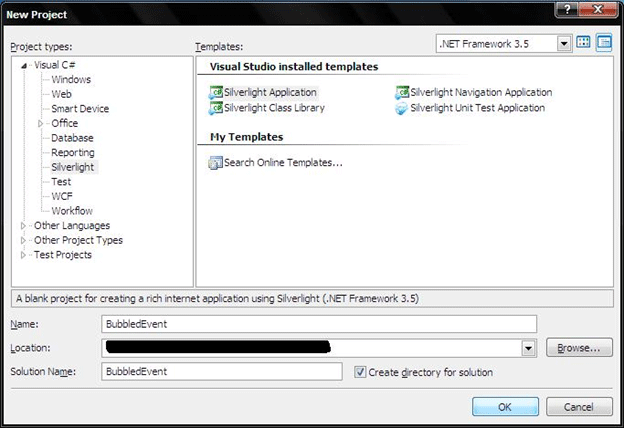
Step 1: Create a Silverlight application project.
Step 2: You will be welcomed by main.xaml; create a Grid as like below:
<Grid x:Name="LayoutRoot" Margin="3">
<Grid.RowDefinitions >
<RowDefinition Height="Auto"></RowDefinition>
<RowDefinition Height="*"></RowDefinition>
<RowDefinition Height="Auto"></RowDefinition>
<RowDefinition Height="Auto"></RowDefinition>
</Grid.RowDefinitions>
</Grid>
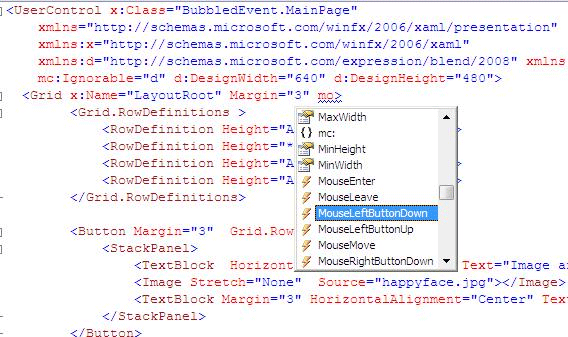
Step 3: Now we create a textbox which will have three other silverlight controls, a textbox, an image, and another textbox.
<Grid x:Name="LayoutRoot" Margin="3">
<Grid.RowDefinitions >
<RowDefinition Height="Auto"></RowDefinition>
<RowDefinition Height="*"></RowDefinition>
<RowDefinition Height="Auto"></RowDefinition>
<RowDefinition Height="Auto"></RowDefinition>
</Grid.RowDefinitions>
<Button Margin="3" Grid.Row="0">
<StackPanel>
<TextBlock HorizontalAlignment="Center" Text="Image and text level"></TextBlock>
<Image Stretch="None" Source="happyface.jpg"></Image>
<TextBlock Margin="3" HorizontalAlignment="Center" Text="Courtesy of the StackPanel"></TextBlock>
</StackPanel>
</Button>
<ListBox Margin="3" Grid.Row="1" x:Name="lstMessages"></ListBox>
<Button Grid.Row="2" Margin="3" HorizontalAlignment="Center" Padding="3" x:Name="cmdClearText" Click="cmdClearText_Click" ></Button>
</Grid>
Step 4: Write a handler for cmdClearText_Click in code behind.
private void cmdClearText_Click(object sender, RoutedEventArgs e)
{
lstMessages.Items.Clear();
}
Step 5: Now create a MouseLeftButtonDown in grid and all other elements.
Step 6: Write a handler for it:
private void SomethingClicked(object sender, MouseButtonEventArgs e)
{
eventCounter++;
string message = "#" + eventCounter.ToString() + ":\r\n" +
" Sender: " + sender.ToString() + "\r\n" +
" Handled: " + e.Handled + "\r\n";
lstMessages.Items.Add(message);
}
Step 7: Press F5 to run it and click anywhere to see the event messages in list below:
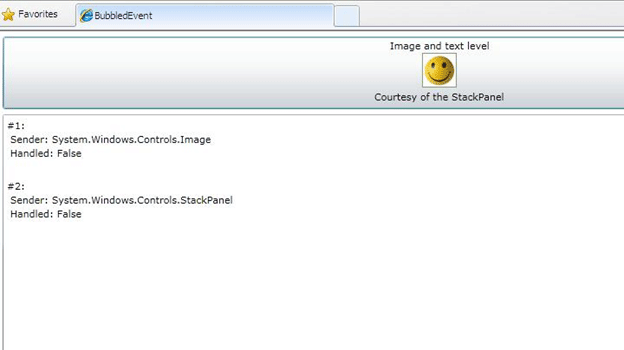
You can see, I clicked image, but event goes from image to its immediate container stackpanel, which raises it further, i.e. a bubbled routed event.
In this example, I have use MouseLeftButtonDown bubble event, you can try out many other bubbled events.
Try out clicking other elements and see the result.
In next article we will learn more on routed event examples
Cheers,