In this article we will be seeing how to create Content Organizer rule in SharePoint 2010.
SharePoint 2010 introduced a new feature called Content Organizer.
Activate the feature Content Organizer:
- Content Organizer is a site feature.
- Go to Site Actions => Site Settings => site Actions =>Manage site features.
- Activate the feature Content Organizer.
Once you have activated this feature, you will see two options "Content Organizer Settings" and "Content Organizer Rules" in Site Actions => Site Settings => Site Administration.
A new document library "Drop Off Library" also will be created where you will be adding the documents. Those documents will be moved to the target document library based on the Content Organizer rule.
And also a new content type will be created for Content Organizer rule as shown in the following
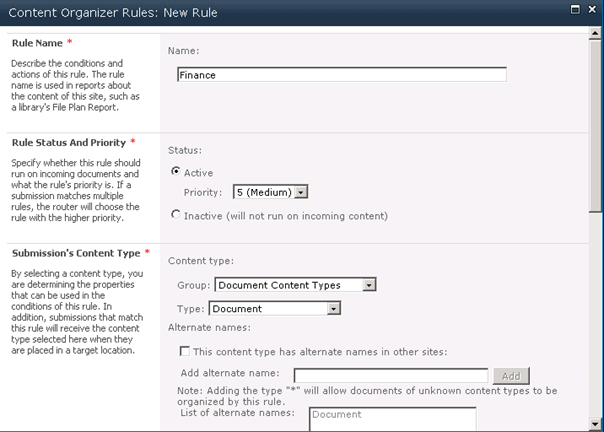
Content Organizer rule:
- Go to Site Actions => Site Settings => Site Administration => Content Organizer Rules.
- Enter the Rule Name.
- In the Submission's Content Type section select the Content type Group and Type.
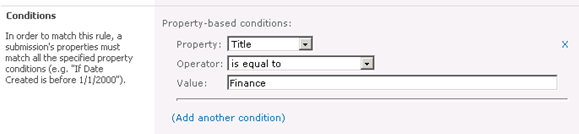
- Set the Property-based conditions for the rule.
- Select the Target location where you want to save the document based on the rule conditions.
- Click OK.
- A new rule will be created successfully.

Add a document to the Drop Off Library, and enter the title as Finance.
If the rule condition is satisfied (in my case if "Title is equal to Finance") a message will pop up as shown in the following
and the document will be saved in the target library.
If the condition is not satisfied a message will pop up as shown in the following
And the document will be added to the drop off library.