Prologue:
One of the most exciting features that Silverlight 5 introduces - and one that has been a long time in coming to the platform - is Custom Markup Extensions. This article will talk about the Custom Markup Extensions.
What is Custom Markup Extensions?
A Custom Markup Extension is a class that can be derived from the MarkupExtension base class or can be implemented from the IMarkupExtension interface of the namespace System.Xaml.
The markup extension decides at runtime how to set a property's value. Markup extensions allow code to be run at XAML parse time for both properties and event handlers.
Custom Markup Extensions have been a well-known feature in WPF, but are unavailable in Silverlight up to version 4. The Silverlight team announced the Custom Markup Extension feature In Silverlight 5.
Let us discuss the feature with a simple demo application.
Preparing the Solution:
Fire up the VS 2010; create a Silverlight application with the name "CustomMarkupExtensionInSL5Beta" as shown in the figure.
Quick Note:
In this demo application we are going to create a Custom Markup Extension which can be bound with the image source. This markup extension will get the path as a parameter and will return the image source. As Silverlight 5 evaluated trust allows you to access the entire file system, in this demo application we are accessing the image path as an absolute path.
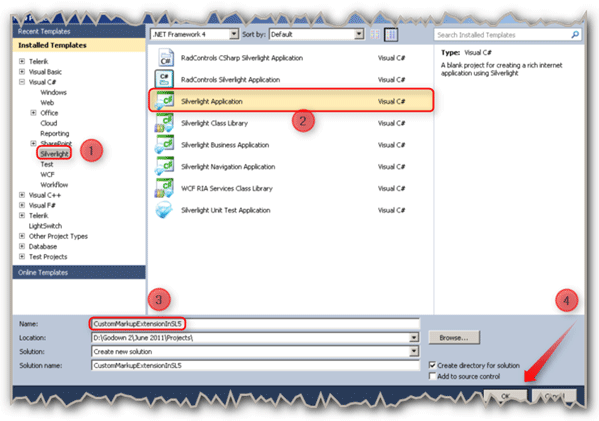
Follow the [No: #] to create a Silverlight application.
Make sure we have selected the Silverlight version 5.
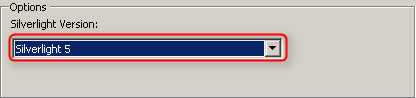
After clicking OK from the New Project window, a pop-up window will prompt you to select the Silverlight version. So change the Silverlight version to 5 since it is version 4 by default.
As we are going to access the image directly; it needs evaluated trust for the application.

In the Silverlight Project property page, Select Silverlight Tab and check the highlighted option to make the application as OOB application.
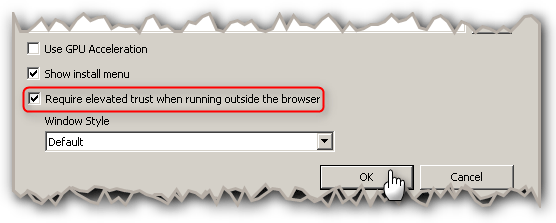
If you click on the Out-Of-Browser Settings button, it will display a window to enable the evaluated trust. As highlighted in the above figure enable the required evaluated trust. Then click OK and save the settings.
The XAML:
Let us design the simple screen. The figure given below shows the complete XAML of the screen.
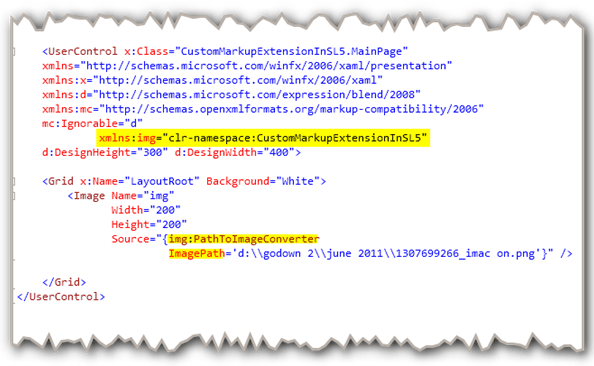
To access the Custom Markup Extension class in XAML page, which we have created in code-behind, obviously we need to add the namespace. From top, the highlighted part shows the namespace added to the XAML part.
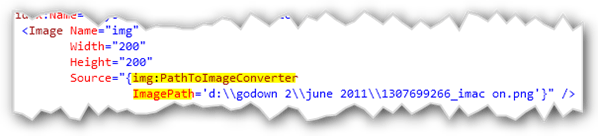
The above figure clearly shows you that how the Custom Markup Extension class has been bound with the Source property of the Image. Here the ImagePath is the property of the Custom Markup Extension class and the PathToImageConverter is our Custom Markup Extension class.
As the Silverlight 5 has the full evaluated trust feature we are going to access the image by giving the absolute path as shown in the above figure.
Let us discuss the Custom Markup Extension class.
The Code-Behind:
In code-behind of the XAML, we are simply leaving the page as it is. But we have to create a class called "PathToImageConverter".
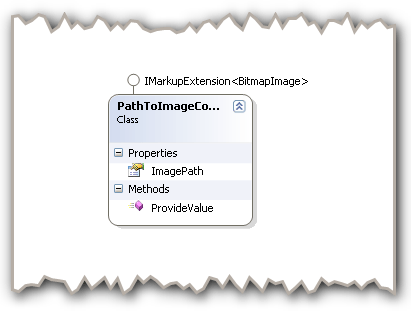
The above figure shows the Class diagram of the PathToImageConverter markup extension class. It has a property of type string and a method called ProvideValue. The extension class implements the IMarkupExtension interface.
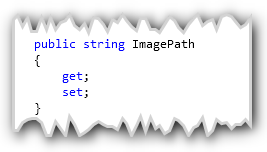
This is the property of type string which is used as a parameter to give the image Path as value.
Here,
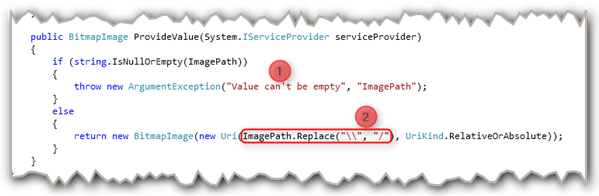
- [No: 1] - We are checking that whether the given value is empty or null. If so then we will throw a new arguments exception with the custom error message.
- [No: 2] - This is what we are trying to demonstrate. I.e. we are converting the given parameter path into image and returning it. The highlighted statement is to make the path as an acceptable path by Silverlight runtime.
That's it; we have done the job. Hit F5.
Application in Action:
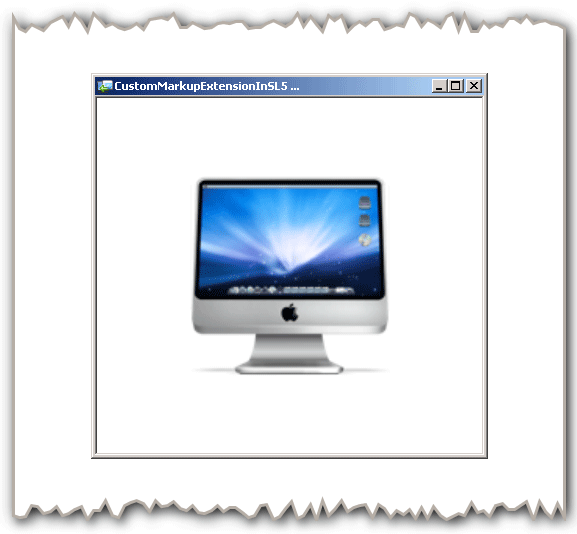
The above figure shows the output of our demo application as we expected. We passed the path of the image as string to the Custom Markup Extension which we have created; converts the image path into image source and binds with the image source property.
Summary:
In this article, we have seen how to create and use the Custom Markup Extensions in Silverlight applications.
Thanks for spending your precious time here. Please provide your valuable feedbacks and comments, which enable me to give a better article the next time.
Thanks.