Glassy Button In Silverlight 3


Introduction

In Silverlight 3 we have normal Button control. For some site or project requirements it needed to be a glassy look. In this article I am going to show you how easy it is to make Glassy Buttons.

Creating a Simple Silverlight Application

Open up Blend 3 and Create a new Silverlight Application.

image1.gif

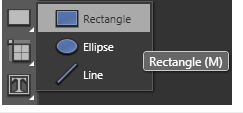
  1. Select the Rectangle tool from the Tools Pane and draw a Rectangle of your desired size.

    image2.gif

    image3.gif

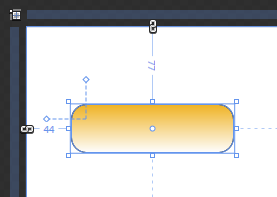
    I have just changed the Rectangle's Fill Property as Gradient Fill and Changed the RadiusX and RadiusY properties of Value 15 each. And the StrokeThickness to Value 3.

  2. image4.gif
     

  3. Now copy the Rectangle and Paste it over the Rectangle. (We will call the Copied Rectangle as Old Rectangle and the newly pasted as New Rectangle)
     
  4. Transform the New Rectangle to a smaller size.

    image5.gif
     
  5. Remove the Stroke from the New Rectangle.

    image6.gif
     
  6. Change the Gradient to White on both sides for the New Rectangle.

    image7.gif
  7. On the Right side of the Gradient Brush change the Alpha to Value 0.

    image8.gif
  8. Now resize the New Rectangle to fit to the Old Rectangle.

    image9.gif
     
  9. Now select both the Rectangles and group it into Grid from the selected Menu.

    image10.gif
     
  10. Now select the Grid and Right Click on it and select Make it Into Control from the menu Selected.

    image11.gif
     
  11. Now Choose Button from the Asset Gallery and name it as MyButtonStyle.

    image12.gif

    Now you have created the Button, a Content Presenter is added.

    image13.gif

Now you can go through my article States Animation In Silverlight 3 to change the states of this Glassy Button.

Enjoy Animating.


Recommended Free Ebook
Similar Articles