Introduction
In this article we will explore about Tree View control in Silverlight 3.
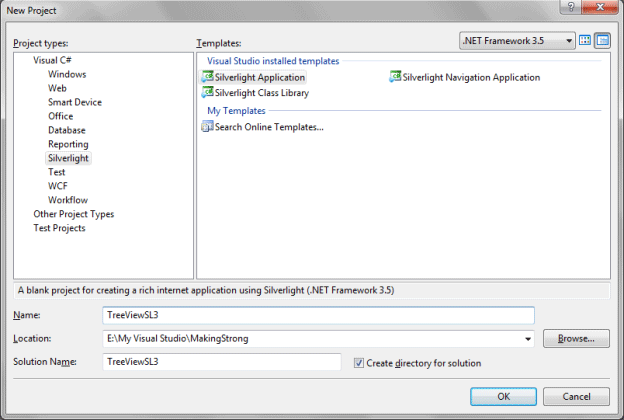
Crating Silverlight Project
Fire up Visual Studio 2008 and create a Silverlight Application. Name it as TreeViewSL3.
The TreeView control displays data in a hierarchical manner.
Open the solution in Expression Blend 3.
Go ahead and a Tree View control to your application.
I have changed the Background to Linear Brush.
To add TreeView Item to the Tree View, just right click on it and add TreeViewItem.
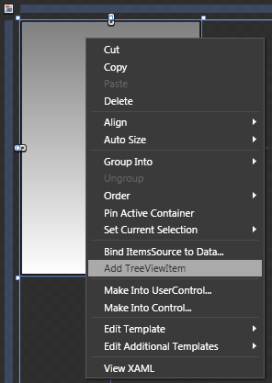
Add several, and if you want to add children of any parent then select the particular TreeViewItem and add another Treeview Item.
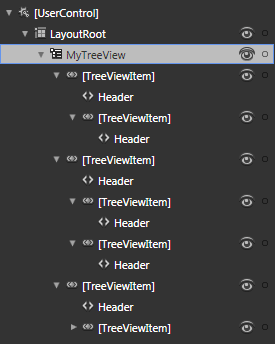
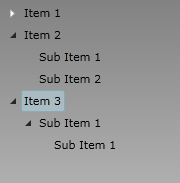
I have created the below hierarchy:
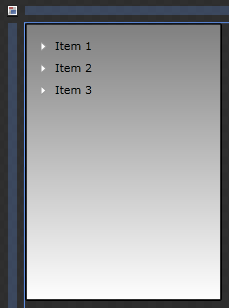
If you see the design view it will look similar to the following:
Here is the XAML code behind for the TreeView:
<controls:TreeView x:Name="MyTreeView" HorizontalAlignment="Left" Width="197" Margin="0,0,0,202">
<controls:TreeView.Background>
<LinearGradientBrush EndPoint="0.5,1" StartPoint="0.5,0">
<GradientStop Color="Gray" Offset="0"/>
<GradientStop Color="White" Offset="1"/>
</LinearGradientBrush>
</controls:TreeView.Background>
<controls:TreeViewItem Margin="0" Header="Item 1">
<controls:TreeViewItem Margin="0" Header="Sub Item 1"/>
</controls:TreeViewItem>
<controls:TreeViewItem Margin="0" Header="Item 2">
<controls:TreeViewItem Margin="0" Header="Sub Item 1"/>
<controls:TreeViewItem Margin="0" Header="Sub Item 2"/>
</controls:TreeViewItem>
<controls:TreeViewItem Margin="0" Header="Item 3">
<controls:TreeViewItem Margin="0" Header="Sub Item 1">
<controls:TreeViewItem Margin="0" Header="Sub Item 1"/>
</controls:TreeViewItem>
</controls:TreeViewItem>
</controls:TreeView>
Now if you run the application you can expand or collapse a particular TreeViewItem.
This article is very basic to understand the Tree View Control in Silverlight 3. We will explore more on this in forth coming articles.
Enjoy Coding.