Introduction
This article is intended to illustrate the concepts of mapping in Biztalk Server 2006. This mechanism solves the problem of receiving incoming messages with schemas different than the business logic and other systems use, because exchanging data requires all systems have a common structure to represent all the business entities and messages or mechanism in which the data can be mapped. Biztalk Mapper is graphical interface which allows specifying transformations between data with different schemas. Instead storing the mapping logic in the business logic layer of each enterprise system involved in the communication, the mappings are stored in the integration layer which is common to every system.
Getting started with a mapping solution
Let's suppose we have an incoming XML message from a CRM system with information about customer such as name, address, city, state and ZIP code as shown in Figure 1 and we want to forward this message to an ERP system whose format representing customer messages is different (structurally and semantically) than the CRM's XML message schema as shown in Figure 2.

Figure 1.
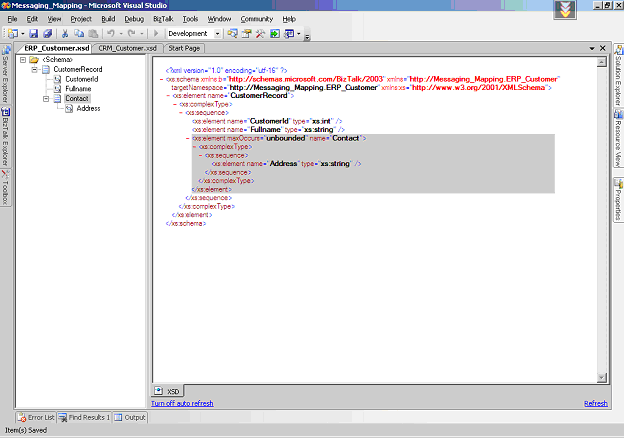
Figure 2.
In order to create the map to transform the values from source to destination schema, we must follow the steps:
- Click on Project|Add New Item from the main menu. In the Add New Item window, click on Map Files on the left pane and Map on the right pane. Enter a descriptive name for the map as shown in Figure 3.
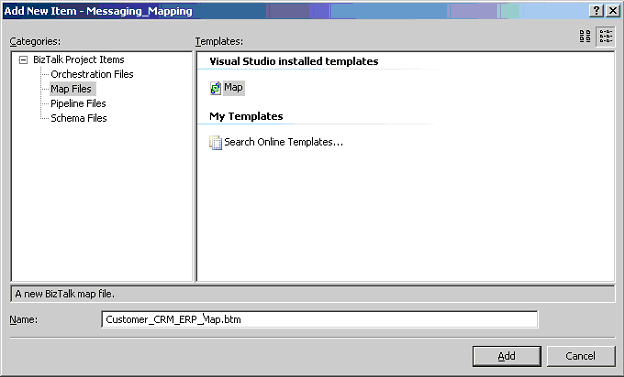
Figure 3.
- A blank map is added to the project. Left and right panes are for the source and destination schemas. The center pane is the map surface defined as an area where you can manipulate how mappings are made by using Biztalk functoids. Click the Open Source Schema link in the left pane and expand the Schemas nodes in the Biztalk Type Picker pop-up window until you find the CRM_Customer schema. Do the same with the Open Destination Schema link in the right pane and find the ERP_Customer schema. The figure 4 shows the intended goal of this step.
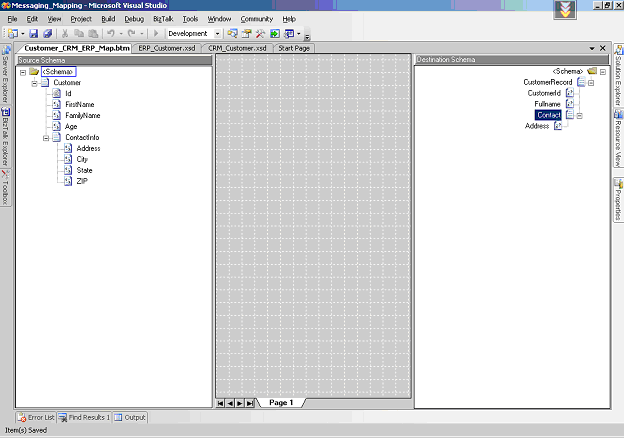
Figure 4.
- Now let's begin to create the mapping. Click on the Id attribute in the left pane and drag-and-drop it in the CustomerId element in the left pane.
- Now let's do some concatenation. Drag and drop a String Concatenate functoid onto the map surface. Click and drag and drop from the FirstName and FamilyName element in the left pane onto the String Concatenate functoid. In order to add spaces between each element value, then double-click the String Concatenate functoid and insert a new parameter as a blank space as shown in Figure 5. Next click and drag and drop from the String Concatenate onto the Fullname element in the right pane.
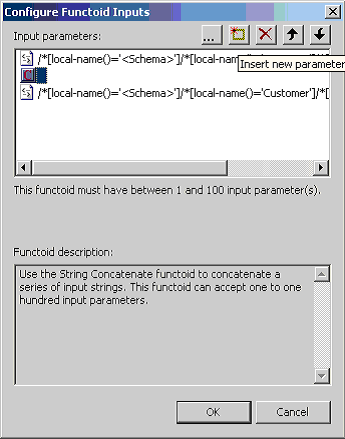
Figure 5.
- Do the step 4 with the elements Address, City, State and ZIP in the source schema onto the Address element in the destination schema. The final map is shown in Figure 6.
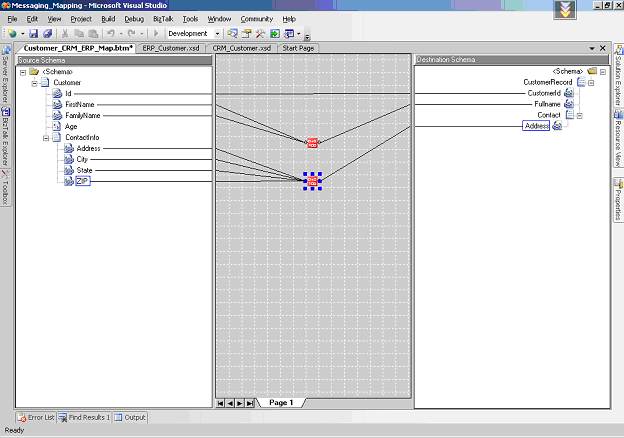
Figure 6.
- In order to test the map, go to the Solution Explorer window and right-click on the Customer_CRM_ERP_Map.btm file and select Properties. Set the values of TestMap Input Instance and TestMap Output Instance as shown in Figure 7.
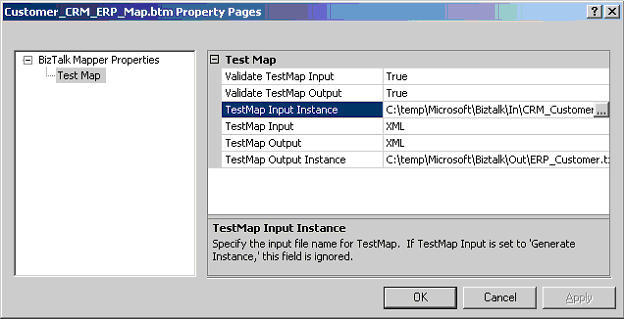
Figure 7.
- Finally, go to the Solution Explorer window and right-click on the Customer_CRM_ERP_Map.btm file and select Test Map option.
Conclusion
In this article I explained the concepts of Biztalk maps through an application solving an data layer integration problem which is very common in one business scenario.