Introduction
Apart from doing the usual "rich user interface" building tasks, you can also experiment with Silverlight 2 to achieve interesting results and outcomes. For example, you can create a Silverlight 2 application having a button with a filled rectangular content, like the one you see on media players.
Let's see how you can do this.
Procedure:
Create a Silverlight 2 application and add a Button control element in the Page.xaml.
Assume that the resultant code in Page.xaml looks like this:
<UserControl xmlns:basics="clr-namespace:System.Windows.Controls;assembly=
System.Windows.Controls" x:Class="SilverlightApplication1.Page"
xmlns="http://schemas.microsoft.com/winfx/2006/xaml
/presentation"
xmlns:x="http://schemas.microsoft.com/winfx/2006/xaml"
Width="400" Height="300">
<Grid x:Name="LayoutRoot" Background="White">
<Button Height="100" Width="100">
</Button>
</Grid>
</UserControl>
Now add a Button.Content element between the <Button></Button> tags as shown below.
<UserControl xmlns:basics="clr-namespace:System.Windows.Controls;assembly=
System.Windows.Controls" x:Class="SilverlightApplication1.Page"
xmlns="http://schemas.microsoft.com/winfx/2006/xaml
/presentation"
xmlns:x="http://schemas.microsoft.com/winfx/2006/xaml"
Width="400" Height="300">
<Grid x:Name="LayoutRoot" Background="White">
<Button Height="100" Width="100">
<Button.Content>
</Button.Content>
</Button>
</Grid>
</UserControl>
Now add a Rectangle element as shown below.
<UserControl xmlns:basics="clr-namespace:System.Windows.Controls;assembly=System.Windows.Controls" x:Class="SilverlightApplication1.Page"
xmlns="http://schemas.microsoft.com/winfx/2006/xaml/presentation"
xmlns:x="http://schemas.microsoft.com/winfx/2006/xaml"
Width="400" Height="300">
<Grid x:Name="LayoutRoot" Background="White">
<Button Height="100" Width="100">
<Button.Content>
<Rectangle Fill="BlueViolet" Height="20" Width="20"></Rectangle>
</Button.Content>
</Button>
</Grid>
</UserControl>
Save, build and execute the application. The output would be as shown in Figure 1.
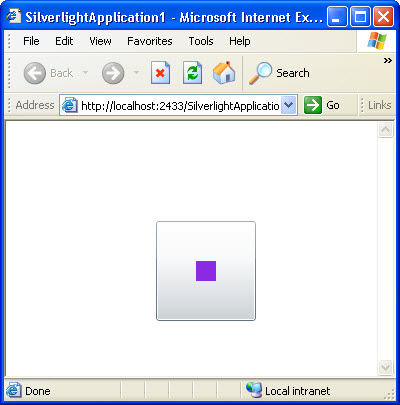
Figure 1: Button with Rectangle content
Another interesting thing to do is make use of threading support to create a marquee or scrolling text. Let's see how you can do this.
Create a Silverlight 2 application and add the following code to Page.xaml.
UserControl x:Class="ThreadDemo.Page"
xmlns="http://schemas.microsoft.com/winfx/2006/xaml/presentation"
xmlns:x="http://schemas.microsoft.com/winfx/2006/xaml"
Width="400" Height="250">
<Grid x:Name="LayoutRoot" Background="Lavender">
<Canvas Name="MyCanvas" Margin="50" Background="PaleGreen" Width="300">
<Button Click="Button_Click" Content="Start"></Button>
<TextBlock x:Name="Marquee" Canvas.Top="50" Canvas.Left="1" >This is a scrolling text</TextBlock>
</Canvas>
</Grid>
</UserControl>
The resulting user interface will be as shown in Figure 2.
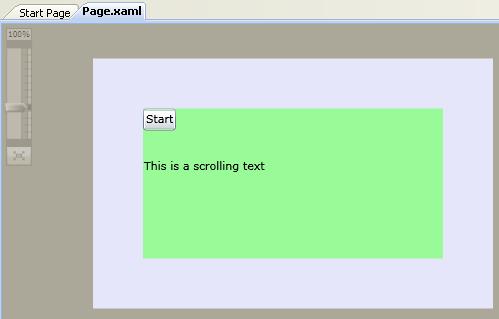
Figure 2: Creating a Scrolling text application
In the .cs file of Page.xaml, that is, Page.xaml.cs, replace the default existing code with following code:
using System;
using System.Collections.Generic;
using System.Linq;
using System.Net;
using System.Windows;
using System.Windows.Controls;
using System.Windows.Documents;
using System.Windows.Input;
using System.Windows.Media;
using System.Windows.Media.Animation;
using System.Windows.Shapes;
using System.Threading;
namespace ThreadDemo
{
public partial class Page : UserControl
{
private Thread _thread1;
private static TextBlock _marquee;
private static Canvas _canvas;
private static bool _done = true;
public Page()
{
InitializeComponent();
_marquee = Marquee;
_canvas = MyCanvas;
}
public bool Done
{
get { return _done; }
set { _done = value; }
}
private void StartScroll()
{
_done = false;
_thread1 = new Thread(DoThread1);
_thread1.Start();
}
public static void DoThread1()
{
while (!_done)
{
_marquee.Dispatcher.BeginInvoke(delegate()
{
double x = double.Parse( _marquee.GetValue(Canvas.LeftProperty).ToString()) ;
x++;
double canvas = double.Parse(_canvas.Width.ToString());
_marquee.SetValue(Canvas.LeftProperty, x);
if (x >= 180)
{
_done = true;
}
});
Thread.Sleep(100);
if (_done)
{
break;
}
}
}
private void Button_Click(object sender, RoutedEventArgs e)
{
if (false == _done)
_done = true;
else
StartScroll();
}
}
}
Here, you have created a Thread object and used an anonymous method inside the Thread worker method to perform the scrolling action. The variable x indicates the begin point of the scrolling of the text. It is incremented in the loop. The value at which x should stop incrementing has been hard-coded here as 180, if you wish, you can replace that with a programmatically computed value. When you save, build and run the application, and then click Start, you will see the text scrolling.
Conclusion: This article showed you how you can experiment with Silverlight.