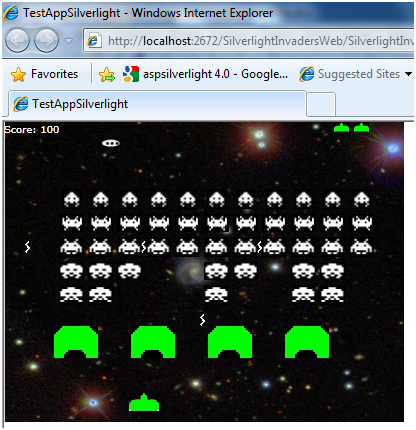
Figure 1 - Silverlight Invaders in Action
Introduction
A long time ago I wrote an invaders application in C# that ran in a Windows Form application. Later I wrote one for the pocket PC and about a year ago I wrote one for Silverlight. Not that I'm obsessed with the game or anything, but it is a fun one to duplicate because it's not overly complicated but it has all the components of a real-time arcade game. Duplicating it in Silverlight proved to be trickier than the other platforms, but that was a year ago. I believe in the newer Silverlight 4, this would have been a lot easier.
The Design
Because it's a graphics game, the design lends itself nicely to objects. In Silverlight invaders there is a ship, several invaders, shields, bullets, bombs, and a flying saucer. In the design shown below, all graphical objects inherit from a Sprite class. The Sprite class has methods for both drawing and moving the objects. All of the graphical objects take a constructor that takes the path of the image it is describing. All images are constructed for the game when it starts and added to the Visual Tree. The sprite class encapsulates all the movement and creation nicely so that objects that are created for the game don't have to concern themselves with the details of Silverlight.
The game engine consists of a storyboard that keeps resetting itself. This seems to work well because you can just handle the mechanics and updates of the game in the Completed event of the storyboard. Each time the Completed event is fired, ships, invaders, bombs and bullets are updated.
All graphic objects are handled with Canvases, so every object in the game is pretty much "drawn" on the screen in the Completed event handler. All canvases are moved on the screen dynamically through Translation Render Transforms.
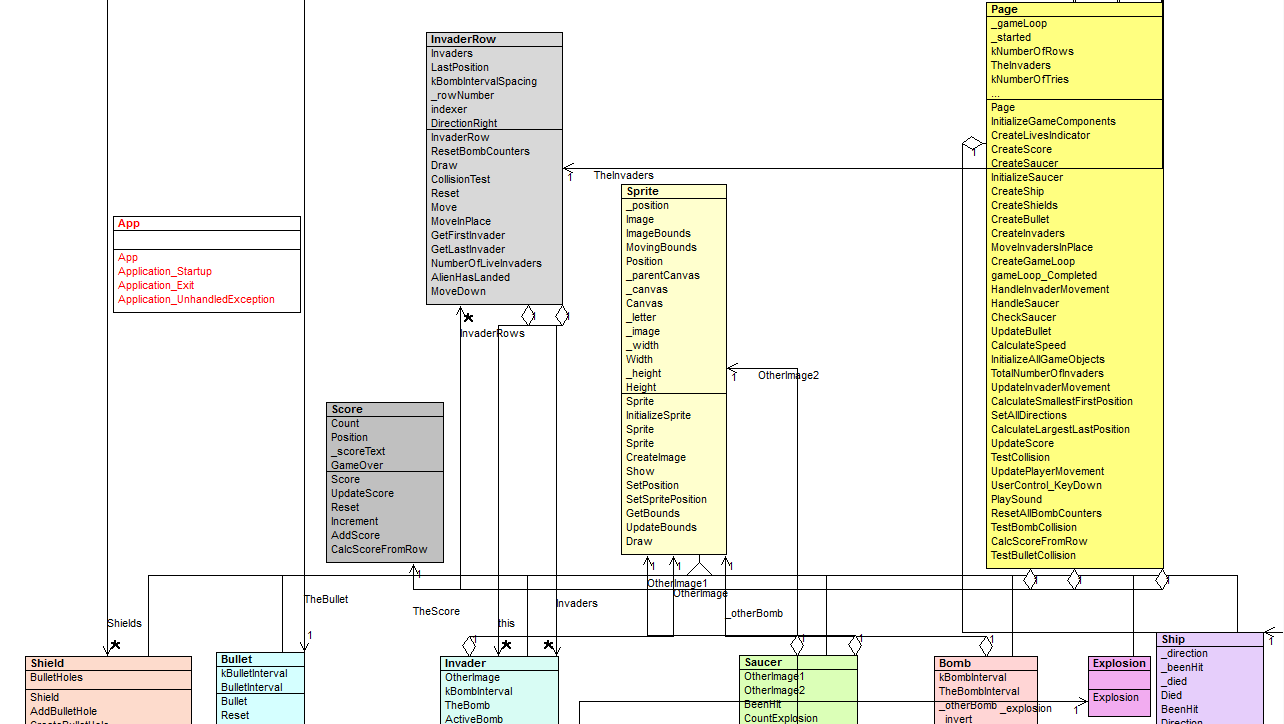
Design Reverse Engineered Using WithClass 2000
The Code
There is too much happening with this game to describe with one article, so we will only pick a few interesting methods to talk about. You can purchase the full source code for the game at SilverlightGameSpace if you are interested in all aspects of the code. Part of the purchase for the source code will go towards C# Corner to help pay authors for their generous contributions to the C# Corner community. The source code includes the full game including sounds, graphics, and the game classes and simple storyboard engine. It also includes all project files and is ready to build.
Generating a Sprite
In this article, we use the Canvas as a way to hold our individual bitmaps that represent game objects. When we initialize a sprite, we can construct a canvas dynamically, add an image to it, and add it to the Visual Tree on the page. Below is the InitializeSprite call to create a sprite in Silverlight. It basically takes the image and places it inside a canvas container. The sprite canvas is then attached to the main game canvas. Finally, the sprite canvas is translated in the visual tree to its initial x, y position.
Listing 1 - Creating the Sprite Graphic and Positioning it in the Game
|
private void InitializeSprite(Canvas c, int x, int y, Image img, Canvas existingCanvas)
{
// set the image to stretch to fit the canvas
img.Stretch = Stretch.Uniform;
// make sure we have a canvas in the first place
_canvas = existingCanvas;
if (existingCanvas == null)
{
_canvas = new Canvas();
}
// set the canvases width and height based upon the dimensions of the image + 1
_canvas.Width = img.Width + 1;
_canvas.Height = img.Height + 1;
_width = _canvas.Width;
_height = _canvas.Height;
_parentCanvas = c;
_image = img;
_position = new Point(x, y);
// track the boundary of the image for movement purposes.
ImageBounds = new Rect(0, 0, _canvas.Width, _canvas.Height);
// update the bounds to the position of the sprite in the game
UpdateBounds();
// add the game sprite to the canvas which is the game board
if (existingCanvas == null)
{
_parentCanvas.Children.Add(_canvas);
}
// add the image to the sprite canvas
_canvas.Children.Add(_image);
// translate the canvas according to the position of the sprite
_canvas.RenderTransform = new TranslateTransform();
(_canvas.RenderTransform as TranslateTransform).X = x;
(_canvas.RenderTransform as TranslateTransform).Y = y;
}
|
All objects are placed this way initially in the construction of the game. The high level code for doing the initialization is shown below. One of Robert Martin's hard and fast rules(in his book Clean Code) is to create methods whose individual code statements all have the same level of abstraction. Although I failed to obey this rule in other places in the code, all of the lines of code used to create the game components are at the same level of abstraction in listing 2 . The InitializeGameComponent is called from the constructor of the Page, so it is kicked off as soon as the Silverlight application starts.
Listing 2 - Creating the various game components.
|
private void InitializeGameComponents()
{
CreateLivesIndicator();
CreateShip();
CreateShields();
CreateBullet();
CreateGameLoop();
CreateInvaders(1);
CreateSaucer();
CreateScore();
ResetAllBombCounters();
SetFocusOnTheGame();
}
public Page()
{
InitializeComponent();
InitializeGameComponents();
}
|
The Game Engine
The game engine is implemented with a Silverlight trick using the storyboard. You can tell the story board to start itself by calling Begin. When the storyboard's Complete event is triggered, we simply tell it to restart by calling Begin again. In listing 3, The CreateGameLoop method creates the storyboard and wires up the Complete event handler to the gameLoop_Completed method. It then sets the game in motion by calling Begin. After the storyboard is created, all updates happen in the Completed event handler. The Completed event handler calls Begin again on the storyboard so the process can start over again. Movement all objects occur in the Completed event handler. Some objects, such as invaders, are throttled using the mod function to control their speed.
Listing 3 - The Game Engine
|
public void CreateGameLoop()
{
_gameLoop = new Storyboard();
_gameLoop.SetValue(FrameworkElement.NameProperty, "gameloop");
this.Resources.Add("gameloop", _gameLoop);
_gameLoop.Completed += new EventHandler(gameLoop_Completed);
_gameLoop.Begin();
}
long _countTimer = 0;
void gameLoop_Completed(object sender, EventArgs e)
{ // do your game loop processing here
_countTimer++;
_gameLoop.Begin();
if (_started)
{
if (GameGoing == false)
{
if (_countTimer % TheSpeed == 0)
MoveInvadersInPlace();
return;
}
HandleSaucer();
//react to the keyboard
// ReactToKeyPress();
// update man movement
UpdatePlayerMovement();
// Update Invader movement
HandleInvaderMovement();
// Update bullet
UpdateBullet();
TestBulletCollision();
TestBombCollision();
// test for collision
int scoreChange = TestCollision();
// update Score
UpdateScore(scoreChange);
}
}
|
Testing Collisions
Collisions are tested in a similar way as any other game, by seeing if two rectangles intersect. We can test if an invader is hit by a bullet if the invader's bounding rectangle intersects with the bullet's bounding rectangle. In our existing design, we go through each invader in an InvaderRow object and test for a collision. Since only one invader can get hit by a bullet at a time, we just look for the first invader in that row that intersects with the bullet.
Listing 4 - Testing for collision
|
public int CollisionTest(Rect aRect)
{
// loop through each invader in the row
for (int i = 0; i < Invaders.Length; i++)
{
Rect testRect = aRect;
// if the invader rect intersects with the current bullet rect,
// return the index of the row of the invader that was hit
testRect.Intersect(Invaders[i].GetBounds());
if ((testRect != Rect.Empty) && (!Invaders[i].BeenHit))
return i;
}
return -1;
}
|
Blowing up the Ship
When your ship gets hit, it explodes. How do we simulate the explosion graphically? One way we could do this, is by using a storyboard animation made specifically for the explosion. Another technique is to just draw the explosion frame everytime an update is made to the game loop. The explosion effect in Silverlight Invaders is created by drawing 50 random pixels 100 times inside the bounding area of the ship as shown in Listing 5.
Listing 5 - Simulating the Explosion in the Ship class
|
void DrawExplosion()
{
// don't need to draw the explosion if the ship already died
if (Died)
return;
// count the number of times the explosion frame was drawn
CountExplosion++;
// if it is less than 100 times, draw another explosion frame
if (CountExplosion < 100)
{
// remove the previous explosion frame
RemoveExplosion();
// draw a new explosion frame,
// by placing 50 random white pixels inside the ships
// bounding canvas
for (int i = 0; i < 50; i++)
{
int xval = RandomNumber.Next((int)Width * (int)(CountExplosion * .25));
int yval = RandomNumber.Next((int)Height* (int)(CountExplosion * .25));
//xval += (int)Position.X;
//yval += (int)Position.Y;
// g.DrawLine(Pens.White, xval, yval, xval, yval+1);
// first get rid of any line
Line pixel = new Line();
pixel.X1 = xval;
pixel.Y1 = yval;
pixel.X2 = xval + 1;
pixel.Y2 = yval + 1;
pixel.Stroke = new SolidColorBrush(Colors.White);
Canvas.Children.Add(pixel);
}
}
else
{
// the explosion frames were drawn 100 times, remove it.
RemoveExplosion();
Died = true;
}
}
|
Conclusion
This article illustrates some of the graphic techniques you can use to create a real-time 2D game in Silverlight. In the articles to follow, we will describe other kinds of games you can create in Silverlight and we will also explore the MVVM design behind them.
The full source code for this article can be purchased and downloaded at Silverlight Game Space