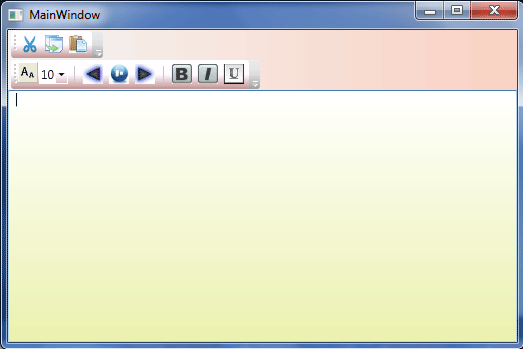
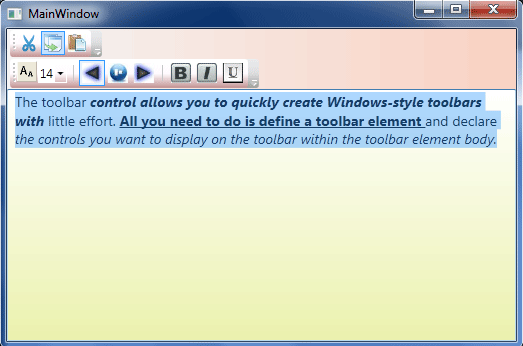
Today let's try a window having a toolbar of our own choice. The ToolBar control allows you to quickly create Windows-style toolbars with little effort. All you need to do is define a ToolBar element and declare the controls you want to display on the toolbar within the ToolBar element body. So start with expression blend:
Step 1: Open a new WPF Application in Expression blend 4.0 and name it "ToolBar".
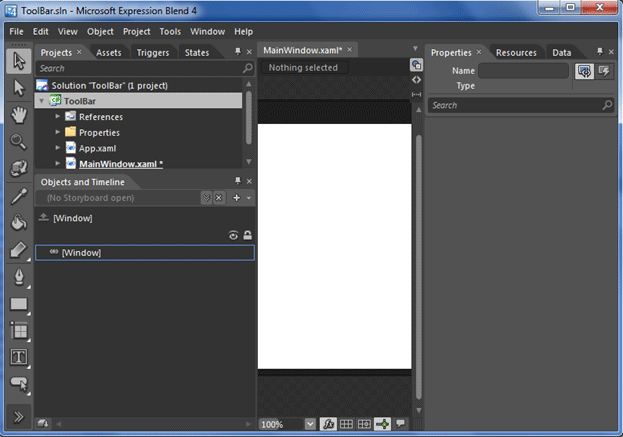
Step 2: Select and draw a Dock panel from the "Assets and libraries" and set its LastChildFill property to "true". You are not limited in placing the ToolBar at the top of the form or window, but you would typically put it in a System.Windows.Controls.DockPanel and dock it to the top edge of the panel.

<DockPanel LastChildFill="True">
</DockPanel>
Step 3: Again select Toolbartray from the Assets and library and draw it on the top of the dockpanel by using the following code:
<ToolBarTray DockPanel.Dock="Top"/>

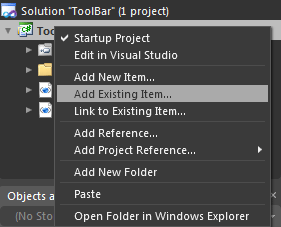
Step 4: Before Adding the toolbars to the toolbartray add images to your project for cut, copy, paste, bold, italic, underline etc.. of your own choice and for this right click on your project and add existing items as under:
Now in the toolbar add a button for the "Cut" option and for that you can drag drop the image also:
<ToolBar Band="0">
<Button Command="ApplicationCommands.Cut" >
<Image Height="18" Source="Cut.png" Stretch="Fill" Width="18"/>
<Button/>
<ToolBar/>
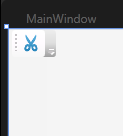
Similarly add the buttons for "copy" and "paste" in the same toolbar.
Step 5: Set the background of your toolbar by using the "Brushes" so that your tool bar looks like this:
<ToolBar.Background>
<LinearGradientBrush EndPoint="0,1" StartPoint="0,0">
<GradientStop Color="White" Offset="0"/>
<GradientStop Color="#FFFFFBFF" Offset="0.5"/>
<GradientStop Color="#FFC29292" Offset="1"/>
</LinearGradientBrush>
</ToolBar.Background>
Add first toolbar:
<ToolBar Band="0">
<ToolBar.Background>
<LinearGradientBrush EndPoint="0,1" StartPoint="0,0">
<GradientStop Color="White" Offset="0"/>
<GradientStop Color="#FFFFFBFF" Offset="0.5"/>
<GradientStop Color="#FFC29292" Offset="1"/>
</LinearGradientBrush>
</ToolBar.Background>
<Button Command="ApplicationCommands.Cut" >
<Image Height="18" Source="Cut.png" Stretch="Fill" Width="18"/>
</Button>
<Button Command="ApplicationCommands.Copy" >
<Image Height="18" Source="copy.png" Stretch="Fill" Width="18"/>
</Button>
<Button Command="ApplicationCommands.Paste" >
<Image Height="18" Source="Paste.jpg" Stretch="Fill" Width="18"/>
</Button>
</ToolBar>

Step 6: Add second toolbar which contain the font, align, bold, italic and underline property:
<ToolBar Band="1">
<ToolBar.Background>
<LinearGradientBrush EndPoint="0,1" StartPoint="0,0">
<GradientStop Color="White" Offset="0"/>
<GradientStop Color="#FFFFFBFF" Offset="0.5"/>
<GradientStop Color="#FFC29292" Offset="1"/>
</LinearGradientBrush>
</ToolBar.Background>
<ToolBar/>
Firstly add a text block for the font size and then combobox to select the font size like this:
<TextBlock VerticalAlignment="Center" ><Run Text=""/>
<InlineUIContainer>
<Image Height="20" Source="font_size.gif" Stretch="Fill" Width="20"/>
</InlineUIContainer>
</TextBlock>
Then Add Combobox and it's items for the size:
<ComboBox Name="cbxFontSize">
<ComboBoxItem Content="06" Margin="2" />
<ComboBoxItem Content="08" Margin="2" />
<ComboBoxItem Content="10" Margin="2" IsSelected="True"/>
<ComboBoxItem Content="12" Margin="2" />
<ComboBoxItem Content="14" Margin="2" />
<ComboBoxItem Content="16" Margin="2" />
<ComboBoxItem Content="18" Margin="2" />
<ComboBoxItem Content="20" Margin="2" />
<ComboBoxItem Content="22" Margin="2" />
</ComboBox>
Use Radiobuttons for the align property and apply images to it:
<RadioButton Command="EditingCommands.AlignLeft" IsChecked="True">
<Image Height="20" Source="left.jpg" Stretch="Fill" Width="20"/>
</RadioButton>
<RadioButton Command="EditingCommands.AlignCenter" >
<Image Height="20" Source="center.jpg" Stretch="Fill" Width="20"/>
</RadioButton>
<RadioButton Command="EditingCommands.AlignRight" >
<Image Height="20" Source="right.jpg" Stretch="Fill" Width="20"/>
</RadioButton>
Note: Use Separator to separate items of the same types : <Separator Margin="5"/>
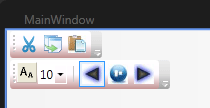
Now to add the option for bold, italic and underline we use buttons as under:
<Button Command="EditingCommands.ToggleBold" >
<Image Height="20" Source="Bold.jpg" Stretch="Fill" Width="20"/>
</Button>
<Button Command="EditingCommands.ToggleItalic" >
<Image Height="20" Source="Italic.jpg" Stretch="Fill" Width="20"/>
</Button>
<Button Command="EditingCommands.ToggleUnderline" >
<Image Height="20" Source="underline.jpg" Stretch="Fill" Width="20"/>
</Button>
Step 7: Last but not the least add a rich textbox which is used to write the text like this:
<RichTextBox Name="rtbTextBox" >
<RichTextBox.Background>
<LinearGradientBrush EndPoint="0.5,1" MappingMode="RelativeToBoundingBox" StartPoint="0.5,0">
<GradientStop Color="White" Offset="0"/>
<GradientStop Color="#FFEBF1AF" Offset="1"/>
<GradientStop Color="#FFEBF1AF" Offset="0.985"/>
</LinearGradientBrush>
</RichTextBox.Background>
<FlowDocument>
<Paragraph FontSize="{Binding SelectedItem.Content, ElementName=cbxFontSize}"><Run Text=""/>
</Paragraph>
</FlowDocument>
</RichTextBox>
Running Window:
