

Introduction
Azure subscription is like a prepaid account. You required balance in it before utilizing its resourses. Sometime its account balance (Azure credits) is going to expire, and once it goes to zero you will not be able to use its resources, until you will refill account again.
If you have more than one azure subscription and you don’t want to refill your account, you can move your resource from one account to another account. Here we are migrating Azure VM from one Azure subscription to another subscription. Please note, if any of your subscription is disabled, due to zero credits, this migration will not work.
Steps to Migrate a VM on another subscription
This process contains the following three steps:
- Migrating VM’s blob on another subscription.
- Create a new disk on target subscription for the blob.
- Create the Virtual Machine with the created disk.
Migrating VM’s blob on another subscription
To migrate blob which is used by Virtual machine, follow the steps in PowerShell.
Connect to Subscription by PowerShell
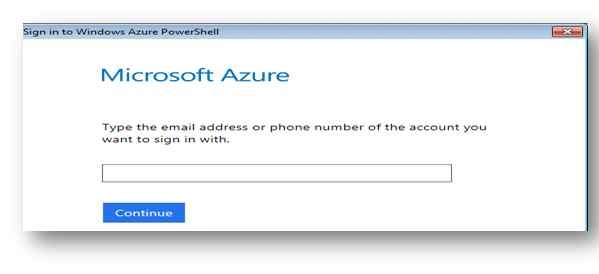
- Type Add-AzureAccount command in PowerShell, a window will open, enter your email address here which has the subscription.

- On next page, enter your credentials to log in in to your Azure account.
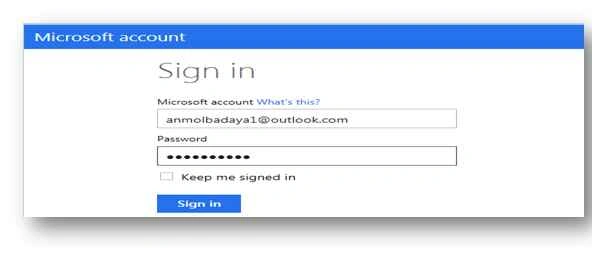
- Now you can use PowerShell to work with your account.
Get the subscriptions details
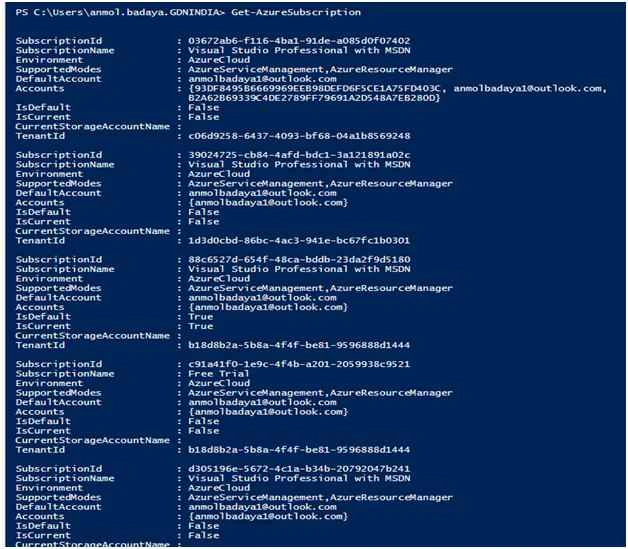
Get-Azure Subscription: This command lists all the subscriptions which are associated with your email
Get the current Subscription
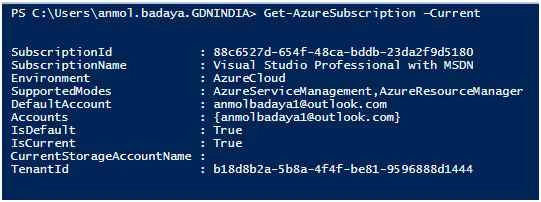
Get-AzureSubscription-Current: If you have more than one subscription to get the current one execute the following command.
Get the Current subscription id
(Get-AzureSubscription -Current).SubscriptionId
Set current Subscription
If you have more than one subscription, and your current subscription is different from your required subscription, then set your desired subscription as the current subscription:
By Name:
Select-AzureSubscription -SubscriptionName anmolbadaya –Current
Here anmolbadaya is my Subscription Name
By ID:
Select-AzureSubscription -SubscriptionId 03672ab6-f116-4ba1-91de-a085d0f07402 –Current
Here 03672ab6-f116-4ba1-91de-a085d0f07402 is my subscription id.
For more details refer link.
List all virtual machines in current Subscription
Get-AzureVM
It will display all VMs with service name and VM name. Please check VM which you want to migrate and exist here.

To Know a VM’s Storage Account Name
To migrating a VM we require VM storage account name, execute the following command to get it.
- $disk = Get-AzureDisk | Where-Object { $_.AttachedTo.RoleName -eq "VMName" }
- $mediaLink = $disk.MediaLink
- $storageAccountName = $mediaLink.Host.Split('.')[0]
- $storageAccountName

Get container and vhd file details of your VM
To migrate a VM we also container name and vhd file name. Get it by the following command:
Get-AzureVM –ServiceName “anmolwin8vs” –Name “anmolwin8vs” | Get-AzureOSDisk
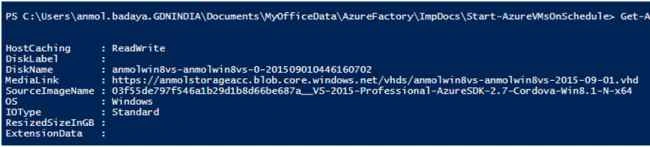
MediaLink value is the complete path of vhd file; you can see vhd file name here with .vhd extension and container name just before .vhd file. Here container name is vhds, and VHD file name is anmolwin8vs-anmolwin8vs-2015-09-01.vhd.
VHD blob copy from one Subscription to other
- # Source VHD blob#
- $blobName = "vhd file name"
- # Provide Source Storage Account details #
- $sourceStorageAccountName = "source Account name"
- $sourceAccountKey = "Source Storage Account Key"
- $sourceAccountContext = New-AzureStorageContext –StorageAccountName $sourceStorageAccountName -StorageAccountKey $sourceAccountKey
- $sourceContainer = "Container Name"
- # Provide Destination Storage Account Details #
- $destinationStorageAccountName = "Destniation Account Name"
- $destinationAccountKey = "Destination Storage Account Key"
- $destinationContext = New-AzureStorageContext –StorageAccountName $destinationStorageAccountName -StorageAccountKey $destinationAccountKey
- # Copy the blob #
- $blobCopy = Start-AzureStorageBlobCopy -DestContainer $destinationContainerName `
- -DestContext $destinationContext `
- -SrcBlob $blobName `
- -Context $sourceContext `
- # VHD blob to copy #
- $blobName = "anmolwin8vs-anmolwin8vs-2015-09-01.vhd"
- # Source Storage Account Information #
- $sourceStorageAccountName = "anmolstorageacc"
- $sourceKey = "rF4Xp4sfozYorNQaq1OJ7PfN/IXhY9HPUhP3H7njU5ogD9Q1VBp2yhn9v/FSeHt5bKklS2tvKe1qMv3aNXQ5Xg=="
- $sourceContext = New-AzureStorageContext –StorageAccountName $sourceStorageAccountName -StorageAccountKey $sourceKey
- $sourceContainer = "vhds"
- # Destination Storage Account Information #
- $destinationStorageAccountName = "portalvhds8mzfbcnfbn3f1"
- $destinationKey = "dPFG2UqP/EseJyGs5Bpx3URYzycyvdHoRKKFG7tHPW6oudWGRKfHZnqUHIXphOKkiL8GqP841Dwddm8rv9xDoA=="
- $destinationContext = New-AzureStorageContext –StorageAccountName $destinationStorageAccountName -StorageAccountKey $destinationKey
- # Create the destination container #
- $destinationContainerName = "vhds"
- # Copy the blob #
- $blobCopy = Start-AzureStorageBlobCopy -DestContainer $destinationContainerName `
- -DestContext $destinationContext `
- -SrcBlob $blobName `
- -Context $sourceContext `
- -SrcContainer $sourceContainer
- $destinationContainerName = "vhds"
- New-AzureStorageContainer -Name $destinationContainerName -Context $destinationContext -Permission Blob
You can also copy blob by using AzCopy tool.
- Download and install AzCopy utility from here.
- Install it in your computer. After installation open command prompt and Run below command:
AzCopy https://sourceaccount.blob.core.windows.net/container1 https://destaccount.blob.core.windows.net/container2 /sourcekey:key1 /destkey:key2 fileNameWhichyouWantToCopy.txt
- By default, the AzCopy installation creates a folder named AzCopy under %ProgramFiles(x86)%\Microsoft SDKs\Azure\ (on Windows 64-bit machine) or %ProgramFiles%\Microsoft SDKs\Azure\ (on Windows 32-bit machine). For more details on how to use AzCopy for different scenarios, check out “Getting Started with the AzCopy Command-Line Utility”.
Example:
AzCopy /Source:https://anmolstorages.blob.core.windows.net/ anmolstorageacc /Dest:https://anmolmachineVMonkiritmac.blob.core.windows.net/destinationvhds8 /SourceKey:s2NgY75yIY1uPisP79mxljQ7yK6VqCLbVfY4a247AJtqa4ug+Dvg1GYvondmW4Dn0gxpJEBYm81bAuY9GVIqIw== /DestKey:q5EQPhhJPQVKwgqgSEpDvLWUoGKAaHR3YR1BP5+aRqi/Mzjp19PKbOQWfhBb4VEPrKf7DEMudaypChvkdDQcqw== /Pattern:AnmolMachineVS-AnmolMachineVS-0-20150713.vhd
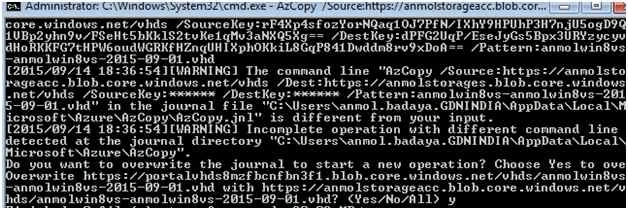
Create a new disk on target subscription for the blob
Till now, we have just moved a blob to new subscription; we have to create an Azure disk to boot from it. For this on azure portal here are the steps:
- Click on Virtual Machine:
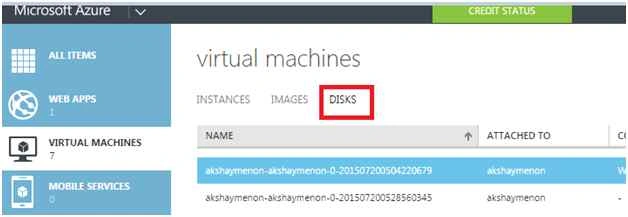
- Click on the DISKS.
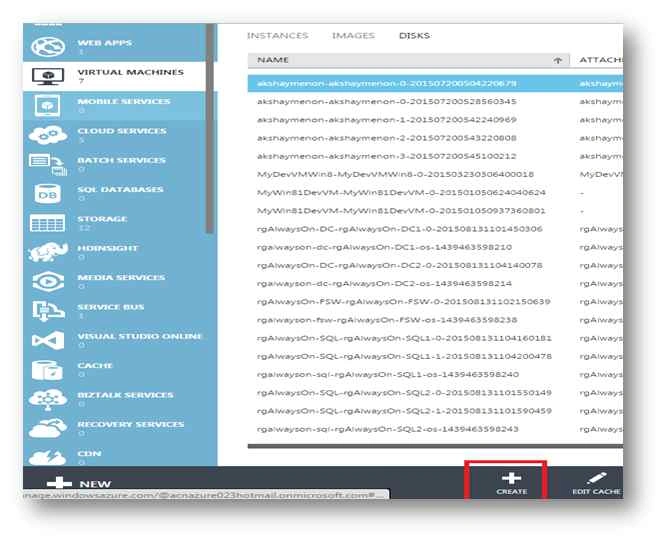
- Click on Create.
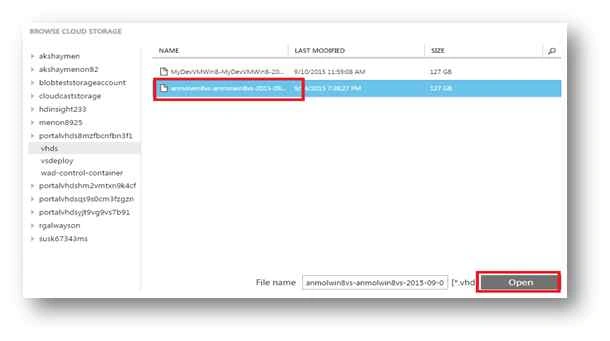
- An explorer window will open; we have to provide a disk name and have to select the blob from the destination container which we copied.
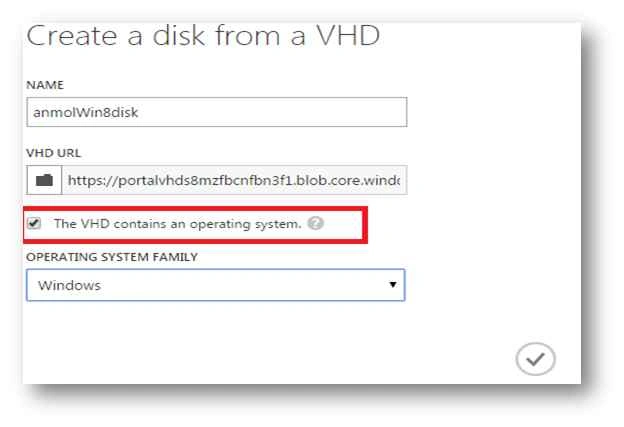
- Please select the toggle “The VHD contains an operating system.” It means disk which we are creating is OS disk not the data disk.
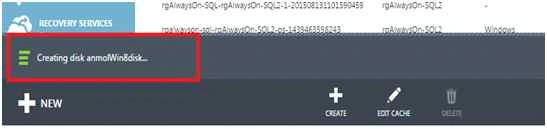
- Click on correct sign, and the following screen will be visible:

You can also use the following PowerShell command for creating disk:
Add-AzureDisk -DiskName "anmolWin8Disk" `
-OS Windows `
-MediaLocation "https://portalvhds8mzfbcnfbn3f1.blob.core.windows.net/vhds/ Fileanmolwin8vs-anmolwin8vs-2015-09-01.vhd " `
-Verbose
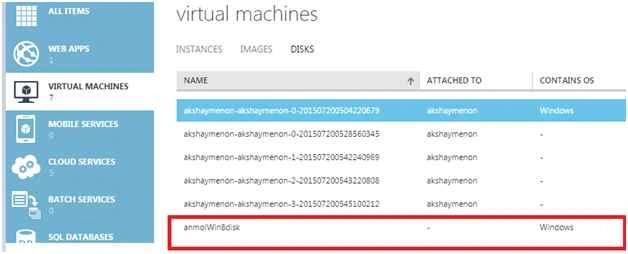
- Once it completes, the following message will show, and the disk will be displayed in the Disks section of Virtual Machines.
Create the Virtual Machine with the created disk
To create VM with migrated disk, here are the steps in Azure management portal:
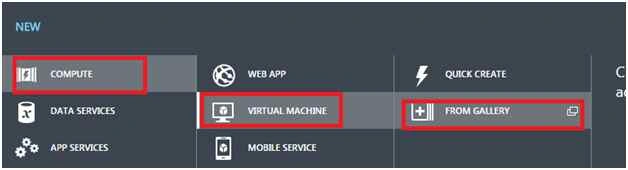
- Click NEW on Left down corner:

- Select COMPUTE, then VIRTUAL MACHINE and click FROM GALLERY.
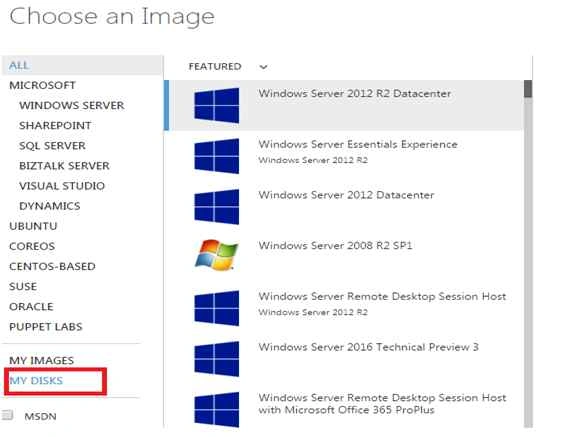
- Click on My Disk:
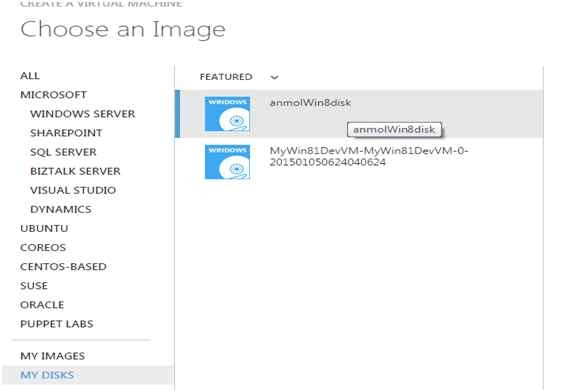
- Select your disk and click and proceeds:
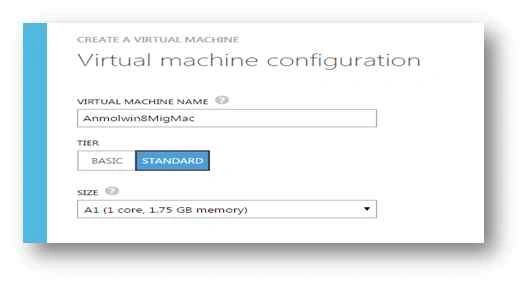
- Provide new machine name and proceeds:
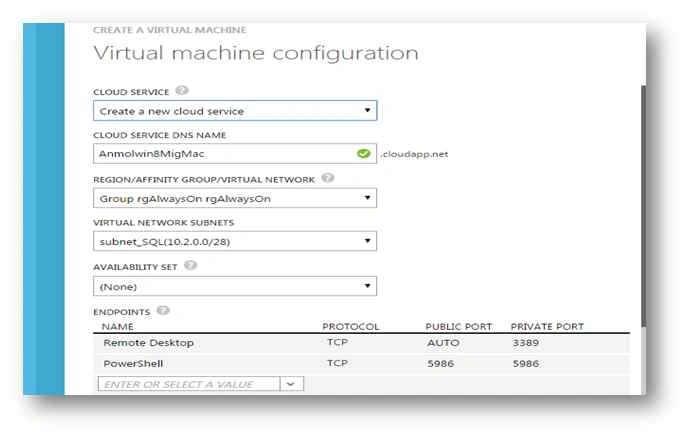
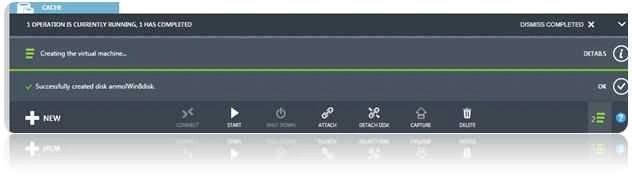
- Now you can see your migrated Virtual machine here.

Santhakumar MunuswamyPosted Sep 17, 2015, 10:29 AM
Thanks for nice article:)
Mohammed IbrahimPosted Sep 15, 2015, 8:04 PM
nice
Harshad PansuriyaPosted Sep 15, 2015, 6:23 AM
Nice One