

Getting Started
First of all you need to install Team Foundation Server 2013 and setup your project. And open your project from TFS.
- Create a new Project. Open Visual Studio 2013.
- Go to "Team" -> "Connect to Team Foundation Server".
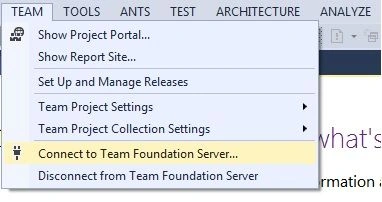
Image1.
Now select your project from the list.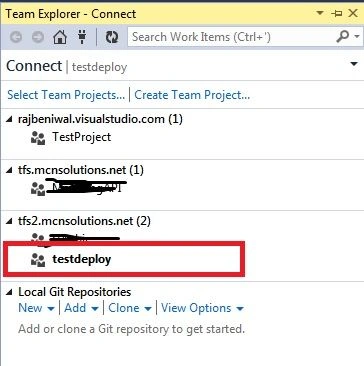
Image2.
Connect project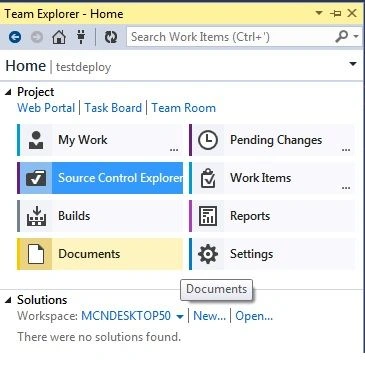
Image3.
After connecting the project to TFS click on the Builds tab and click on New Build Definition. 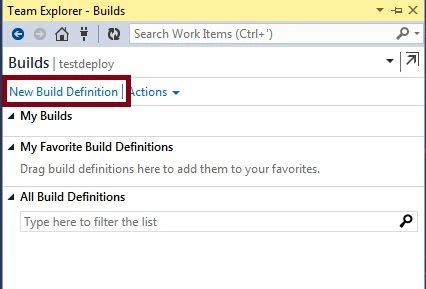
Image4.
From here our main work starts. Enter the build definition name and description (optional) in the General tab setting. Queue processing should be enabled by default.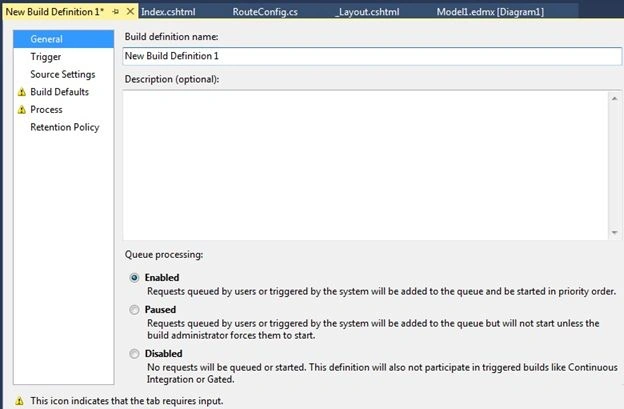
Image5.
Now select the trigger setting from the trigger tab.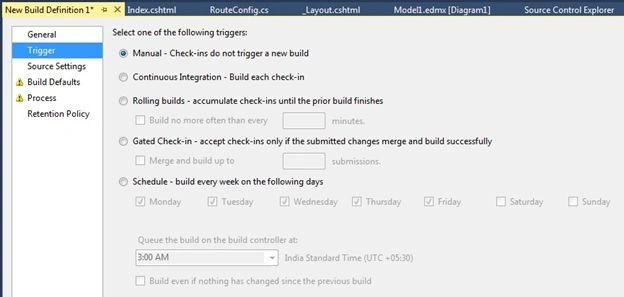
Image6.
Let's explain these triggers a little bit.
- Manual: Manual mode allows the Build to be triggered manually.
- Continuous Integration: This mode allows, on every check in into the source code control, a build and hence a deployment that we configure.
- Rolling Builds: Sometimes when working in big teams this mode can be disruptive since there are several checks that happen every other hour. In that case you can inform your development team that there will be a build happening every minute and they should plan for that. During the end game period of the project this configuration may help to have routine quick builds coming out.
- Gated Check-Ins: This is very important and useful mode for teams that did not want any broken builds due to bad check-ins. This will ensures that only check-ins that merge and build successfully.
- Scheduled Builds: As the name suggests you can also have builds coming out regularly every day. This is the model used by larger Visual Studio and .NET teams in general; we too get our builds created on a nightly basis.
Now select the source settings and select your project from the listing.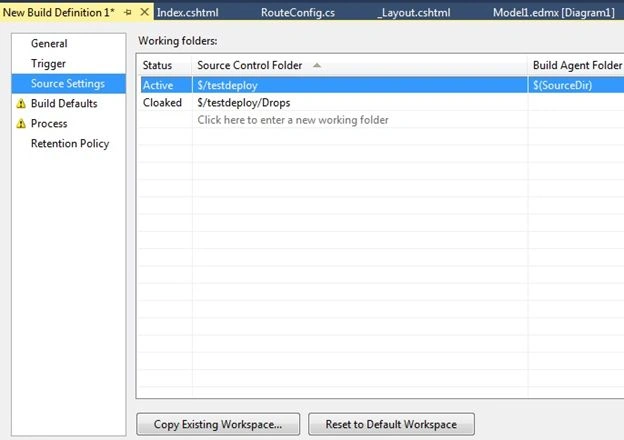
Image7.
Now select the Build Defaults tab and check the build controller name and description.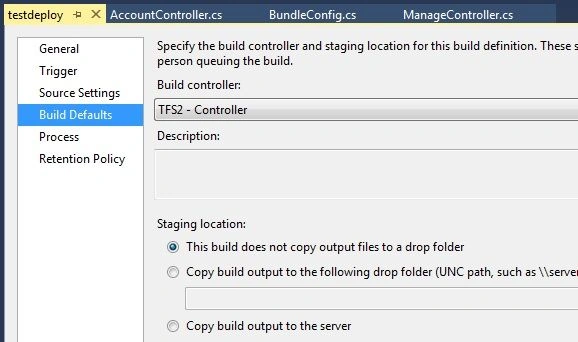
Image8.
Next you need to configure the process tab and browse your project solutions file in the projects property.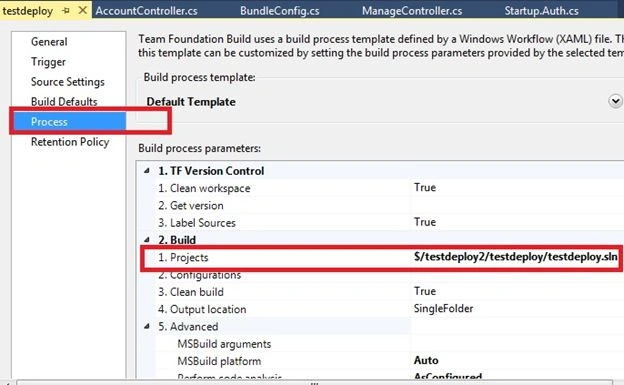
Image9.
The next tab shows the retention policy that indicates your build status.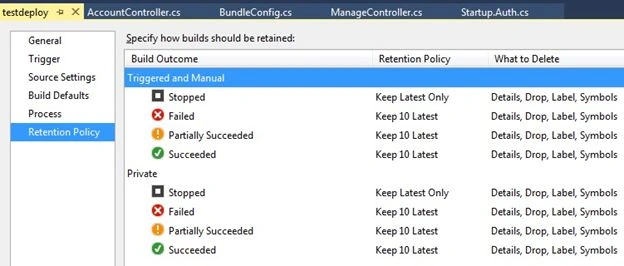
Image10.
Click save now. Here we are done with the settings. Now let's move to build now. As you can see there is one build definition that has been created.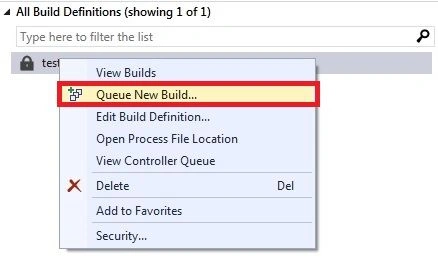
Image11.
Right-click on the build definition and click Queue New Build.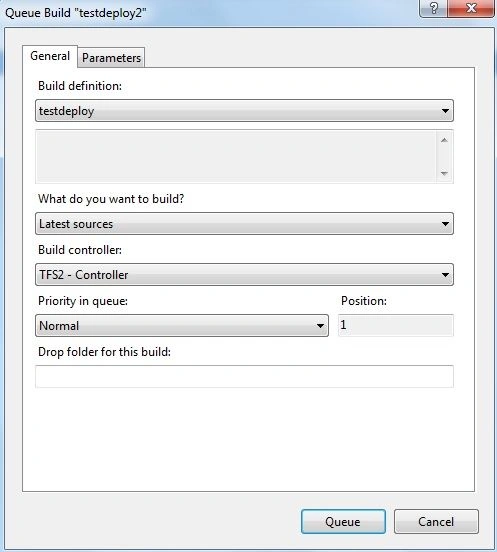
Image12.
Click Queue button.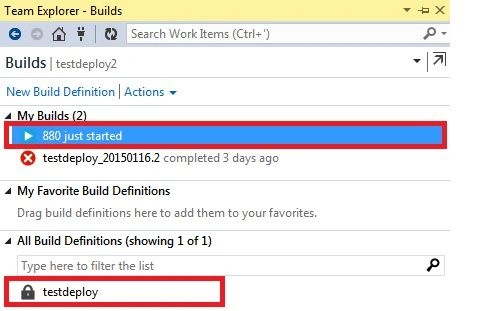
Image13.
You can see two things in my build, one build has been started and the other one has not succeeded before. Now let's wait to complete the build.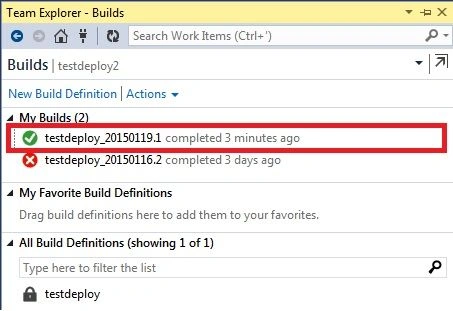
Image14.
The Green arrow indicates that the build has been successful.
Deployment Setting
Now let's do the final settings for deployment, you need to return to the Process (Image9) tab from edit build definition and put build arguments like this: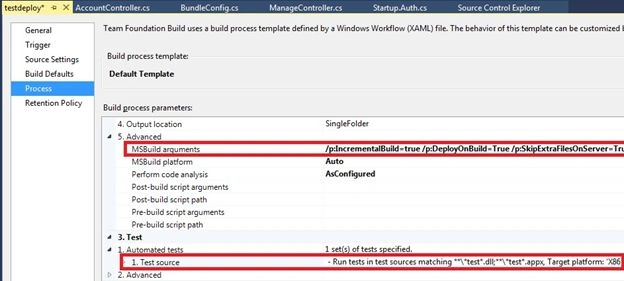
Image15.
Property
/p:IncrementalBuild=true
/p:DeployOnBuild=True
/p:SkipExtraFilesOnServer=True
/p:DeployTarget=MsDeployPublish
/p:CreatePackageOnPublish=True
/p:MSDeployPublishMethod=WMSVC
/p:MSDeployServiceUrl=localhost
/p:DeployIisAppPath="Default Web Site/testdeploy" /p:UserName=domain\user
/p:Password=myPassword
/p:IncrementalBuild=true // indicates incremental build
/p:DeployOnBuild=True // This property tell the Web Publishing Pipeline (WPP) to engage after the build is successful.
/p:SkipExtraFilesOnServer=True // doesn't delete extra files on server
/p:DeployTarget=MsDeployPublish // Microsoft deploy target
/p:CreatePackageOnPublish=True // Creates package when publish if true
/p:MSDeployPublishMethod=WMSVC // publish method name WMVC or InProc
/p:MSDeployServiceUrl=localhost // service URL
/p:DeployIisAppPath="Default Web Site/testdeploy" // target virtual directory name
/p:UserName=domain\user // domain user name
/p:Password=myPassword // domain password
- Automated Tests: TFS allows you to run the tests in Tests.dll automatically during each build so if you would like to have some unit tests run during build and deployment then this is a great place to specify that. There is also a flag to stop running the tests in the grid that you can set if you do not want to disturb your configuration of this property.
- MSBuild Arguments: This is the location where you need to specific the hooks to specify that you want to trigger deployment as part of the build.
- Web Packaging: For Web Packaging the argument you want to specify is simply.
- Web Publishing: For Web Publishing the arguments you want to specify are.
Now again queue new build and wait for complete. 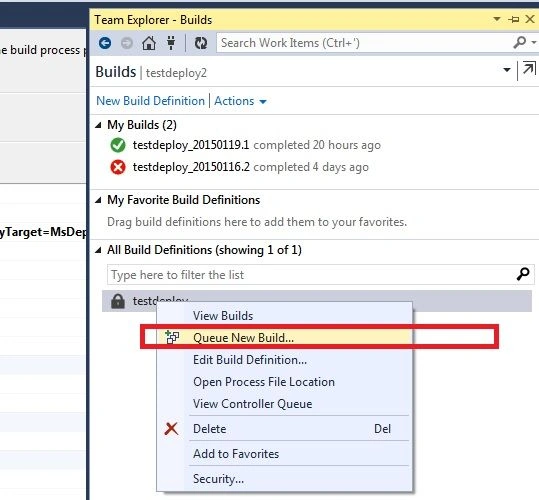
Image16.
Once it's complete with a Green arrow go to your deployment location, you can see all the files have been deployed there.
Himanshu PatelPosted Dec 19, 2017, 4:47 AM
Can we deploy same build in multiple environment using tfs 2013?
Humayun Kabir MamunPosted Apr 5, 2016, 11:43 PM
Nice...
Rahul Kumar SaxenaPosted Apr 5, 2016, 1:12 PM
Very Helpfull
Rahul Kumar SaxenaPosted Apr 5, 2016, 1:12 PM
Good One Sir..
Gowtham KPosted Apr 5, 2016, 1:11 PM
Good One, Thanks for sharing:)
Mohammed IbrahimPosted Apr 5, 2016, 12:26 PM
nice
Gowtham RajamanickamPosted Apr 20, 2015, 3:09 PM
good on
Raj KumarPosted Jan 20, 2015, 7:22 AM
You are right Sreekanth Mohan this is one part other part is MS Release Management tool.
Sreekanth MohanPosted Jan 20, 2015, 6:57 AM
Thank you for the detailed post on MS Build. Adding to this, we can integrate ms build with MS Release Management tool to deploy across multiple environments with custom work flow.