

This article is a part of a series of articles related to one of the Azure Compute options “Cloud Services”.
- Azure Cloud Service Introduction
- Azure Cloud Services - Create Hello World Cloud Service Using Visual Studio
- Azure Cloud Service Examine Files
- Azure Cloud Service – Add existing Web Application to Cloud Service
- Azure Cloud Service – Compute Emulator
- Azure Cloud Service - Create Package using Visual Studio
- Azure Cloud Service – Create a new Cloud Service using Azure Management Portal
- Azure Cloud Service – Deploy Cloud Service using Azure Management Portal
- Azure Cloud Service – Create Staging Slot using Azure Management Portal
- Azure Cloud Service – VIP Swap using Azure Management Portal
- Azure Cloud Service – Delete Slot using Azure Management Portal.
- Azure Cloud Service – Scale up Instance Size
- Azure Cloud Service – Scale Out Instances using Visual Studio
- Azure Cloud Service – Enable Remote Desktop using Visual Studio
In previous articles, we learned how to create, deploy, and Scale up the size of the required VMs. In this article, we will learn how to increase the number of instances in Cloud Service.
Open the Cloud Service Project that you created in the Azure HelloWorld Cloud Service.
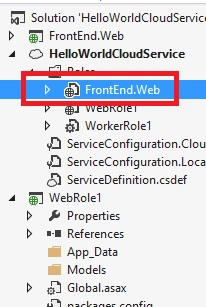
As shown in the above screen, select the Web Role located in the roles folder and double click the same to open the following Role Properties window.
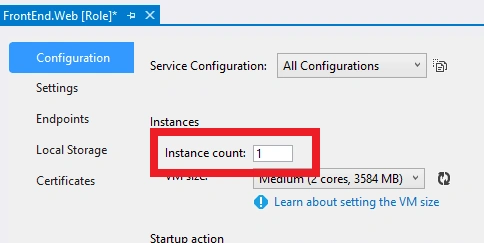
In the Configuration tab of the Web Role Properties, under the Instances section, we have “Instance Count” textbox with the default value 1. In order to increase the Instance Count to more than 1, we need to update the “Instance Count” textbox. For this example, let’s make it to “2”.
As soon as I made the Instance Count to “2”, I got the following warning message.
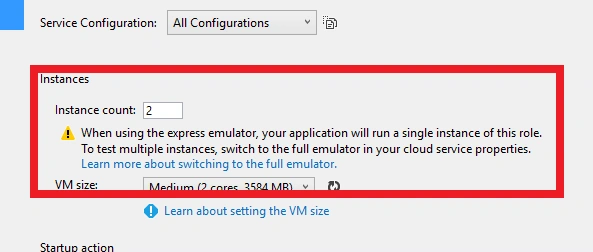
As per the message, we can scale in the “Instance Count” to more than 1 only in Full Emulator but not in Express Emulator which is used by default in Visual Studio.
Let’s select “Full emulator” by navigating to the cloud service properties. Select the cloud Service project, right click the same, and select properties, as shown below.
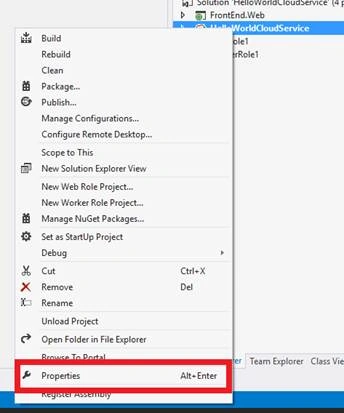
Clicking on the “Properties” will open up the following window.
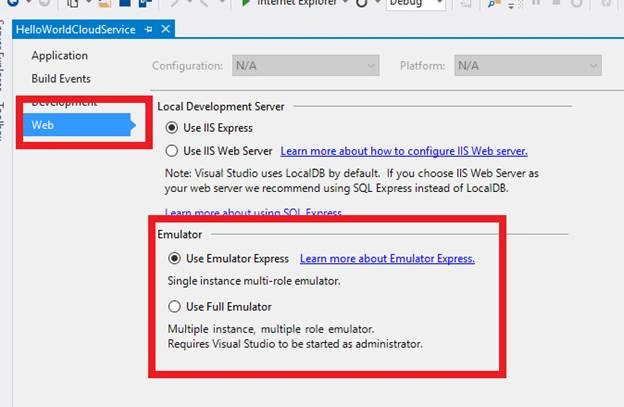
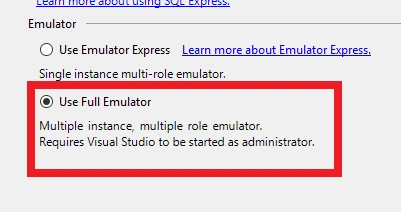
Currently, Visual Studio is using “Use Emulator Express”. Let’s change the setting to use “Use Full Emulator”, as shown below.
Now, navigate back to the Web Role’s configuration properties, as shown below, and change the “Instance Count” to “2”.
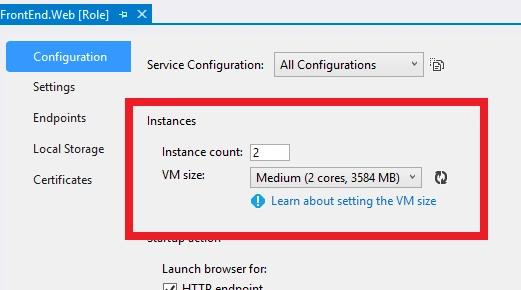
Our Web Role now has two instances that can serve the requests. In other words, we have setup a load balancing environment. The Cloud Service will take care of the routing the requests to these two instances based on internal algorithms. Also, be cautious while building applications that you plan to host in load balancing environment like this. All the applications should be stateless in order to get the most benefits of the cloud architecture. One of the most important ones is handling sessions in the Load balancing environments. Please have a look at one of my previous articles Azure App Service: Sessions Management in Load Balancing Environment Using Redis Cache.
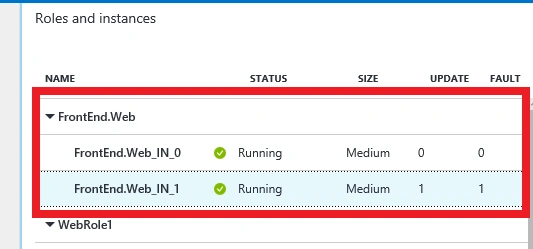
Let’s Create Package using Visual Studio and Deploy Cloud Service using Azure Management Portal. Navigate to the Cloud Service and in the “Roles and Instances” section of the Essentials tab, you will notice that there are two instances for the Web Role.
In this article, we have learned how to increase the number of instances of a Web Role in a Cloud Service. Hope you enjoyed reading the article. Your feedback is appreciated.
Join the conversation! Your thoughts help the community grow.